There’s nothing quite like turning on the hot water tap and getting blasted with ice-cold water. Whether it’s your morning shower or just trying to wash dishes, a malfunctioning water heater can bring your entire household to a standstill. Most people assume they need to call a plumber immediately, but many water heater issues are actually simple enough to diagnose and fix yourself.
Understanding how your water heater works can save you hundreds in service calls. The three main culprits behind heating failures are faulty heating elements, malfunctioning thermostats, and airflow or venting problems. Let’s break down each issue so you can identify what’s going wrong and get your hot water flowing again.
Understanding Your Water Heater’s Heating Elements
Electric water heaters rely on one or two heating elements to warm your water. These metal rods sit inside your tank and work like giant versions of the coil in an electric kettle. Most residential tanks use two elements: one near the top and one near the bottom. They rarely heat simultaneously. Instead, the upper element heats first, then the lower element takes over to maintain temperature.
When a heating element fails, you’ll notice specific symptoms. If your upper element dies, you’ll get little to no hot water at all. When the lower element goes out, you’ll have hot water initially, but it runs out quickly because only the top portion of your tank is heating.
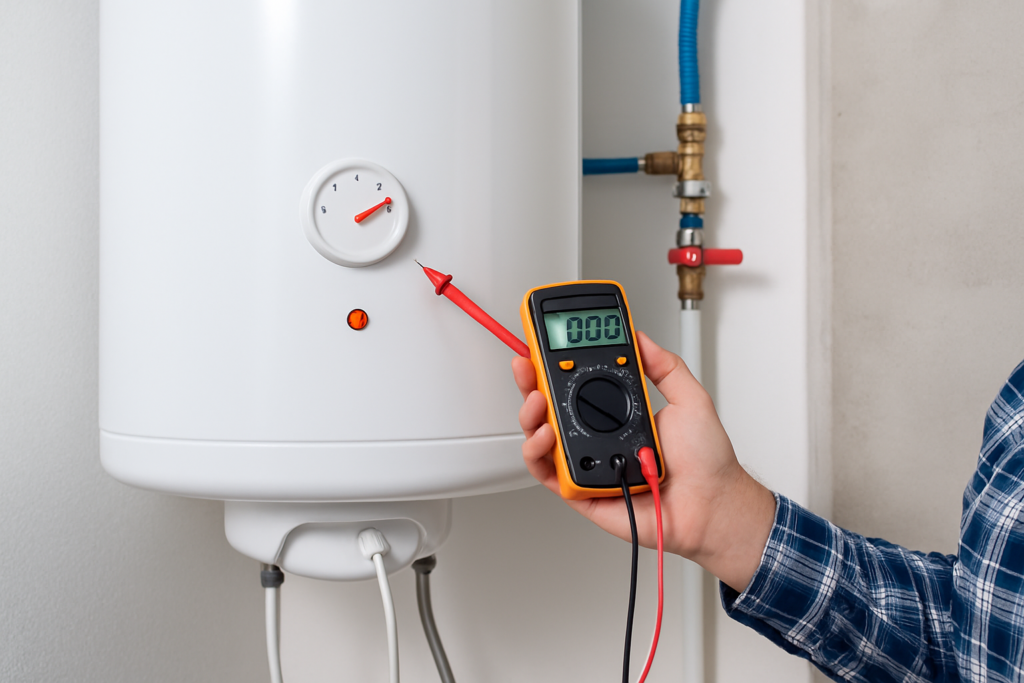
Testing a heating element requires a multimeter and a bit of caution since you’re working with electrical components. First, shut off the power at your circuit breaker. Remove the access panel and insulation covering the element. Disconnect the wires and test for continuity. A functioning element should show resistance between 10-30 ohms. No reading means the element is burned out and needs replacement.

Water Heater Element Testing Kit
A reliable multimeter makes diagnosing electrical issues quick and accurate.
Replacing a heating element isn’t as scary as it sounds. You’ll need to drain your tank below the element level, remove the old element with a wrench, and install the new one with plumber’s tape on the threads. The most common mistake is overtightening, which can crack the porcelain lining of your tank. Snug is good enough.
Thermostat Troubles and Temperature Settings
Your water heater’s thermostats act as the brain of the operation. They tell the heating elements when to turn on and off based on water temperature. Electric heaters typically have two thermostats, one for each element, while gas models have a single thermostat and gas control valve.
Sometimes the problem isn’t a broken thermostat but simply incorrect settings. Most manufacturers set thermostats to 140°F from the factory, but 120°F is safer and more energy-efficient. If your water is lukewarm, someone may have accidentally adjusted the dial, or the settings between your upper and lower thermostats might be mismatched.
Check both thermostats with the power off. They should be set to the same temperature. The upper thermostat controls the lower one, so if it’s set too low, your bottom element may never activate. Adjust both to 120°F and restore power. Wait a few hours and test your hot water.
When thermostats actually fail, you’ll see erratic behavior. Water might be scalding hot one minute and cold the next. Your circuit breaker might trip repeatedly. A faulty thermostat can also cause the high-limit switch to trip, which is a safety feature that cuts power when water gets dangerously hot.
Testing thermostats is trickier than testing elements. You need to verify they’re sending power to the heating elements at the right times. Many homeowners find this is where calling a professional makes sense, especially since thermostat replacement involves working with live wires and precise calibration.
Gas Water Heater Burner and Pilot Light Issues
Gas water heaters face a different set of problems. Instead of electric elements, you’ve got a gas burner at the bottom of the tank. Modern units use electronic ignition, but many older models still rely on a standing pilot light.
If your pilot light won’t stay lit, you’re looking at one of three issues: a dirty thermocouple, a faulty gas valve, or air in the gas line. The thermocouple is a small copper rod that sits in the pilot flame. It generates a tiny electrical current that tells the gas valve it’s safe to allow gas flow. When it gets covered in soot or wears out, it can’t generate enough current, and your pilot shuts off.
Cleaning a thermocouple takes about five minutes. Turn off the gas, let everything cool, and gently clean the tip with fine sandpaper or steel wool. Don’t bend it out of position. It needs to sit directly in the pilot flame to work correctly.
Thermocouple Replacement Kit
Keep a spare thermocouple on hand since they’re the most common failure point in gas water heaters.
Electronic ignition systems are more reliable but can still fail. You’ll hear clicking when the igniter tries to light the burner. If you hear clicking but see no flame, the igniter itself might be cracked or positioned incorrectly. These require professional replacement in most cases.
Venting and Airflow Problems You Shouldn’t Ignore
Gas water heaters need proper ventilation to exhaust combustion gases safely. When venting goes wrong, your heater won’t just fail to heat water. It becomes a genuine safety hazard, potentially releasing carbon monoxide into your home.
Your vent pipe should slope upward from the heater to the chimney or outside vent. Any horizontal sections should pitch at least 1/4 inch per foot. Over time, these pipes can sag, corrode, or become disconnected. Check for rust holes, gaps, or sections that have separated.
Birds occasionally nest in vent caps, and debris can block the flue. A blocked vent prevents proper draft, which means combustion gases can’t escape. Your heater’s safety systems should shut down the burner, but don’t rely on them. Inspect your vent cap annually and clear any obstructions.
Backdrafting is another serious issue. This happens when negative pressure in your home pulls exhaust gases back down the flue instead of letting them vent outside. Running bathroom fans, dryer vents, and range hoods simultaneously can create this problem, especially in newer, tightly sealed homes.
You can test for backdrafting with a simple smoke test. Light a match, blow it out, and hold the smoking stick near the draft hood. The smoke should be drawn upward into the vent. If it blows away from the vent or swirls around, you have a backdrafting problem that needs professional attention.
Sediment Buildup and Tank Maintenance
Minerals in your water gradually settle at the bottom of your tank, forming a layer of sediment. This crusty buildup acts like insulation between the heating element or burner and the water itself. Your heater works harder, uses more energy, and heats less effectively.
You can actually hear sediment problems. If your water heater makes popping, crackling, or rumbling sounds, that’s water trapped beneath the sediment layer turning to steam. It’s trying to bubble up through the mineral crust.
Flushing your tank annually prevents most sediment issues. Attach a garden hose to the drain valve at the bottom of your tank, run it to a floor drain or outside, and drain several gallons. The first water will look rusty and dirty. Keep draining until it runs clear.
For tanks with heavy buildup, a full flush might not be enough. You may need to remove the drain valve and use a water heater cleaning wand to break up stubborn deposits. These flexible wands spray water in all directions inside your tank, stirring up sediment so it can drain out.
Installing a water softener helps tremendously if you have hard water. Less mineral content means less sediment formation. You’ll extend your water heater’s lifespan and improve efficiency at the same time.
Tripped Reset Buttons and Safety Switches
Sometimes your water heater isn’t broken at all. It just hit a safety limit and shut itself down. Electric water heaters have a high-limit switch, usually hidden under the upper thermostat. This red button trips when water temperature exceeds safe levels, typically around 170°F.
Finding and resetting this button solves many “broken” water heaters instantly. Turn off the power, remove the upper access panel and insulation, and look for a red or black button. Press it firmly. You should hear or feel a click. Replace the insulation and panel, restore power, and wait an hour to test.
If the button trips repeatedly, you have a deeper problem. A faulty thermostat might be allowing water to overheat. A grounded heating element can also cause this. Don’t keep resetting the button without investigating why it’s tripping.

Non-Contact Voltage Tester
This safety tool lets you verify power is off before working on electrical components.
Gas water heaters have similar safety features. The thermal cutoff switch prevents the burner from firing if the flue isn’t venting properly. Unlike the electric high-limit switch, these typically can’t be reset. They’re designed to fail once and require replacement, which means you need a service call.
When to Replace Instead of Repair
Water heaters typically last 8-12 years. If yours is approaching that age and having problems, replacement might make more sense than repair. A new heating element costs between what you’d find on Amazon, but labor can double that. Meanwhile, a new energy-efficient water heater might pay for itself in energy savings within a few years.
Tank corrosion is a death sentence. If you see water pooling around the base of your tank or rust stains on the outside, the tank itself is leaking. No repair can fix this. You need a new water heater immediately before you end up with a flooded basement.
Rusty water coming from your hot taps suggests your tank’s glass lining has failed and the steel is corroding. Once corrosion starts inside the tank, it accelerates quickly. You might limp along for a few months, but failure is inevitable.
Consider upgrading to a tankless water heater if you’re replacing anyway. They cost more upfront but last 20+ years, use less energy, and provide endless hot water. For smaller homes or point-of-use applications, they’re incredibly efficient.
Preventive Maintenance to Avoid Future Problems
You can avoid most water heater failures with simple annual maintenance. Flush your tank every year to prevent sediment buildup. Test the temperature and pressure relief valve by lifting the lever and making sure water flows freely. If nothing comes out or it doesn’t reseal properly, replace it.
Check the anode rod every three years. This sacrificial metal rod attracts corrosive elements that would otherwise attack your tank. When the rod corrodes away to less than 1/2 inch thick or the core wire is exposed, replace it. This single maintenance task can double your water heater’s lifespan.
Insulating your tank and pipes reduces heat loss and makes your system more efficient. Pre-cut water heater insulation blankets are available for older tanks without factory insulation. Just avoid covering the thermostat, top of gas heaters, or any warning labels.
Keep the area around your water heater clear. Storing boxes or chemicals nearby creates fire hazards and blocks access for maintenance. Gas heaters need combustion air, so adequate clearance isn’t just convenient, it’s essential for safe operation.
Frequently Asked Questions
Why is my water heater producing lukewarm water instead of hot?
Lukewarm water usually means one heating element has failed in an electric water heater, or your thermostat settings are too low. If you have a two-element electric heater, the upper element might be working while the lower one is dead. This gives you some hot water but not enough to fill a tub or run the dishwasher. Check your thermostat settings first, then test both heating elements with a multimeter.
How long should it take for my water heater to reheat after running out?
A typical 50-gallon electric water heater takes about 60-90 minutes to fully reheat from cold. Gas heaters are faster, usually reheating in 30-40 minutes. If your recovery time is significantly longer, you might have a failing element, sediment buildup reducing efficiency, or an undersized heater for your household’s needs. Calculate your peak hour demand and make sure your tank capacity matches.
Can I replace a water heater element without draining the entire tank?
Yes, you only need to drain the tank below the level of the element you’re replacing. For the lower element, drain about half the tank. For the upper element, drain about a quarter. Attach a hose to the drain valve and direct it to a suitable drain location. This saves time and water compared to a full drain, but you’ll still want to flush sediment while you’re at it.
What does it mean when my water heater is making rumbling or popping noises?
Those sounds indicate sediment buildup at the bottom of your tank. Water trapped beneath the mineral layer turns to steam and creates those popping or rumbling sounds as it bubbles through. Flushing your tank usually resolves the noise and improves heating efficiency. If the sounds continue after flushing, you may have excessive buildup that requires more aggressive cleaning or indicates your tank is nearing the end of its useful life.
This article contains affiliate links. We may earn a small commission at no extra cost to you.