As an Amazon Associate I earn from qualifying purchases. This article contains affiliate links.
Your kitchen junk drawer probably holds a few things you use every day and a much larger collection of things you haven’t decided where to put. Organizing it starts with choosing its job: a small home for useful household essentials.
Use five zones as a starting layout, then adjust them to your household. The goal is to find what you need without lifting out three unrelated objects first.
Empty the drawer and decide what belongs
Put everything on a clear table. Test pens, pair up items that belong together, and return unrelated objects to their proper rooms. Recycle or discard unwanted material according to local guidance, especially electronics and batteries.
Move medicine, food, sharp tools, and loose batteries to appropriate storage. Keep small objects and tools secured from young children. Don’t let a convenient kitchen location override the storage instructions for a particular item.
Choose one drawer for everyday utility supplies and use a separate place for bulk refills. You don’t need every pen you own beside the measuring tape. For the surrounding cupboards, see our kitchen drawer and cabinet organization guide.
Measure the usable space
Measure inside width, front-to-back depth, and the available height when the drawer closes. Check for screws, runners, or a low frame that reduces the space near the back. Product dimensions may include a rim wider than the tray’s usable base.
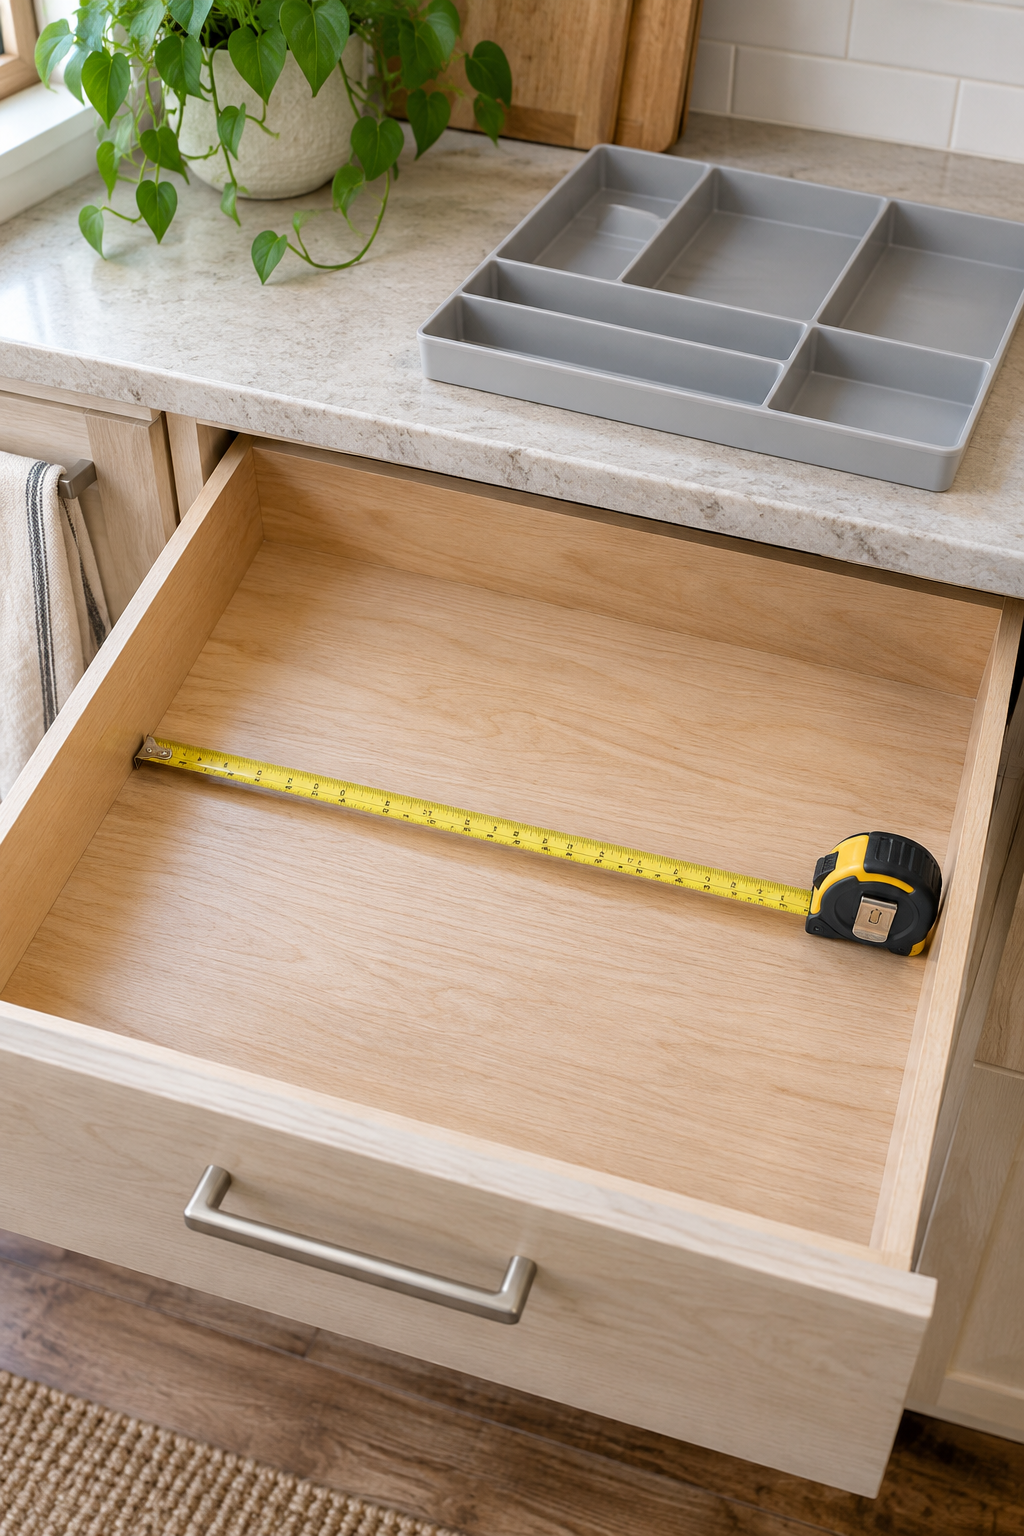
Make a quick paper plan with rectangles for your zones. Leave enough clearance to remove each tray without bending it. Test a tall tape dispenser or flashlight before buying organizers that fit the base but won’t let the drawer shut.
Shallow drawer organizer trays
Compare the usable drawer depth and height with each tray. A few separate pieces let you fit the contents without wasting narrow gaps. Opens Amazon search results.
Build your five zones
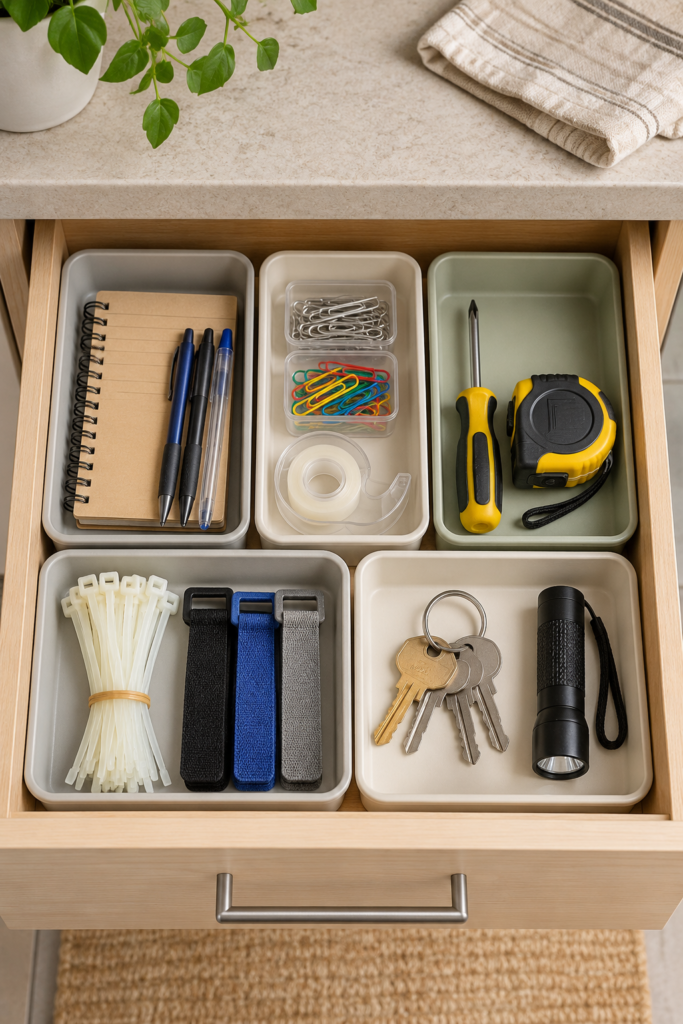
- Write: Keep two working pens, a pencil, and a small notepad. Put these near the front if they’re your most-used items.
- Stick and fasten: Give tape, paper clips, and a few useful fasteners a shallow tray. Contain tiny pieces rather than letting them migrate.
- Measure and adjust: Keep a compact measuring tape and an appropriate basic tool, stored safely. Full tool kits belong elsewhere.
- Tie and connect: Store reusable cable ties or a few identified household accessories. Don’t keep mystery chargers indefinitely.
- Grab and go: Reserve a small space for a useful flashlight and household essentials that genuinely belong here. Avoid mixing this with an overflowing key or mail station.
Your zones don’t have to be equal. A long pen tray and a wider tool tray may make more sense than five matching squares. Put the largest essential object on the paper plan first, then fit the smaller groups around it.
Choose dividers that suit the drawer
Individual shallow trays are the most flexible starting point because you can rearrange them after using the drawer. Adjustable dividers work well when a long object needs a custom-width lane. Check the drawer’s construction before using tension-mounted products.
Adjustable drawer dividers
Check the supported width range and end pads. Avoid spring pressure that can damage a lightweight drawer or interfere with its movement. Opens Amazon search results.
Keep the base easy to wipe. A liner is optional and should sit flat without interfering with the runners. Don’t use adhesive products on a finish unless the manufacturer allows them.
Try the layout for a week before labeling anything permanently. You may discover that the tape needs a wider tray or a rarely used tool belongs in another room. Small adjustments are easier while the system is still flexible.
Give incoming clutter another destination
The drawer won’t stay usable if it becomes the default place for unopened mail, receipts, and things waiting to be repaired. Return those items to an appropriate action or storage area before they settle here.
For cleaning supplies that have drifted into the drawer, our under-sink cabinet guide can help you assign a separate, suitable location. Keep the drawer focused on the small utility tasks you chose at the start.
Use a simple capacity rule: a new item needs a clear home inside its zone. When the tray is full, review the contents rather than stacking another layer on top.
Reset it while you’re already tidying
During a weekly reset, remove unrelated items and put stray pieces back in their zones. Wipe the empty sections as needed. Once a month, check pens, unidentified accessories, and duplicate supplies.
Take a quick photo of the arrangement when it works well. You can use it as a reference after cleaning, and other household members can see where items go without asking.
Common questions
What works in a very narrow drawer?
Combine closely related zones and use fewer objects. Three slim trays can still separate writing, fastening, and small household tools. The five-zone list is a decision aid, not a requirement to squeeze five containers into every drawer.
Should you buy a matching organizer set?
Only after checking the measurements. A mixed layout that fits the drawer and contents is more useful than a matching set with pieces you can’t use.
Article images are AI-generated illustrations.