
That grimy buildup covering your shower walls isn’t just unsightly. It’s a breeding ground for bacteria and mold that can affect your family’s health. Soap scum, mineral deposits, and mildew transform what should be your clean sanctuary into something that looks more like a science experiment.
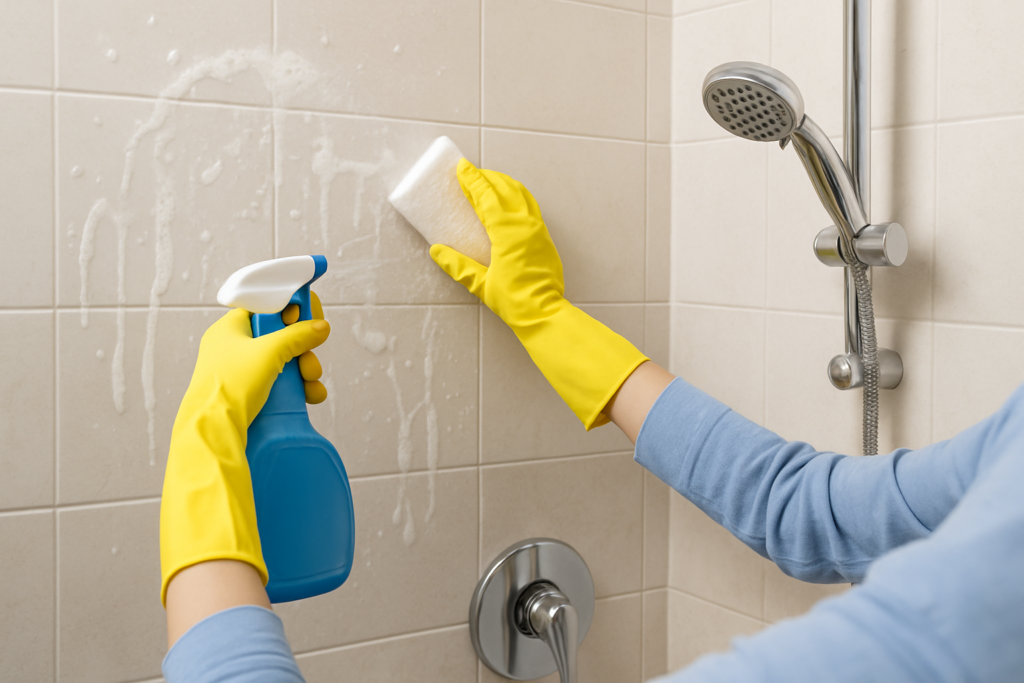
Most people tackle shower cleaning with a quick spray and wipe, but surface cleaning won’t cut through months of accumulated grime. You need a systematic deep cleaning approach that targets different types of buildup with the right tools and techniques.
This guide will walk you through the complete process of restoring your shower to sparkling condition, plus show you how to keep it that way with minimal effort.
Understanding What You’re Fighting
Before you start scrubbing, you need to identify what type of buildup you’re dealing with. Different problems require different solutions, and using the wrong approach can actually make things worse.
Soap scum forms when soap mixes with hard water minerals and body oils. It creates that stubborn, filmy residue that seems impossible to remove with regular cleaners. This buildup is slightly alkaline, which means acidic cleaners work best against it.
Mildew appears as black or dark spots, typically in corners and along grout lines where moisture lingers. Unlike soap scum, mildew is a living organism that needs to be killed, not just scrubbed away.
Hard water stains show up as white, chalky deposits on glass doors and metal fixtures. These mineral deposits respond well to acidic treatments but can be stubborn on textured surfaces.
Gathering Your Deep Cleaning Arsenal
Having the right tools makes the difference between a frustrating afternoon and efficient cleaning. You’ll need both cleaning solutions and proper equipment to tackle different surfaces safely.
Essential Cleaning Tools
Start with a good scrub brush that won’t scratch your surfaces. Plastic bristles work well for most jobs, while softer brushes protect delicate finishes.
Microfiber cloths are your best friend for final polishing and water removal. They won’t leave lint behind and grab onto residue that other cloths miss.
A plastic scraper helps remove thick buildup without damaging surfaces. Avoid metal scrapers on anything except the most stubborn deposits on ceramic tile.
Don’t forget protective gear. Rubber gloves protect your hands from harsh chemicals, and good ventilation prevents you from breathing cleaning fumes.
Commercial Cleaning Solutions
For heavy-duty soap scum removal, products containing surfactants and mild acids work best. Look for cleaners specifically designed for soap scum rather than general bathroom cleaners.
CLR Bathroom & Kitchen Cleaner
Excellent for both soap scum and hard water stains with minimal scrubbing required
Mildew requires antimicrobial action. Bleach-based cleaners kill mold and mildew effectively, but they can discolor some surfaces and create harmful fumes when mixed with other chemicals.
For daily maintenance, enzyme-based cleaners break down soap and body oils naturally without harsh chemicals. They work slower than conventional cleaners but are gentler on surfaces and safer for regular use.
Natural Cleaning Alternatives
White vinegar cuts through mineral deposits and soap scum naturally. Its acetic acid dissolves buildup without toxic fumes, making it perfect for routine cleaning.
Baking soda provides gentle abrasive action and neutralizes odors. It works especially well when combined with vinegar for a foaming action that lifts stubborn deposits.
Dawn dish soap mixed with vinegar creates a powerful soap scum remover. The surfactants in dish soap help break down oils while vinegar tackles mineral deposits.
Step-by-Step Deep Cleaning Process
Deep cleaning works best when you follow a systematic approach. Start from the top and work down, tackling the worst buildup first while your cleaning solutions have maximum contact time.
Preparation and Safety
Remove all bottles, razors, and accessories from your shower. This gives you complete access to all surfaces and prevents items from getting damaged by cleaning chemicals.
Rinse the entire shower with hot water to remove loose debris and help open up pores in soap scum buildup. Hot water also helps cleaning solutions work more effectively.
Open windows or turn on exhaust fans before applying any cleaning products. Proper ventilation prevents chemical buildup and makes the work environment more comfortable.
Attacking Soap Scum
Apply your soap scum remover to all affected surfaces, starting with the worst areas. Let the product sit for the full recommended time. Most people don’t wait long enough for the chemicals to break down the buildup.
For natural cleaning, spray a 50/50 vinegar and water solution on soap scum. Follow with a paste made from baking soda and a small amount of dish soap. The combination creates a foaming action that lifts stubborn deposits.
Use your scrub brush in circular motions, applying steady pressure. Don’t scrub frantically. Let the cleaning solution do most of the work while you provide gentle agitation.
Scotch-Brite Non-Scratch Scrub Sponges
Safe for all shower surfaces while providing effective scrubbing power
Eliminating Mildew and Mold
Mildew requires a different approach than soap scum. You need to kill the organisms, not just remove the visible stains.
For severe mildew, apply a bleach solution (1 part bleach to 10 parts water) directly to affected areas. Let it sit for 10-15 minutes before scrubbing. Never mix bleach with other cleaning products.
Natural mildew treatment involves white vinegar applied directly to moldy areas. Vinegar kills most types of mold and mildew without toxic fumes. Let it sit for at least 30 minutes before scrubbing.
Pay special attention to grout lines and corners where mildew loves to hide. Use an old toothbrush to work cleaning solution into these tight spaces.
Tackling Different Shower Surfaces
Ceramic and porcelain tiles can handle stronger cleaners and more aggressive scrubbing. Use plastic scrapers to remove thick buildup before applying cleaning solutions.
Natural stone requires gentler treatment. Avoid acidic cleaners on marble, granite, or travertine. Stick to pH-neutral cleaners designed specifically for stone surfaces.
Fiberglass and acrylic surfaces scratch easily. Use only soft cloths and gentle cleaners. Avoid abrasive scrubbers that can dull the finish permanently.
Glass shower doors respond well to vinegar solutions. For heavy mineral deposits, apply undiluted vinegar and let it sit for 15 minutes before scrubbing with a soft cloth.
Grout Deep Cleaning Techniques
Grout presents special challenges because its porous surface absorbs stains and provides perfect conditions for mildew growth. Regular surface cleaning won’t penetrate deep enough to remove embedded dirt and organisms.
Create a paste using baking soda and water for light staining. Apply the paste with an old toothbrush and let it sit for 10 minutes before scrubbing. This gentle approach works well for routine grout maintenance.
For heavy staining, try oxygen bleach powder mixed with water. Unlike chlorine bleach, oxygen bleach won’t discolor grout and is safer to use in enclosed spaces.
Steam cleaning provides chemical-free grout restoration. The high temperature kills mildew while the pressure removes embedded dirt. Handheld steam cleaners work well for shower applications.
Fixture and Hardware Cleaning
Shower fixtures accumulate the same buildup as other surfaces but require more careful cleaning to avoid damage to finishes and moving parts.
Remove mineral deposits from showerheads by unscrewing them and soaking in undiluted vinegar overnight. For fixed showerheads, fill a plastic bag with vinegar, secure it around the showerhead with a rubber band, and let it soak.
Clean faucet handles and trim with appropriate cleaners for the finish. Chrome and stainless steel can handle stronger cleaners, while brushed finishes and special coatings need gentler treatment.
Don’t forget the shower drain. Remove the cover if possible and clear out hair and debris. Pour baking soda down the drain followed by vinegar for natural deodorizing.
Final Rinse and Inspection
After cleaning, rinse everything thoroughly with hot water. Cleaning residue left on surfaces can attract new dirt and create streaking.
Dry all surfaces with clean microfiber cloths. This prevents water spots and lets you see any areas that need additional attention.
Check your work under good lighting. Bathroom lighting often hides cleaning issues that become obvious in natural light.
Prevention Strategies for Long-Term Cleanliness
The best cleaning strategy is preventing heavy buildup in the first place. Simple daily habits can dramatically reduce the need for deep cleaning sessions.
Daily Maintenance Habits
Squeegee glass doors after each shower to prevent water spots and soap scum buildup. This 30-second habit eliminates most glass cleaning issues.
Leave the shower door or curtain open after use to promote air circulation. Trapped moisture creates perfect conditions for mildew growth.
Wipe down surfaces weekly with a microfiber cloth and simple vinegar solution. This prevents buildup from becoming embedded and difficult to remove.
Ventilation and Humidity Control
Run your exhaust fan during showers and for 30 minutes afterward. Proper ventilation is the single most effective way to prevent mildew problems.
Check that your exhaust fan moves adequate air. A fan that’s too small or clogged with dust won’t control humidity effectively.
Consider upgrading to a timer switch for your exhaust fan. This ensures the fan runs long enough to clear humidity even when you forget to leave it on.
Product Selection for Prevention
Switch to liquid body washes instead of bar soaps. Liquid soaps create less scum buildup than traditional bar soaps.
Rain-X Shower Door Water Repellent
Creates an invisible barrier that makes water bead up and prevents soap scum formation
Apply water repellent treatments to glass surfaces every few months. These products make water bead up and roll off instead of leaving spots and scum.
Use a daily shower spray designed for prevention. These products break down soap residue before it can form stubborn deposits.
Maintenance Schedule for Different Areas
Different parts of your shower need attention at different intervals. Creating a schedule helps you stay ahead of problems without over-cleaning.
Daily tasks include squeegeeing glass and wiping down the most used surfaces. This prevents the majority of buildup from forming.
Weekly cleaning should focus on a thorough rinse and light scrubbing of all surfaces. Use gentle cleaners to remove fresh buildup before it hardens.
Monthly deep cleaning targets grout, fixtures, and areas that don’t get daily attention. This is when you break out stronger cleaners and do detailed work.
Quarterly maintenance includes checking and cleaning exhaust fans, reapplying protective treatments, and addressing any developing problems before they become major issues.
Frequently Asked Questions
How often should I deep clean my shower?
Most showers benefit from deep cleaning every 2-4 weeks, depending on usage and water hardness. Houses with hard water or multiple daily users may need weekly deep cleaning, while lightly used showers with soft water can go longer between sessions.
Can I mix different cleaning products for better results?
Never mix cleaning products, especially those containing bleach or ammonia. Chemical combinations can create toxic gases. Use one product at a time, rinse thoroughly between applications, and wait several hours before switching to a different cleaner.
What’s the best way to prevent soap scum buildup?
Prevention starts with proper ventilation and regular maintenance. Squeegee glass surfaces after each shower, wipe down walls weekly, and consider switching to liquid soaps that create less scum. Installing a water softener also dramatically reduces soap scum formation in hard water areas.
How do I know if staining is mildew or just dirt?
Mildew typically appears as black or dark green spots that seem to spread over time. It often has a musty odor and appears in corners or areas where water sits. Dirt and soap scum usually appear more uniform and don’t have the organic, spreading pattern of mildew growth.
This article contains affiliate links. We may earn a small commission at no extra cost to you.