Your water heater works tirelessly behind the scenes, delivering hot showers and clean dishes without complaint. Until one day it doesn’t. You wake up to an ice-cold shower and suddenly realize that trusty appliance has been completely neglected for years.
Most water heaters die prematurely from preventable problems like sediment buildup, corroded anode rods, and improper temperature settings. With just a few hours of maintenance each year, you can easily extend your water heater’s life from the typical 8-10 years to 13-15 years. That translates to thousands of dollars in savings and zero emergency replacement headaches.
Whether you have a traditional tank water heater or a modern tankless unit, these six essential maintenance steps will keep your system running efficiently for years longer than expected.
1. Flush Your Tank Every 12-18 Months
Sediment buildup is the number one killer of tank water heaters. Over time, minerals from your water supply settle at the bottom of the tank, creating a thick layer that acts like insulation between the heating element and the water. This forces your system to work harder and eventually leads to complete failure.
Flushing removes this sediment and immediately improves efficiency. You’ll notice water heats faster and your energy bills may drop by 10-15%.
How to Flush Your Tank Water Heater
Turn off the power (flip the circuit breaker for electric units or set gas units to “pilot”). Shut off the cold water supply valve at the top of the tank. Connect a garden hose to the drain valve near the bottom of the tank and run the other end to a floor drain or outside.
Open a hot water faucet somewhere in your house to break the vacuum, then open the drain valve. The first water will likely be rusty and full of debris. Keep draining until the water runs clear, which usually takes 10-20 minutes.
Close the drain valve, remove the hose, turn the cold water supply back on, and restore power. You’ll hear the tank refilling. Once hot water flows from your test faucet, the job is complete.
Rheem Water Heater Maintenance Kit
Complete kit with everything needed for annual tank flushing and basic maintenance
2. Check and Replace Anode Rods Every 3-5 Years
The anode rod is your water heater’s unsung hero. This sacrificial metal rod attracts corrosive elements in your water, slowly dissolving itself to protect the tank walls from rust. Once it’s completely consumed, corrosion attacks your tank directly and replacement becomes inevitable.
Most homeowners never check their anode rod, which explains why tanks start leaking after just 6-8 years. A simple inspection and replacement schedule can double your tank’s lifespan.
Inspecting Your Anode Rod
Turn off power and water supply, then drain 2-3 gallons from the tank to lower the water level. The anode rod typically screws into the top of the tank, either through its own port or combined with the hot water outlet.
Use a socket wrench to remove the rod. A healthy rod should be at least 1/2 inch thick with some original metal visible. Replace it immediately if the rod is less than 1/4 inch thick, completely covered in white calcium deposits, or if the wire core is exposed.
Aluminum rods work best for most water conditions, while magnesium rods are ideal for soft water. Powered anodes are worth considering for homes with sulfur smell issues.
Corro-Protec Powered Anode Rod
Eliminates sulfur smell and provides superior protection without needing replacement
3. Set the Optimal Temperature
Most water heaters ship with temperatures set to 140°F, but the Department of Energy recommends 120°F for optimal efficiency and safety. This lower setting reduces energy consumption by 6-10% and significantly slows mineral buildup and corrosion.
Higher temperatures also increase the risk of scalding injuries, especially dangerous for children and elderly family members. Water at 140°F causes third-degree burns in just five seconds, while 120°F water takes two full minutes to cause similar injury.
Adjusting Your Water Heater Temperature
Electric water heaters have two thermostats hidden behind removable panels on the side of the tank. Turn off the power, remove both panels, and adjust both thermostats to the same temperature using a flathead screwdriver.
Gas water heaters have a single dial or digital display at the bottom of the unit. Simply turn the dial to 120°F or use the controls to set the digital display.
Wait 24 hours after adjustment, then test your water temperature at the tap farthest from the heater using a cooking thermometer. Fine-tune the setting if needed.
4. Test the Pressure Relief Valve Annually
The temperature and pressure relief valve (TPR valve) is your water heater’s most important safety feature. It automatically releases water if tank pressure or temperature exceeds safe limits, preventing dangerous explosions.
TPR valves can stick closed over time, especially if never tested. A stuck valve creates a potentially dangerous situation where excessive pressure has no way to escape.
Testing Your TPR Valve
Locate the valve on the top or side of your tank. It has a lever and a discharge pipe that runs down the side of the tank. Lift the lever briefly to release a small amount of water through the discharge pipe.
Water should flow immediately when you lift the lever and stop completely when you release it. If no water comes out, the valve is stuck closed and needs replacement. If water continues flowing after you release the lever, debris is preventing proper seating and the valve should be replaced.
Replace any TPR valve that fails this test immediately. This isn’t a repair job for inexperienced DIYers since proper installation is critical for safety.
5. Insulate Your Tank and Pipes
Adding insulation to your water heater and the first six feet of hot and cold water pipes can reduce heat loss by 25-45%. This simple upgrade pays for itself within a year through lower energy bills.
Tank insulation is especially beneficial for units installed in unheated areas like basements, garages, or utility rooms. Even new “efficient” water heaters benefit from additional insulation.
Installing Water Heater Insulation
Measure your tank’s dimensions and purchase a pre-cut water heater blanket from any home improvement store. These blankets typically provide R-10 insulation value and include all necessary tape and fasteners.
Wrap the blanket around your tank, leaving the top, bottom, thermostat, and TPR valve uncovered. Secure with the included tape, making sure no insulation blocks air intakes on gas units or covers the TPR valve discharge pipe.
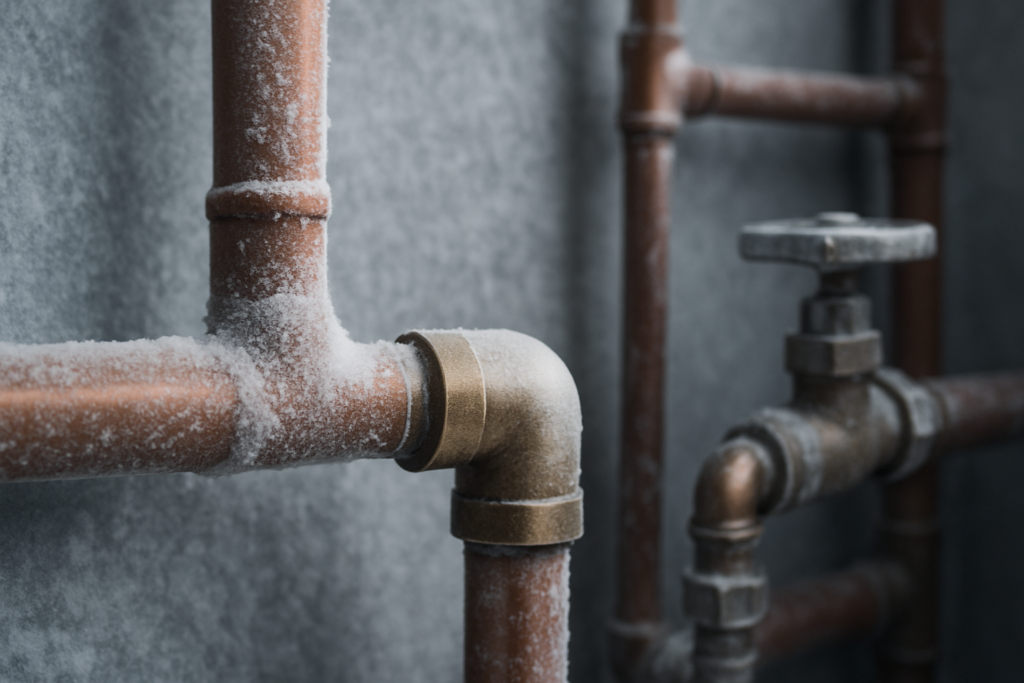
Add foam pipe insulation to the first six feet of both hot and cold water lines connected to your heater. This prevents heat loss in hot pipes and reduces condensation on cold pipes.
Duck Brand Water Heater Blanket
Easy-to-install insulation kit that fits most standard tank sizes
6. Tankless Water Heater Maintenance
Tankless systems require different but equally important maintenance. The primary enemy of tankless units is mineral scale buildup in the heat exchanger, which reduces efficiency and can cause complete system failure.
Descaling frequency depends on your water hardness. Homes with soft water need annual descaling, while hard water areas require descaling every 6-8 months.
Descaling Your Tankless Water Heater
You’ll need a submersible pump, two garden hoses, and four gallons of white vinegar or commercial descaling solution. Turn off gas and electrical power to the unit, then shut off the water supply valves.
Connect hoses to the service valves (usually marked with blue and red handles). Run one hose from the cold service valve to your pump, sitting in a bucket of vinegar. Connect the second hose from the hot service valve back to the same bucket.
Open both service valves and run the pump for 60-90 minutes, circulating vinegar through the heat exchanger. Rinse with fresh water for 15 minutes, then reconnect everything and restore power and gas.
Replace the inline water filter if your system has one. These filters protect the heat exchanger from sediment and should be changed every 6-12 months depending on water quality.
Additional Tankless Maintenance Tasks
Clean the air intake filter monthly in dusty environments or quarterly in normal conditions. Remove the front panel and gently vacuum or rinse the filter screen.
Inspect venting connections annually for gas units. Look for rust, corrosion, or gaps in the vent pipe joints. Any issues require professional attention since improper venting can cause carbon monoxide problems.
Check error codes if your unit has a digital display. Most tankless heaters store fault codes that help identify developing problems before they cause complete failure.
Creating Your Maintenance Schedule
Consistency is key to extending your water heater’s life. Mark these tasks on your calendar or set phone reminders to stay on track.
Annual Tasks:
- Flush tank water heaters (12-18 month intervals)
- Test TPR valve operation
- Descale tankless units (soft water areas)
- Inspect tank insulation and pipe insulation
- Check temperature settings
Every 3-5 Years:
- Inspect and replace anode rods in tank units
- Replace inline filters in tankless systems
Every 6 Months:
- Descale tankless units (hard water areas)
- Clean tankless air intake filters
- Check for signs of leaks around fittings
Signs Your Water Heater Needs Professional Attention
Some maintenance tasks require professional expertise. Call a licensed plumber if you notice water pooling around the base of your tank, unusual noises like popping or rumbling that persist after flushing, or if your hot water has a metallic taste or reddish color.
Gas water heaters producing a yellow flame instead of blue, or any smell of gas around the unit, require immediate professional service. Don’t attempt DIY repairs on gas components.
Tankless units displaying persistent error codes or failing to provide adequate hot water despite proper maintenance also need professional diagnosis.
Frequently Asked Questions
How do I know if my anode rod needs replacement?
Remove and inspect the rod visually. Replace it if less than 1/4 inch of the original rod remains, if calcium deposits completely coat the rod, or if the internal wire core is exposed. Most rods last 3-5 years, but water chemistry affects lifespan significantly.
Can I use my water heater while flushing the tank?
No, turn off the power and water supply before flushing. Using the water heater during maintenance can damage heating elements and create safety hazards. Plan flushing for times when hot water won’t be needed for 2-3 hours.
Why does my tankless water heater need descaling if I have a water softener?
Water softeners remove hardness minerals but don’t eliminate all scale-forming substances. Even soft water contains some minerals that accumulate over time. However, soft water areas can typically descale annually instead of every 6 months.
Should I replace a 10-year-old water heater even if it’s still working?
Not necessarily, especially if you’ve maintained it properly. Well-maintained units often operate efficiently for 15+ years. However, start shopping for replacement once your unit reaches 12-13 years old, since failure rates increase significantly after this point.
Regular maintenance transforms your water heater from a potential emergency into a reliable, long-term investment. These six steps take just a few hours annually but can easily add five or more years to your system’s lifespan while keeping it running at peak efficiency.
This article contains affiliate links. We may earn a small commission at no extra cost to you.