
Nothing kills your cleaning momentum quite like a vacuum that’s lost its pulling power. One minute you’re making quick work of that living room carpet, the next you’re pushing around what feels like an expensive push broom. Your vacuum runs, it makes all the right noises, but somehow the dirt just sits there mocking you.
Before you start shopping for a replacement or call in expensive repairs, take a deep breath. Most suction problems have surprisingly simple solutions that you can tackle in your own home. I’ve been fixing vacuums for over a decade, and I’d estimate that 80% of suction issues come down to basic maintenance problems that take more elbow grease than expertise to solve.
Let’s walk through eight proven fixes, starting with the most common culprits and working our way up to the trickier problems. By the end of this guide, your vacuum should be back to its dirt-devouring best.
Safety First: Essential Precautions
Before we start troubleshooting, unplug your vacuum completely. This isn’t just about avoiding electric shock (though that’s important). Many vacuum components can pinch fingers or cause injury if the motor kicks on unexpectedly. Keep your work area well-lit, and have a flashlight handy for peering into dark crevices.
For bagless models, do your work outside or in a garage if possible. You’re about to disturb a lot of accumulated dust and debris that’s been trapped in your vacuum’s system. Trust me, your allergies will thank you later.
Fix #1: Check and Replace Full Bags
This might seem obvious, but you’d be amazed how many people overlook a completely stuffed vacuum bag. Even bags that don’t look entirely full can restrict airflow enough to kill suction. Most vacuum bags should be changed when they’re about 75% full, not when they’re bursting at the seams.
Remove the bag and hold it up to the light. Can you see through the material at all? If not, it needs to go. While you’re at it, check the bag housing for any tears or holes that might be letting air escape.
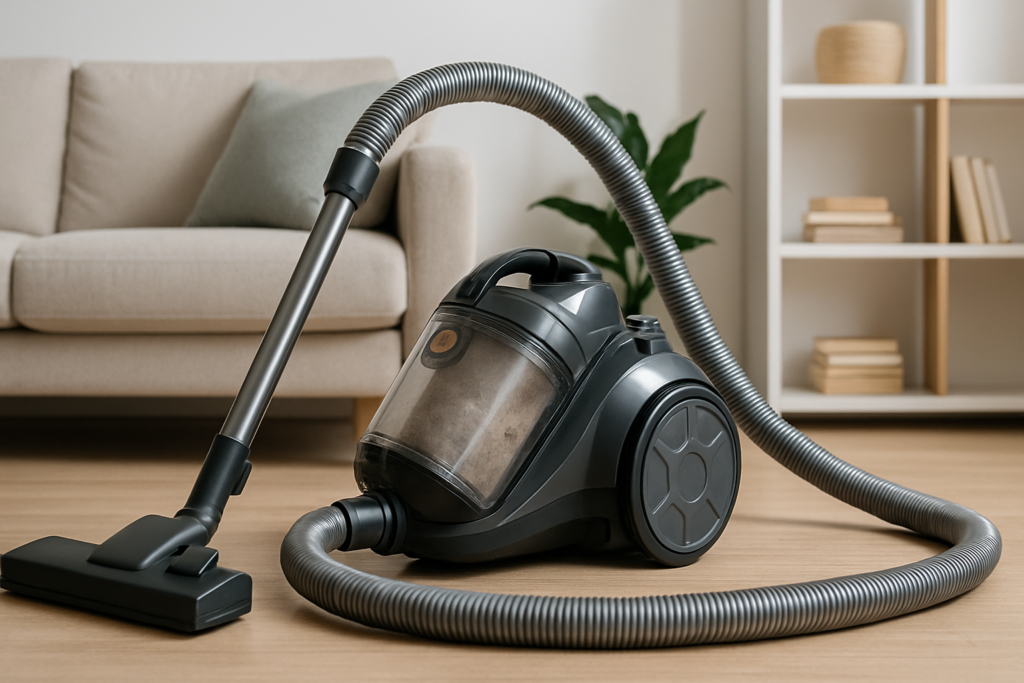
For bagless models, empty that canister even if it’s only half full. Dirt and debris can compact against the sides and create air pockets that reduce suction efficiency. Give the canister a thorough rinse with warm water and let it dry completely before reinstalling.
Vacuum Bags Universal Fit
High-quality replacement bags that fit most major vacuum brands.
Fix #2: Clear Clogged Hoses and Attachments
Hose clogs are sneaky. They often develop gradually as debris builds up over time, creating partial blockages that slowly strangle your vacuum’s performance. Start by disconnecting the hose completely from both the vacuum body and any attachments.
Hold the hose up to a light source and look through it. You should see clear light from end to end. If you spot any dark areas, you’ve found your culprit. For minor clogs, try the “snake” method: straighten out a wire coat hanger and carefully push it through the hose. Move slowly to avoid puncturing the hose walls.
Stubborn clogs might need more aggressive treatment. Drop a handful of coins into the hose and shake it vigorously. The coins will knock loose debris free without damaging the hose material. Follow up by running water through the hose (if your model allows it) and let it dry completely before reconnecting.
Don’t forget to check your attachments too. Brush heads, crevice tools, and upholstery attachments can harbor surprising amounts of debris. Pull out any hair or string wrapped around brush bristles, and use a toothpick to clear blocked openings.
Fix #3: Clean or Replace Dirty Filters
Dirty filters are probably the most underestimated cause of suction loss. Your vacuum’s filters work overtime to trap fine dust and allergens, but they can only hold so much before they start choking off airflow. Most vacuums have multiple filters, and you need to check them all.
Start with the pre-motor filter, usually located near the dust bag or canister. Remove it carefully and tap it against the inside of a trash can to knock loose surface dirt. For washable filters, rinse under cool water until the water runs clear. Never use hot water or soap, as these can damage the filter material.
HEPA filters require special attention. These dense filters trap microscopic particles but clog more easily than standard filters. If your HEPA filter looks gray or brown instead of white, it’s time for a replacement. Attempting to wash a non-washable HEPA filter will destroy its effectiveness permanently.
HEPA Vacuum Filter Replacement
Compatible replacements for most major vacuum brands with excellent filtration.
Post-motor filters (usually located near the exhaust) also need regular attention. These filters protect your motor from debris that might escape the primary filtration system. A clogged post-motor filter can create back-pressure that reduces overall suction performance.
Fix #4: Inspect and Replace Worn Belts
A broken or stretched belt is like having a car with a snapped fan belt. Everything looks normal on the surface, but the power isn’t getting where it needs to go. Most vacuum belts are hidden under the brush head assembly, so you’ll need to flip your vacuum over and remove a few screws or clips.
Look for obvious signs of damage: cracks, fraying, or complete breaks. But also check belt tension by pressing down on the belt with your finger. It should have some give but shouldn’t feel loose or sloppy. A properly tensioned belt will deflect about half an inch under moderate pressure.
Even if your belt looks intact, consider its age. Rubber belts naturally stretch and lose elasticity over time. Most manufacturers recommend belt replacement every 6-12 months for average household use. If you have pets or do a lot of heavy-duty cleaning, you might need replacements more frequently.
When installing a new belt, make sure it’s properly seated on both the motor shaft and brush roller. A belt that’s twisted or riding up on the pulley edges won’t transfer power efficiently and will wear out quickly.
Fix #5: Clean the Brush Roll and Remove Debris
Your brush roll does the heavy lifting when it comes to agitating carpet fibers and loosening embedded dirt. When it gets clogged with hair, string, or other debris, it can’t spin properly and your suction efficiency plummets.
Remove the brush roll completely (usually by lifting out or unscrewing end caps). You’ll probably be shocked at what you find wrapped around it. Pet hair and human hair are the biggest culprits, but I’ve pulled out everything from shoelaces to Christmas tinsel.
Use scissors to carefully cut away hair and string, working from one end of the brush to the other. A seam ripper (the small tool used in sewing) works even better than scissors for this job. Be patient and thorough. Even small amounts of debris can throw the brush roll off balance and create vibration that reduces cleaning effectiveness.
While you have the brush roll out, spin it by hand to check the bearings. It should rotate smoothly without catching or grinding. If you feel resistance or hear unusual noises, the bearings might need lubrication or replacement.
Fix #6: Examine Air Pathways for Obstructions
Modern vacuums have complex internal air pathways that can develop blockages in unexpected places. These hidden clogs are often the most frustrating to diagnose because everything visible looks fine.
Start by removing all removable components: bags, filters, hoses, and brush rolls. With everything stripped down, turn on your vacuum briefly to test the raw motor suction. You should feel strong airflow at the motor intake. If the suction feels weak even with everything removed, you’ve got an internal blockage or motor problem.
Check the connection points where hoses and attachments meet the main body. These areas are prone to debris buildup because they create turbulence in the airflow. Use a flashlight to inspect these joints thoroughly, and use a thin brush or compressed air to clear any obstructions.
Some vacuums have internal ducts that can be accessed by removing additional screws or panels. Consult your owner’s manual for guidance on how far you can disassemble your specific model without voiding the warranty.
Fix #7: Test and Address Motor Issues
Motor problems are more serious but not necessarily fatal. Before assuming the worst, make sure you’ve ruled out all the simpler causes we’ve already covered. A motor that’s working against clogged filters or blocked airways will seem weak even when it’s mechanically sound.
Listen to your motor’s sound signature. A healthy vacuum motor should run smoothly with a consistent tone. Grinding, squealing, or intermittent noises suggest internal problems. Motors that run but produce very little suction might have worn carbon brushes or damaged fan blades.
Check your motor’s cooling vents for dust buildup. Overheated motors lose efficiency and can suffer permanent damage. Use compressed air to blow out any accumulated dust, working from the inside out to avoid pushing debris deeper into the motor housing.
If your motor runs intermittently or shuts off during use, you might be dealing with thermal protection circuits. These safety features shut down the motor when it overheats, usually due to restricted airflow. Solving the underlying airflow problem will often resolve intermittent motor behavior.
Fix #8: Address Seal and Gasket Problems
Air leaks are the silent killers of vacuum performance. Even small gaps in seals and gaskets can dramatically reduce suction by allowing air to bypass the intended flow path. These problems often develop gradually, making them hard to notice until performance becomes obviously poor.
Inspect all gaskets and seals systematically. Look for cracks, hardening, or areas where the seal doesn’t make complete contact. Pay special attention to the bag housing area, filter compartments, and any removable covers or panels.
A simple test for air leaks: with your vacuum running (and all normal components installed), slowly move your hand around all the seams and joints. You should not feel any air escaping. Areas where you detect airflow indicate failing seals.
Many gaskets can be repaired temporarily with appropriate sealants, but replacement is usually the better long-term solution. When shopping for replacement seals, bring your old gasket to the store for size matching, or take detailed measurements and photos.
Vacuum Repair Kit
Complete maintenance kit with belts, filters, and basic tools for most repairs.
When to Call a Professional
Most suction problems can be solved with the fixes we’ve covered, but some situations call for professional help. If you’ve worked through all eight fixes and your vacuum still isn’t performing, you might be dealing with internal motor damage or complex electronic issues.
Consider professional repair if your vacuum is relatively new (under 3 years) and still under warranty. Attempting complex repairs yourself can void warranty coverage and potentially create safety hazards.
For older vacuums, weigh repair costs against replacement costs. A good rule of thumb: if professional repairs cost more than 50% of a new vacuum’s price, it’s usually better to upgrade.
Prevention Tips for Future Problems
Regular maintenance prevents most suction problems from developing in the first place. Empty bags or canisters before they’re completely full, and clean filters monthly (or more frequently in dusty environments).
Inspect your vacuum’s brush roll monthly for hair and debris buildup. This simple step prevents the kind of severe tangles that can damage both the brush and drive belt.
Store your vacuum in a dry area to prevent moisture damage to filters and electrical components. Avoid leaving it in basements, garages, or other high-humidity areas whenever possible.
Frequently Asked Questions
How often should I replace vacuum filters?
Standard filters should be cleaned monthly and replaced every 3-6 months depending on use. HEPA filters typically last 6-12 months but should be replaced sooner if they appear discolored or damaged. Heavy use or homes with pets may require more frequent replacement.
Why does my bagless vacuum lose suction so quickly?
Bagless vacuums are more sensitive to filter cleanliness than bagged models. The cyclonic action that separates dirt from air depends on proper airflow, which gets disrupted by dirty filters. Clean your bagless filters every 2-3 uses for optimal performance.
Can I wash all vacuum filters?
No, not all filters are washable. Check your owner’s manual or look for washing symbols on the filter itself. HEPA filters are often not washable, and attempting to wash them can destroy their filtration capabilities. When in doubt, replace rather than wash.
How do I know if my vacuum belt needs replacement?
Signs of belt problems include reduced suction, burning smells during use, or visible wear when you inspect the belt directly. Even if a belt looks intact, replace it every 6-12 months as rubber naturally stretches and loses effectiveness over time.
This article contains affiliate links. We may earn a small commission at no extra cost to you.