That high-pitched whine from your vacuum cleaner might be more than just an annoying noise. It could be your vacuum’s way of telling you the filter needs attention. But before you rush to order a replacement, you might be throwing money away on filters that just need a good cleaning.
Understanding when to clean versus replace your vacuum filter can save you hundreds of dollars over your vacuum’s lifetime. More importantly, it keeps your vacuum running at peak performance and your home’s air quality at its best. Different filter types have vastly different maintenance needs, and knowing these differences is key to making smart decisions.
Let’s break down everything you need to know about vacuum filter maintenance, from identifying filter types to recognizing when it’s time to say goodbye to that old filter for good.
Understanding Different Vacuum Filter Types
Not all vacuum filters are created equal. The type of filter in your vacuum determines both how you should maintain it and how long it will last.
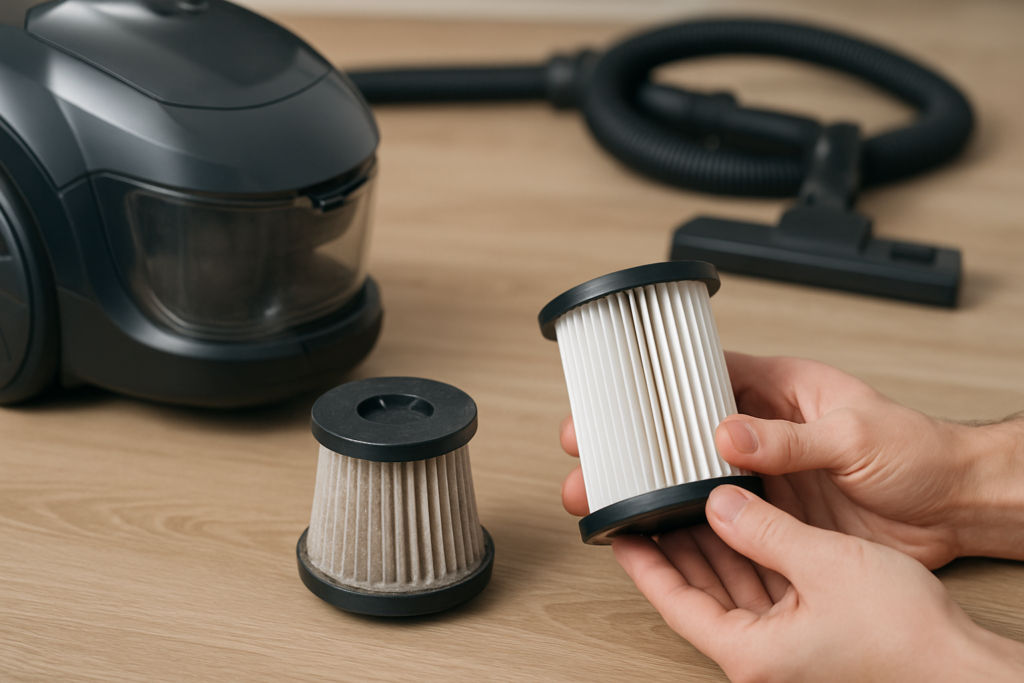
HEPA Filters
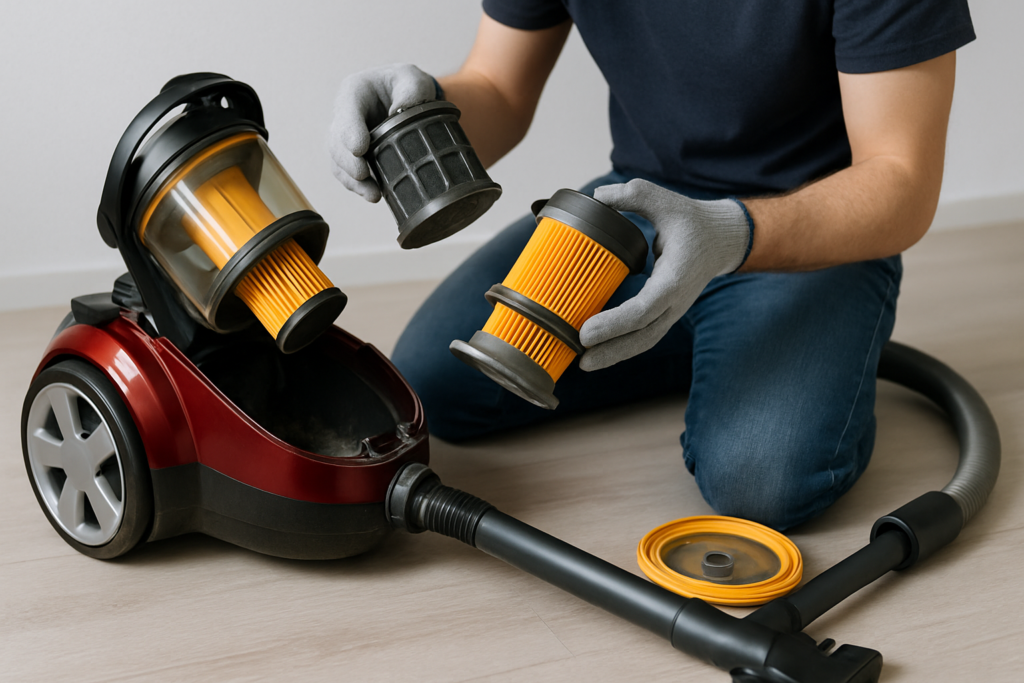
True HEPA filters capture 99.97% of particles 0.3 microns or larger. These filters come in two varieties: washable and non-washable. Washable HEPA filters can typically handle 6-12 cleanings before needing replacement, while non-washable versions should be replaced every 6-12 months depending on usage.
You’ll find HEPA filters in higher-end vacuums and models designed for allergy sufferers. Brands like Shark, Dyson, and Bissell often use washable HEPA filters in their premium models.
Replacement HEPA Filter Set
Essential for maintaining peak filtration performance in allergy-prone homes
Foam Filters
Foam filters are almost always washable and incredibly durable. These spongy filters can last 1-2 years with proper maintenance. You’ll typically find them in shop vacuums, some bagless uprights, and as pre-filters in multi-stage filtration systems.
The key advantage of foam filters is their resilience. They can handle dozens of wash cycles without breaking down, making them the most economical option long-term.
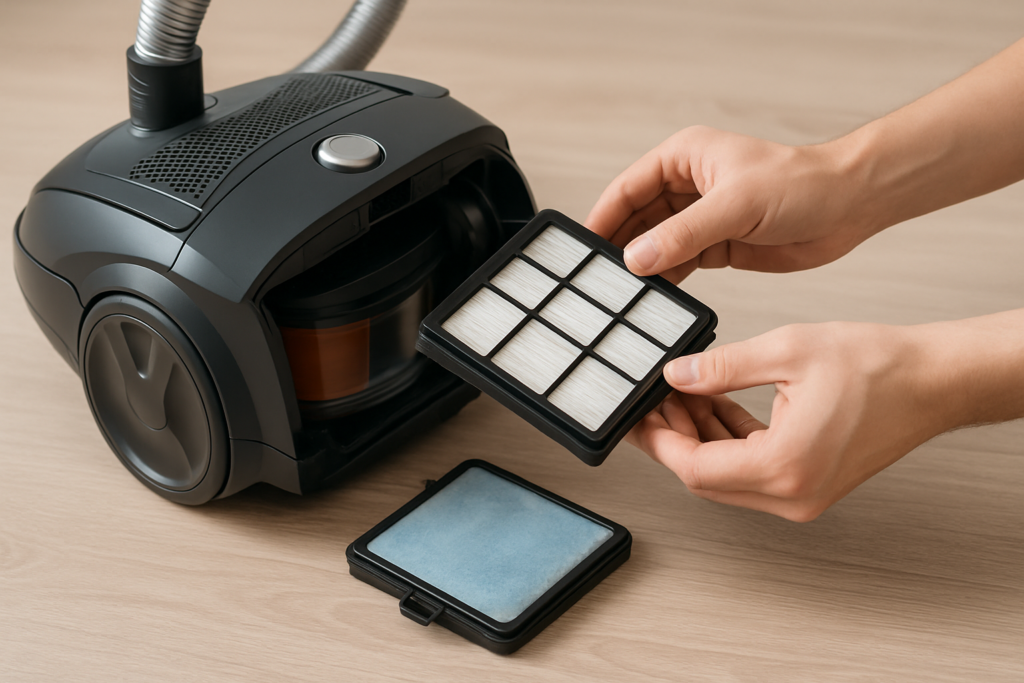
Pleated Paper Filters
These accordion-style filters offer excellent particle capture but are generally not washable. Water will destroy the paper fibers and reduce filtration efficiency. Replace pleated paper filters every 3-6 months, or when they appear visibly dirty.
Many Hoover and Eureka models use pleated paper filters as their primary filtration method.
Cloth and Fabric Filters
Cloth filters fall somewhere between foam and paper in terms of washability. Most can be gently hand-washed, but they’re more delicate than foam filters. Expect to replace cloth filters every 6-8 months with regular cleaning.
When to Clean Your Vacuum Filters
Timing your filter cleaning properly extends filter life and maintains suction power. Here are the key indicators that cleaning time has arrived.
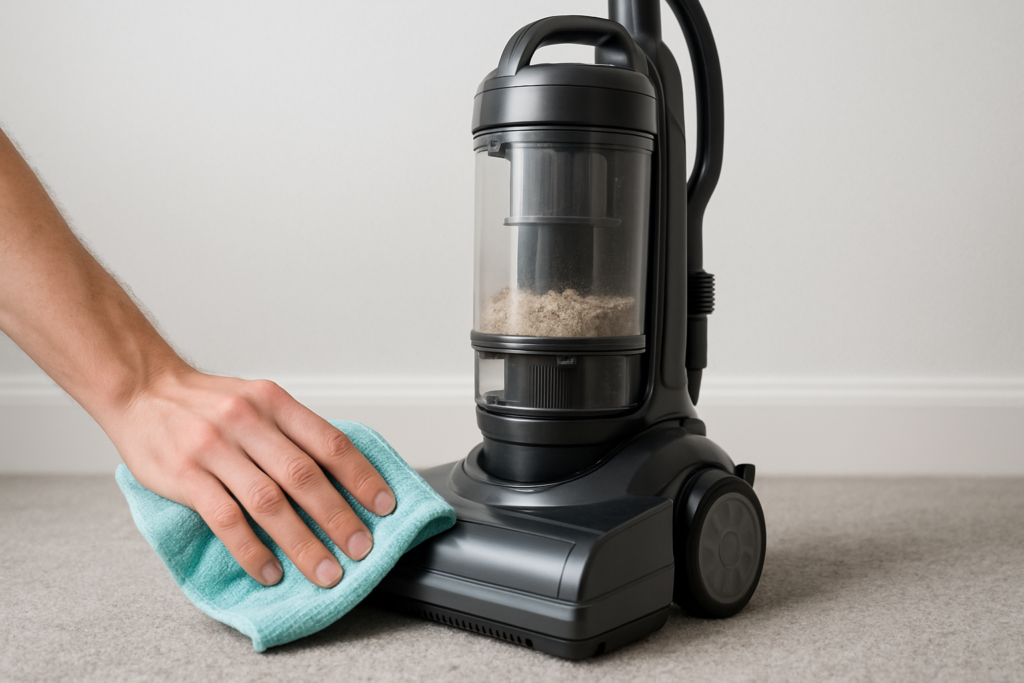
Visual Inspection Cues
Pull out your filter and give it a close look. Light dust accumulation that you can see through indicates it’s time for cleaning. If the filter looks uniformly gray or brown instead of its original color, don’t wait any longer.
For pleated filters, check between the folds where debris tends to accumulate. Foam filters should feel spongy, not stiff or crusty.
Performance Indicators
Reduced suction is the most obvious sign of a clogged filter. Your vacuum might also run hotter than usual or make different sounds. Some modern vacuums have filter indicator lights that take the guesswork out of timing.
Pay attention to how quickly your vacuum fills its dust container. If it’s filling faster than usual, the filter might be allowing larger particles through.
Time-Based Guidelines
Even without obvious signs, establish a regular cleaning schedule. For average household use, check and clean washable filters monthly. Homes with pets, heavy foot traffic, or ongoing construction should clean filters every 2-3 weeks.
Proper Filter Cleaning Methods
Cleaning technique matters just as much as timing. The wrong approach can damage filters or reduce their effectiveness.
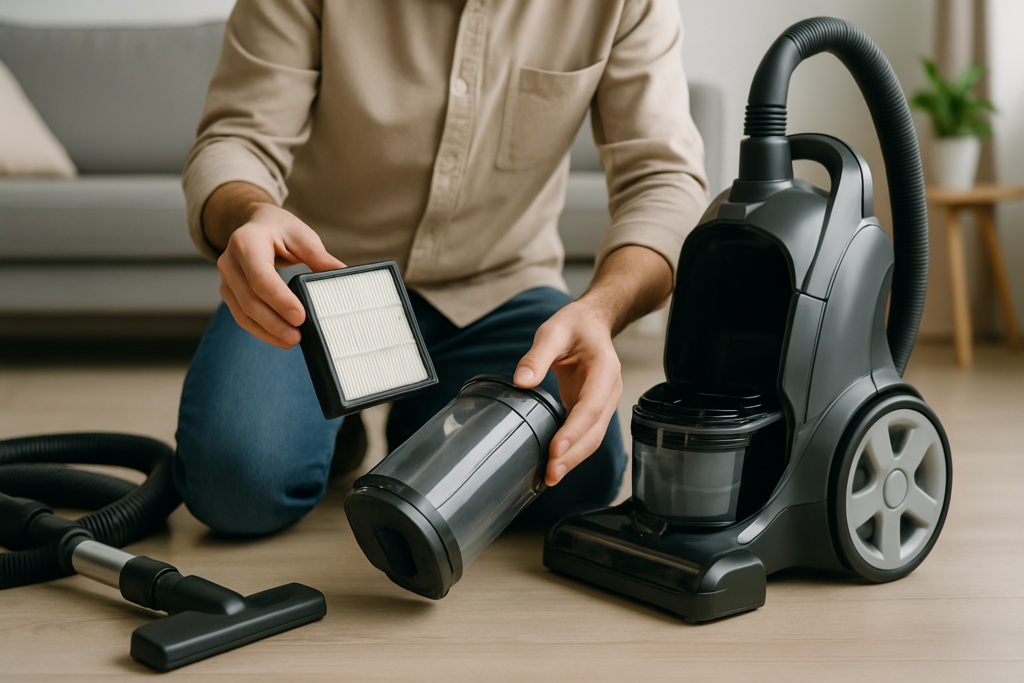
Cleaning Washable HEPA Filters
Start by tapping the filter gently to remove loose debris. Rinse under cool water, working from the clean side to the dirty side. Use a soft brush to gently remove stubborn particles, but never scrub aggressively.
Allow the filter to air dry completely, typically 24-48 hours. Installing a damp filter can lead to mold growth and motor damage. Speed up drying by placing the filter in front of a fan, but never use heat sources like hair dryers.
Vacuum Filter Cleaning Brush Set
Gentle bristles help remove debris without damaging delicate filter materials
Foam Filter Maintenance
Foam filters are more forgiving but still require proper technique. Remove loose debris by tapping or gentle brushing. Wash in warm water with a small amount of mild dish soap.
Squeeze gently to work out dirt, but don’t wring or twist the foam. Rinse thoroughly until water runs clear. Squeeze out excess water using a towel and allow to air dry completely.
Cloth Filter Care
Treat cloth filters more delicately than foam. Use cool water and minimal soap. Work dirt out gently with your hands rather than using brushes. Some cloth filters can handle gentle machine washing on a delicate cycle, but check manufacturer guidelines first.
When Replacement is Necessary
Even the best maintenance can’t make filters last forever. Recognizing when cleaning isn’t enough saves you from poor performance and potential damage to your vacuum.
Signs a Filter is Beyond Cleaning
Washable filters that remain discolored after cleaning have reached the end of their useful life. If a HEPA filter tears, develops holes, or has damaged pleats, replacement is mandatory.
Foam filters that become stiff, crumbly, or lose their shape won’t provide proper filtration. Cloth filters with frayed edges or thin spots should also be replaced.
Persistent odors that don’t disappear after thorough cleaning often indicate bacterial growth or deep-seated contamination that can’t be removed.
Performance-Based Replacement Indicators
If your vacuum’s suction doesn’t improve after cleaning the filter, the filter might be permanently clogged or damaged. Similarly, if you notice dust or debris escaping from the vacuum’s exhaust, the filter is no longer doing its job.
Keep track of how quickly filters get dirty after cleaning. If they’re clogging much faster than before, the filter material has likely degraded.
Manufacturer Recommendations
Most manufacturers provide specific replacement timelines in their documentation. Dyson recommends replacing their washable filters annually, while Shark suggests 6-9 months for their HEPA filters under normal use.
These timelines assume regular cleaning and average household conditions. Adjust accordingly based on your usage patterns and environment.
Cost-Saving Strategies
Smart filter management can dramatically reduce your vacuum maintenance costs without sacrificing performance.
Maximize Filter Lifespan
Empty your vacuum’s dust container frequently. A full container forces air to work harder to pass through, putting extra stress on filters. Keep containers no more than two-thirds full.
Use your vacuum’s appropriate power settings. Running on maximum power constantly puts unnecessary strain on the filtration system. Match power levels to the cleaning task.
Consider using pre-filters when available. These inexpensive filters catch larger particles before they reach your main filter, extending its life significantly.
Universal Pre-Filter Set
Catches large debris before it reaches your expensive main filter
Smart Purchasing Decisions
Buy filters in multipacks when possible. Most manufacturers and third-party suppliers offer better per-unit pricing on bulk purchases. Just make sure you’ll use them before they degrade from storage.
Consider compatible third-party filters for significant savings. Many aftermarket filters perform as well as OEM versions at a fraction of the cost. Check reviews and specifications carefully to ensure compatibility.
Time your purchases around sales events. Many retailers offer vacuum accessory discounts during spring cleaning seasons and major shopping holidays.
When to Choose Cleaning vs Replacement
Calculate the cost-per-cleaning for washable filters. A filter that competitively priced and lasts through 10 cleanings competitively priced per cleaning cycle. Compare this to disposable alternatives to make informed decisions.
Factor in your time and effort. If you’re constantly cleaning filters because they clog quickly, it might be more economical to replace them more frequently.
Impact of Poor Filter Maintenance
Neglecting filter maintenance affects more than just your vacuum’s performance. The consequences can be costly and far-reaching.
Performance Degradation
Dirty filters force your vacuum’s motor to work harder, leading to premature wear and higher energy consumption. You’ll notice reduced suction power, longer cleaning times, and potentially overheating issues.
Clogged filters can also cause debris to bypass the filtration system entirely, leading to poor cleaning results and potentially damaging internal components.
Air Quality Concerns
Compromised filters can’t trap allergens, dust mites, and other microscopic particles effectively. This is particularly problematic for households with allergy sufferers or respiratory conditions.
In extreme cases, damaged filters might actually contribute to poor indoor air quality by redistributing trapped particles back into your living space.
Long-term Costs
Poor filter maintenance can shorten your vacuum’s overall lifespan significantly. Motor damage from overheating or debris infiltration often costs more to repair than the vacuum is worth.
You might also find yourself needing to clean more frequently to achieve the same results, wasting time and energy in the process.
Frequently Asked Questions
How often should I replace vacuum filters if I have pets?
Pet owners should replace filters 50-100% more frequently than the manufacturer’s standard recommendations. Pet hair and dander clog filters faster and can create odor issues. For washable filters, clean them every 2-3 weeks and replace every 6-8 months instead of annually.
Can I speed up filter drying time safely?
Yes, but avoid heat sources. Place clean filters in front of a fan or in a well-ventilated area. Some people use a dehumidifier to speed drying. Never use hair dryers, ovens, or direct sunlight, as heat can damage filter materials and reduce effectiveness.
Are expensive OEM filters always worth the extra cost?
Not necessarily. Many third-party filters perform equally well at lower prices. However, for specialized filters like true HEPA or those in premium vacuum models, OEM filters often provide better fit and performance. Check reviews and specifications when considering alternatives.
What happens if I accidentally wash a non-washable filter?
Non-washable filters, particularly pleated paper types, will likely be ruined by water exposure. The paper fibers break down, creating gaps that allow particles to pass through. Replace the filter immediately and don’t attempt to use it, as it won’t provide proper filtration and could damage your vacuum.
Complete Filter Replacement Kit
Includes multiple filter types for complete vacuum maintenance
Proper filter maintenance is one of the simplest ways to keep your vacuum running efficiently while saving money. By understanding your specific filter types and following appropriate cleaning and replacement schedules, you’ll enjoy better cleaning performance and longer equipment life. Remember that a small investment in regular filter care pays dividends in reduced replacement costs and improved home cleanliness.
This article contains affiliate links. We may earn a small commission at no extra cost to you.