A wobbly toilet or that unpleasant smell coming from your bathroom floor usually means one thing: your toilet’s wax ring has failed. This small but crucial component seals the connection between your toilet and the drain pipe, preventing water damage and sewer gases from entering your home.
Replacing a wax ring might sound intimidating, but it’s actually one of the most manageable plumbing repairs you can tackle yourself. With the right tools and about 2-3 hours of work, you can save hundreds of dollars in plumber fees while gaining the confidence that comes with fixing something important in your home.
Most homeowners avoid this repair because they think it’s too complicated or messy. While it does involve some physical work and getting your hands dirty, the process is quite logical once you understand the steps involved.
Signs Your Wax Ring Needs Replacement
Before you start dismantling your toilet, make sure the wax ring is actually the problem. Several clear indicators point to a failed wax ring that needs immediate attention.
Water pooling around the base of your toilet is the most obvious sign. This water might appear after each flush or accumulate slowly over time. Don’t ignore even small amounts of water, as this can lead to serious floor damage underneath.
Foul odors coming from around the toilet base indicate sewer gases are escaping through a broken seal. These smells are not only unpleasant but also unhealthy for your family.
A toilet that rocks or feels unstable when you sit on it often means the wax ring has compressed or shifted. This movement breaks the seal and allows water to leak out during each flush.
Staining or discoloration on the floor around the toilet base suggests water has been leaking for some time. Check for soft spots in the flooring, which could indicate more extensive damage requiring professional repair.
Tools and Materials You’ll Need
Gathering the right tools before you start will make this job much easier. Most of these items are common household tools, but a few specialized pieces will ensure professional results.
Essential Tools
- Adjustable wrench or socket set
- Putty knife or plastic scraper
- Rubber gloves
- Old towels or rags
- Bucket for water removal
- Level (small torpedo level works fine)
- Utility knife
Required Materials
- New wax ring (with or without horn attachment)
- New toilet bolts and washers
- Toilet bowl cleaner or disinfectant
- Plastic drop cloth or cardboard
Choose a quality wax ring replacement kit that includes everything you need. Standard wax rings work for most installations, but extra-thick rings are better if your toilet sits higher than normal or if you’re installing on an uneven floor.
Safety Precautions and Preparation
This repair involves lifting a heavy toilet and working with potentially contaminated water. Taking proper safety measures protects both you and your home.
Turn off the water supply to your toilet using the shut-off valve behind the toilet. If this valve doesn’t work or you can’t locate it, shut off water to the entire house at the main valve.
Wear rubber gloves throughout the entire process. The area around a failed wax ring can contain harmful bacteria, so proper hand protection is essential.
Clear a path from the toilet to where you’ll set it down. Toilets weigh 70-120 pounds depending on the model, and you don’t want to navigate around obstacles while carrying this awkward load.
Lay down plastic sheeting or old towels to protect your floor. This job can get messy, especially when removing the old wax ring.
Step-by-Step Wax Ring Replacement
Step 1: Remove Water from the Toilet
Flush the toilet to empty the tank completely. Hold down the flush handle to get as much water out as possible. Use a bucket or large cup to remove remaining water from the bowl.
Soak up the last bit of water in the bowl bottom with old towels or a sponge. You want the toilet as light as possible when you lift it.
Step 2: Disconnect the Water Supply
Unscrew the water supply line from the bottom of the toilet tank using an adjustable wrench. Turn counterclockwise to loosen. Have a towel ready to catch any water that spills out.
Some water will remain in the supply line, so point the end toward your bucket when you disconnect it.
Step 3: Remove the Toilet Bolts
Locate the two bolts at the base of the toilet, usually covered by plastic caps. Remove these caps by lifting or unscrewing them.
Use your adjustable wrench to remove the nuts from these bolts. Turn counterclockwise until the nuts come free. If the bolts spin while you’re trying to remove the nuts, hold them steady with pliers.
Corroded bolts can be stubborn. Apply penetrating oil and let it sit for 10-15 minutes if you encounter resistance. In extreme cases, you might need to cut the bolts with a hacksaw.
Step 4: Lift and Remove the Toilet
Grab the toilet bowl firmly on both sides near the seat bolts. Lift straight up with your legs, not your back. The toilet should come free from the floor bolts.
Immediately stuff a rag into the drain opening to prevent sewer gases from entering your bathroom. This also prevents anything from accidentally falling into the drain.
Set the toilet on your prepared surface, tilting it slightly forward so any remaining water doesn’t spill on your floor.
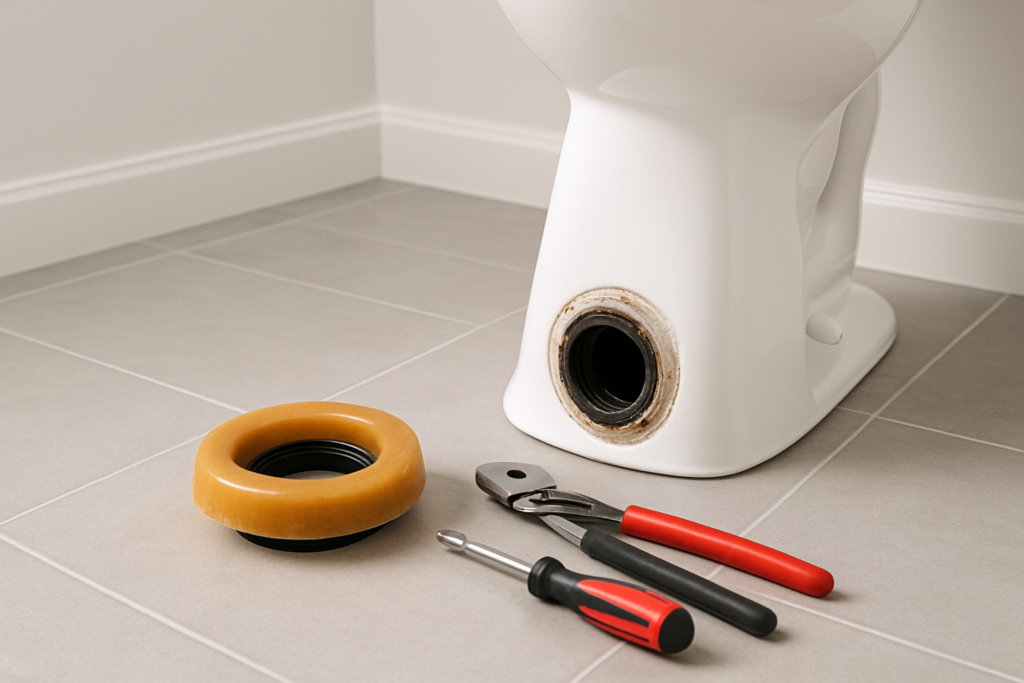
Step 5: Remove the Old Wax Ring
Put on fresh gloves for this step. The old wax ring will be stuck to either the toilet bottom or the floor flange, possibly both.
Use a putty knife to carefully scrape away all old wax material. Remove every bit of old wax from both surfaces, as any remaining residue can prevent proper sealing of the new ring.
Clean both the toilet base and floor flange with disinfectant. This is also a good time to inspect the flange for cracks or damage that might need repair.
Step 6: Install the New Wax Ring
Remove the rag from the drain opening. Check that the floor flange is level and in good condition before proceeding.
Place the new wax ring on the floor flange with the rounded side facing up. If your wax ring has a horn or funnel attachment, make sure it fits properly into the drain opening.
Don’t press down on the wax ring. It should sit loosely on the flange until the toilet compresses it into place.
Step 7: Install New Toilet Bolts
Insert new toilet bolts through the flange slots. The bolt heads should sit flat against the bottom of the flange with the threads pointing straight up.
Position the bolts so they’re exactly opposite each other. Use a small level to make sure they’re perfectly vertical, as crooked bolts will make toilet installation difficult.
Step 8: Reinstall the Toilet
Carefully lower the toilet straight down onto the wax ring. The toilet bolt holes should align with the bolts sticking up from the floor.
Press down firmly on the toilet bowl rim, applying even pressure on both sides. You’ll feel the toilet compress the wax ring and settle into place.
Rock the toilet gently from side to side while pressing down. This helps the wax ring spread evenly and create a complete seal.
Step 9: Secure the Toilet
Place washers and nuts on the toilet bolts. Tighten them evenly, alternating between sides to keep the toilet level.
Snug the nuts down firmly, but don’t overtighten. Excessive force can crack the toilet base. The toilet shouldn’t rock when you sit on it, but the nuts shouldn’t require extreme effort to turn.
Use a level to check that the toilet sits evenly. Minor adjustments can be made by slightly loosening one side and retightening.
Step 10: Reconnect Water and Test
Reconnect the water supply line to the toilet tank. Hand-tighten the connection, then use your wrench to snug it down. Don’t overtighten, as this can damage the fitting.
Turn the water supply back on and let the tank fill. Check for leaks at the connection point and tighten slightly if needed.
Flush the toilet several times and carefully inspect the base for any signs of water leakage. A properly installed wax ring should create a watertight seal immediately.
Proper Sealing and Alignment Techniques
The success of your wax ring replacement depends heavily on proper installation technique. Small mistakes in sealing or alignment can lead to immediate failure or problems down the road.
When positioning the toilet over the new wax ring, lower it straight down without any twisting motion. Rotating the toilet while it’s in contact with the wax ring can displace the seal and create gaps.
Apply steady downward pressure for at least 30 seconds after positioning the toilet. This ensures the wax ring compresses evenly and forms a complete seal around the entire circumference.
Check the toilet’s stability before final tightening. Any rocking motion indicates the wax ring isn’t properly compressed or the flange might be damaged. Address these issues before proceeding with bolt tightening.
The toilet bolts should be tightened in small increments, alternating from side to side. This keeps the toilet level and prevents stress cracks in the ceramic base.
Common Mistakes to Avoid
Several common errors can turn a simple wax ring replacement into a bigger problem. Learning from others’ mistakes will save you time and frustration.
Using the old toilet bolts is a frequent mistake that causes problems later. Old bolts are often corroded or stretched, and they can fail just when you need them most. Always install new bolts with every wax ring replacement.
Failing to remove all the old wax material prevents the new ring from sealing properly. Take your time with this step and make sure both surfaces are completely clean before installation.
Overtightening the toilet bolts can crack the toilet base or compress the wax ring unevenly. Snug is tight enough. The toilet shouldn’t move when you sit on it, but the bolts shouldn’t require excessive force to tighten.
Installing the wax ring upside down is more common than you’d think. The tapered side should face up toward the toilet, while the flat side sits against the floor flange.
When to Call a Professional
While most homeowners can handle wax ring replacement, certain situations require professional expertise to avoid costly damage.
If you discover the floor flange is cracked, broken, or sitting too low, stop the project and call a plumber. Flange repairs often require specialized tools and techniques that are beyond typical DIY skills.
Soft or damaged flooring around the toilet indicates water damage that might need structural repair. A professional can assess whether the subfloor needs replacement before reinstalling the toilet.
If you’re not comfortable lifting heavy objects or working in tight spaces, hiring a professional is worth the cost. Dropping a toilet can cause serious injury or expensive damage to your bathroom.
Multiple failed attempts at wax ring replacement suggest there might be an underlying problem with your plumbing system. A professional plumber can diagnose and fix issues that aren’t obvious to homeowners.
Maintenance Tips for Long-Lasting Results
A properly installed wax ring can last 20-30 years with minimal maintenance, but a few simple practices will maximize its lifespan.
Avoid using excessive force when sitting on or getting up from the toilet. Repeated stress can gradually compress the wax ring and break the seal over time.
Check the toilet bolts annually to make sure they remain snug. Loose bolts allow the toilet to rock, which can damage the wax ring seal.
Address any toilet leaks immediately, even if they seem minor. Water damage around the toilet can weaken the floor and create conditions that stress the wax ring.
Keep the area around your toilet clean and dry. Excessive moisture can accelerate deterioration of both the wax ring and the floor materials underneath.
Frequently Asked Questions
How often should I replace my toilet’s wax ring?
Wax rings typically last 20-30 years under normal conditions. However, you should replace the wax ring whenever you remove the toilet for any reason, as lifting the toilet usually damages the seal. Signs like water leakage, odors, or toilet movement indicate immediate replacement is needed regardless of age.
Can I reuse a wax ring if it looks okay?
Never reuse a wax ring, even if it appears undamaged. Once a wax ring has been compressed and shaped to seal your toilet, removing the toilet disrupts that seal permanently. The small cost of a new wax ring isn’t worth the risk of leaks and water damage from trying to reuse the old one.
What’s the difference between wax rings with and without horns?
Wax rings with horns (also called funnels) have a plastic extension that fits into the drain opening, providing extra guidance for waste flow. Use a horn-style ring if your floor flange sits flush with or below the floor surface. Standard wax rings without horns work better when the flange sits above floor level or if clearance is tight.
Why does my toilet still rock after replacing the wax ring?
A rocking toilet after wax ring replacement usually indicates an uneven floor or a damaged floor flange. Check that the flange is level and securely attached to the subfloor. You might need toilet shims to level the toilet base, or in severe cases, professional repair of the flange or floor structure.
This article contains affiliate links. We may earn a small commission at no extra cost to you.