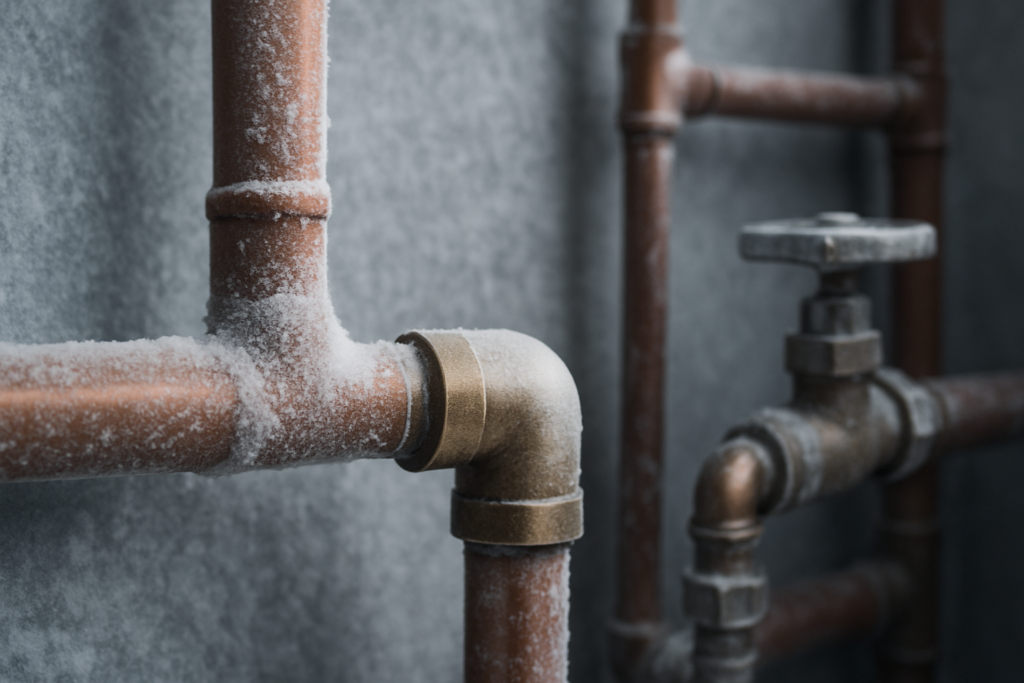
Nothing ruins a winter morning quite like turning on the faucet to discover frozen pipes. That first trickle of water, followed by complete silence, signals the start of what could become an expensive plumbing nightmare. Burst pipes can cause thousands of dollars in water damage, and even pipes that freeze without bursting can leave you without water for days.
The good news is that preventing frozen pipes doesn’t require advanced plumbing skills or a huge investment. With the right materials and techniques, you can protect your plumbing system from even the harshest winter conditions. Most pipe freezing happens in predictable locations, and once you know where to focus your efforts, winterizing becomes a manageable weekend project.
Whether you’re dealing with your first winter in a cold climate or you’ve battled frozen pipes before, this guide will show you exactly how to keep water flowing all season long. We’ll cover everything from basic insulation techniques to emergency prevention measures that work when temperatures drop unexpectedly.
Understanding Why Pipes Freeze
Water expands when it freezes, creating tremendous pressure inside your pipes. This expansion can generate forces exceeding 2,000 pounds per square inch, easily enough to split copper, PVC, or steel pipes. Even a small crack can release hundreds of gallons of water once the ice melts.
Pipes freeze most commonly when temperatures drop below 20°F for extended periods. However, pipes in unheated areas like basements, crawl spaces, and exterior walls can freeze at higher temperatures, especially when combined with wind chill.
The pipes most vulnerable to freezing include outdoor hose bibs, water supply lines in unheated areas, pipes along exterior walls, and lines in basements or crawl spaces. These areas typically lack adequate heating and insulation, making them prime targets for freeze damage.
Essential Pipe Insulation Techniques
Proper insulation forms your first line of defense against frozen pipes. The key is creating a thermal barrier that maintains pipe temperatures above freezing, even when ambient temperatures plummet.
Foam Pipe Insulation
Foam pipe insulation offers the most cost-effective protection for most applications. These pre-slit foam tubes slip easily over pipes and provide excellent thermal protection. Look for insulation with an R-value of at least 3.0 for adequate freeze protection.
Installation is simple but requires attention to detail. Measure your pipes carefully and buy insulation that matches the pipe diameter exactly. Loose-fitting insulation creates air gaps that reduce effectiveness. Clean the pipes before installation to ensure good adhesion of any tape or adhesive strips.
Frost King Foam Pipe Insulation
Pre-slit foam tubes that fit standard pipe sizes with excellent thermal protection.
Seal all seams and joints with duct tape or electrical tape. Pay special attention to pipe elbows and joints, where gaps commonly occur. These small openings can allow cold air to reach the pipe surface, creating freeze points even on otherwise well-insulated lines.
Fiberglass Pipe Wrap
For pipes in extremely cold conditions or areas with limited clearance, fiberglass pipe wrap provides superior insulation. This material offers higher R-values than foam and conforms to irregular pipe shapes and tight spaces.
Apply fiberglass wrap in overlapping layers, similar to wrapping a bandage. Start at one end and work systematically, maintaining consistent overlap of about one inch. Secure the wrap with plastic tape every 12 inches to prevent unraveling.
Always wear gloves and long sleeves when handling fiberglass insulation. The fibers can irritate skin and lungs, so work in well-ventilated areas and consider wearing a dust mask for extended installation sessions.
Pipe Heating Cable and Heat Tape
Heat tape provides active freeze protection by generating warmth along the pipe length. This approach works particularly well for pipes that can’t be adequately insulated or areas where temperatures regularly drop well below freezing.
Self-Regulating vs. Constant Wattage Heat Tape
Self-regulating heat tape automatically adjusts its heat output based on ambient temperature. As conditions get colder, the tape produces more heat. When temperatures rise, heat output decreases. This feature prevents overheating and reduces energy consumption.
Constant wattage heat tape produces steady heat output regardless of temperature. While less energy-efficient, it costs less upfront and works well for short pipe runs or temporary applications.
EASYHEAT ADKS Self-Regulating Heating Cable
Automatically adjusts heat output and includes built-in thermostat for energy efficiency.
Proper Heat Tape Installation
Begin heat tape installation at the end of the pipe run and work systematically toward the water source. This ensures the coldest section receives protection first and prevents ice dams from blocking water flow.
Apply tape in straight runs along the bottom of horizontal pipes where cold air settles. For vertical pipes, spiral the tape around the pipe with coils spaced about 6 inches apart. Never overlap heat tape on itself, as this can cause overheating and fire hazards.
Secure the tape every 2-3 feet with electrical tape or plastic ties. Avoid using metal fasteners that can damage the heating elements. Connect the power cord to a GFCI-protected outlet to prevent electrical hazards in damp conditions.
Always install pipe insulation over heat tape for maximum efficiency. The insulation helps retain generated heat and reduces energy consumption. Use insulation specifically rated for use with heating cables to prevent fire risks.
Protecting Specific Problem Areas
Exterior Wall Pipes
Pipes running through exterior walls face unique challenges. Cold air infiltration through small gaps can freeze pipes even when the interior space stays warm. Focus on sealing air leaks before adding insulation.
Use expanding foam or caulk to seal gaps around pipe penetrations. Install pipe insulation, then add an additional vapor barrier if moisture might be present. Consider relocating frequently freezing pipes to interior walls during major renovations.
Crawl Space Protection
Crawl spaces often lack adequate heating, making pipes vulnerable even during mild freezes. Ventilated crawl spaces are particularly problematic because cold outside air circulates freely around pipes.
Install pipe insulation throughout the crawl space, paying attention to areas near foundation vents. Consider temporarily closing crawl space vents during extreme cold snaps, but remember to reopen them to prevent moisture problems.
For chronic freezing problems, install a small space heater designed for crawl space use. These units include safety features like tip-over protection and automatic shutoff.
Outdoor Faucets and Hose Bibs
Outdoor faucets represent the most common freeze point for residential plumbing. Standard hose bibs offer little freeze protection, but several preventive measures can help.
Disconnect and drain all hoses before the first freeze. Water trapped in hoses can freeze back into the faucet mechanism, causing internal damage. Store hoses in heated areas when possible.
Duck Brand Outdoor Faucet Cover
Insulated cover that protects outdoor faucets from freezing temperatures.
Install faucet covers over all outdoor spigots. These insulated covers create dead air space around the faucet, providing several degrees of freeze protection. Choose covers sized appropriately for your faucet style.
Emergency Prevention Measures
Sometimes winter arrives unexpectedly, or heating systems fail when you need them most. These emergency measures can prevent pipe freezing when you don’t have time for permanent solutions.
Running Water Technique
Allowing faucets to drip keeps water moving through pipes, making freezing much less likely. Moving water requires significantly lower temperatures to freeze than static water.
Open faucets to a pencil-thin stream on both hot and cold sides. Focus on faucets connected to pipes in vulnerable areas like exterior walls or unheated basements. The small amount of wasted water costs far less than repairing burst pipes.
Opening Cabinet Doors
Pipes under kitchen and bathroom sinks often run through exterior walls. Opening cabinet doors allows warm room air to circulate around these vulnerable pipes.
Remove cleaning supplies and other items that might block airflow. Position a small fan to direct warm air into the cabinet space if temperatures are extremely low.
Temporary Heat Sources
Space heaters, heat lamps, or even incandescent light bulbs can provide enough heat to prevent pipe freezing in small areas. Always follow safety guidelines and never leave temporary heat sources unattended.
Hair dryers work well for warming specific pipe sections, but require constant attention. Keep the dryer moving to prevent overheating any single spot.
Additional Winter Plumbing Protection
Thermostat Management
Maintaining consistent indoor temperatures helps protect pipes in heated areas. Avoid turning thermostats down too low when leaving for extended periods. A minimum temperature of 55°F provides reasonable freeze protection while controlling heating costs.
Consider installing a programmable thermostat that prevents temperature drops during nighttime hours when freezing risk peaks.
Insulation Upgrades
Improving general insulation in basements, crawl spaces, and attics helps protect pipes indirectly. Better building insulation maintains higher ambient temperatures around vulnerable pipes.
Add insulation to basement ceilings above unheated crawl spaces. This prevents heated air from the living space above from warming pipes below, but proper pipe insulation becomes even more critical.
Pipe Location Awareness
Know where your main water shutoff valve is located and how to operate it. Quick action after a pipe bursts can prevent extensive water damage. Test the valve annually to ensure it operates smoothly.
Consider installing individual shutoff valves for vulnerable pipe sections. This allows you to isolate problem areas without shutting off water to the entire house.
Frequently Asked Questions
At what temperature do pipes typically freeze?
Pipes typically freeze when temperatures drop to 20°F or below for several hours. However, pipes in unheated areas like basements, crawl spaces, or exterior walls can freeze at temperatures as high as 32°F, especially when combined with wind chill or poor insulation.
How long does heat tape last and when should I replace it?
Quality self-regulating heat tape typically lasts 10-15 years with proper installation and maintenance. Constant wattage heat tape may need replacement every 3-5 years. Replace heat tape immediately if you notice damaged insulation, exposed wires, or sections that don’t heat properly.
Can I use heat tape on PVC pipes?
Yes, but you must use heat tape specifically rated for plastic pipes. PVC has a lower melting point than metal pipes, so standard heat tape can cause damage. Always follow manufacturer specifications and never exceed recommended wattage ratings for plastic pipe applications.
What should I do if my pipes freeze but don’t burst?
Turn off the main water supply to prevent flooding if pipes burst during thawing. Open faucets connected to frozen pipes to relieve pressure. Apply gentle heat using a hair dryer, space heater, or warm towels. Never use open flames or high-heat sources that could damage pipes or create fire hazards.
This article contains affiliate links. We may earn a small commission at no extra cost to you.