A disorganized pantry can turn meal prep into a scavenger hunt. You open the door and find expired cans lurking behind newer purchases, mystery ingredients you bought for one recipe but never used again, and snacks scattered across multiple shelves. The frustration builds every time you can’t find what you need or discover you’ve bought duplicates of items you already had.
The key to pantry success isn’t about having more space. It’s about organizing the space you have in a way that works with your cooking habits and family’s needs. Whether you’re dealing with a sprawling walk-in pantry, a single cabinet, or no dedicated pantry space at all, the right organization system can transform your kitchen experience.
These five proven methods work for any kitchen size and budget. Each system focuses on making your ingredients visible, accessible, and easy to maintain so you can actually enjoy cooking instead of dreading the ingredient hunt.
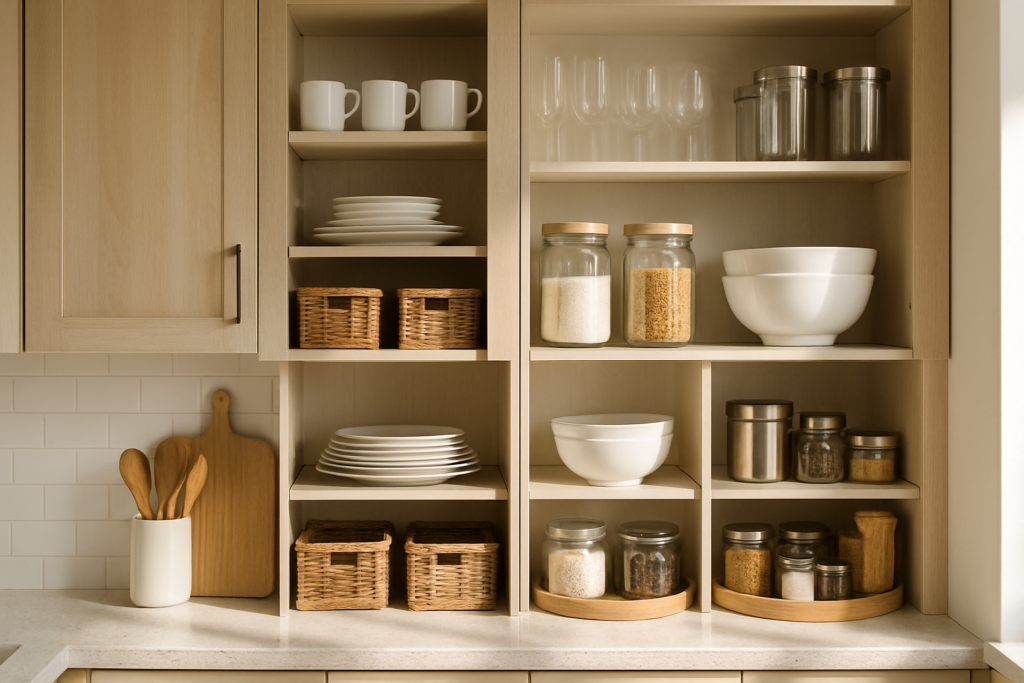
Method 1: Zone Organization for Walk-In Pantries
Walk-in pantries offer the luxury of space, but they can quickly become overwhelming without proper zones. The most effective approach divides your pantry into distinct areas based on how you use different ingredients.
Start by creating a baking zone on one side with flour, sugar, baking powder, extracts, and chocolate chips all within arm’s reach. Place heavier items like flour bags on lower shelves and lighter items like sprinkles up high. Keep measuring cups and spoons in this zone too.
Establish a snack zone at eye level where kids can grab what they need independently. Use clear bins to corral individual packets and prevent the avalanche effect when someone grabs one item.
mDesign Clear Plastic Storage Bins
Perfect clear bins that stack well and keep snacks contained while maintaining visibility
Create a meal prep zone for canned goods, pasta, rice, and cooking oils. Group similar items together and use shelf risers to maximize vertical space. Place frequently used items at eye level and backup supplies on higher shelves.
Dedicate the bottom shelves to bulk items and appliances you don’t use daily. Store paper towels, extra pasta boxes, and small appliances here. Use the door space for spices, condiments, and other small items you grab frequently.
Making Zones Work Long-Term
The key to maintaining zones is making sure every family member understands the system. Label each zone clearly and post a simple diagram showing where different categories belong. This prevents the gradual drift that happens when people put items wherever there’s space.
Review your zones every few months and adjust based on how your cooking habits change. You might find you need more space for snacks during school months or more baking supplies during holiday seasons.
Method 2: Container Systems for Maximum Efficiency
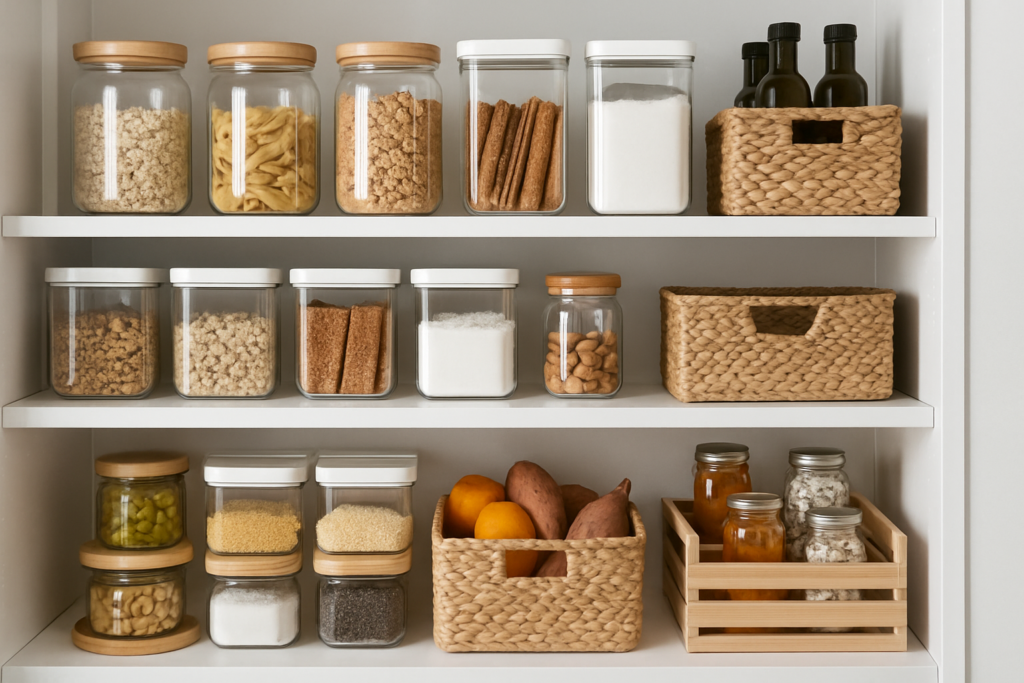
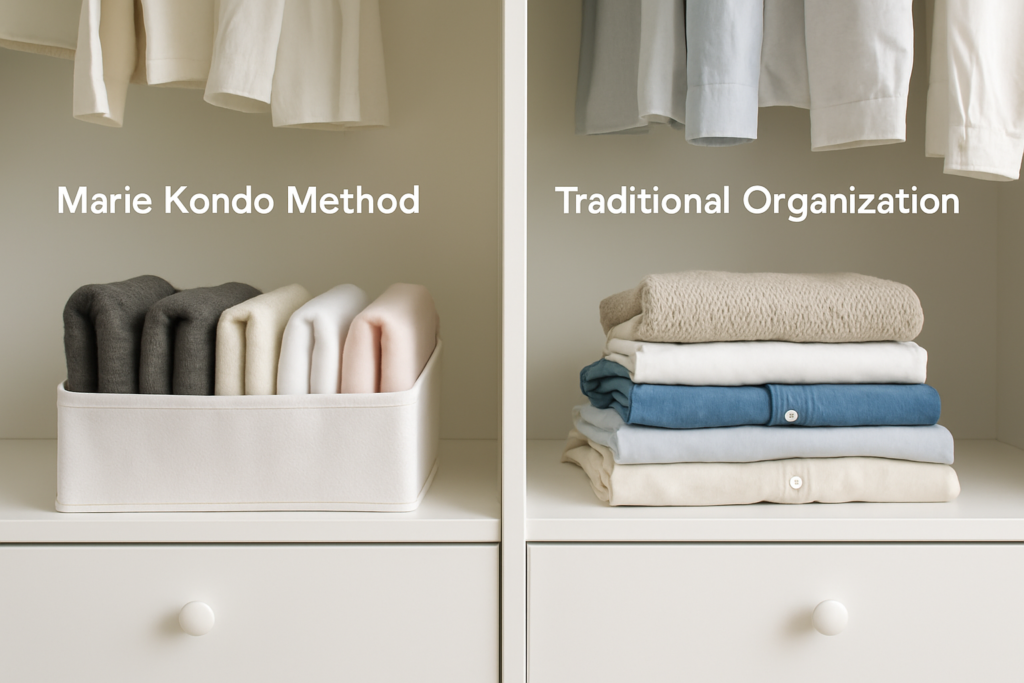
Transferring pantry staples into matching containers creates a clean, organized look while solving common storage problems. Airtight containers keep cereal crispy, flour fresh, and prevent pest issues that can plague cardboard packaging.
Choose containers based on what you store most. Large rectangular containers work well for cereal, pasta, and rice. Smaller square containers are perfect for nuts, dried fruit, and baking ingredients. Round containers waste space but work well for items you store in smaller quantities.
Invest in containers that stack securely and have wide openings for easy scooping. Look for models with airtight seals and clear sides so you can see contents and quantity at a glance.
Rubbermaid Brilliance Pantry Organization Set
These containers have the best airtight seal and stack perfectly without sliding around
Start your container system gradually. Begin with items you use most frequently like flour, sugar, and cereal. Once you see how much easier these are to use and store, you can expand to other categories.
Choosing the Right Container Sizes
Measure your shelf heights before buying containers. Many people buy containers that are too tall for their shelves, creating wasted vertical space. Standard shelves accommodate containers up to 8 inches tall comfortably.
Consider buying modular sets where different sized containers have the same footprint. This allows you to stack different combinations while maintaining a uniform look.
Method 3: Strategic Labeling for Every Family Member
Labels aren’t just decoration. They’re the foundation of a system that other family members can actually follow. The right labeling strategy prevents items from migrating to random locations and helps everyone contribute to keeping the pantry organized.
Use a consistent labeling system throughout your pantry. Choose labels that are easy to read and durable enough to handle frequent use. Avoid handwritten labels that fade or become illegible over time.
Label both containers and shelf areas. Container labels identify contents and expiration dates. Shelf labels show where categories belong, making it easy for family members to put groceries away correctly after shopping trips.
Include expiration dates on container labels, especially for items like flour, spices, and baking powder that don’t get used quickly. Use a small label maker or waterproof markers that won’t smudge with handling.
Brother P-touch Label Maker
Creates professional-looking labels that stay put and remain readable for years
Labels That Work for Kids
Create picture labels for young children who can’t read yet. Take photos of common snacks and laminate them to create durable picture labels. This allows kids to find their own snacks and put items away independently.
Use color coding for different family members or meal types. Red labels for spicy items, green for healthy snacks, or blue for baking supplies. This visual system works faster than reading text when you’re looking for specific items.
Method 4: First In, First Out Rotation Systems
Rotation prevents waste and ensures you’re using ingredients while they’re still fresh. This method is particularly important for canned goods, spices, and baking ingredients that can sit unused for months.
Set up your shelves so newer items automatically go to the back and older items move forward. Use shelf organizers that create a slight slope, allowing cans to roll forward as you remove the front ones.
Check expiration dates when putting groceries away and place items accordingly. Put newer dates behind older dates within the same product category. This simple step prevents discovering expired items months later.
Create an “use first” section for items approaching expiration dates. Place this section at eye level where you’ll notice it when planning meals. Include items opened recently that need to be used quickly once opened.
Rotation Tips for Different Items
Spices need special attention since they lose potency over time even if they don’t technically expire. Date spice containers when you buy them and replace whole spices after 2-3 years, ground spices after 1-2 years.
Store opened items like crackers, cereal, and snacks in airtight containers but keep the original packaging date visible. This helps you track freshness and use items in the right order.
Method 5: Maximizing Small Spaces and No-Pantry Kitchens
Limited pantry space requires creative solutions that maximize every inch. Focus on vertical storage, door space, and multi-purpose organizers that work harder in small areas.
Use over-the-door organizers on cabinet doors to store spices, small cans, and condiments. These organizers turn wasted door space into valuable storage without taking up shelf space inside the cabinet.
Install pull-out drawers in deep cabinets so you can access items in the back without removing everything in front. These drawers work particularly well for heavy items like canned goods that are difficult to reach in deep spaces.
Simple Trending Under Cabinet Organizer
Slides out smoothly and doubles your usable storage space in deep cabinets
Think vertically with stackable shelves and risers. These create multiple levels within single shelves, essentially doubling your storage capacity. Use them for canned goods, jarred items, and boxed ingredients.
Creative Storage Solutions
Repurpose other areas for pantry overflow. A bookshelf in the dining room can hold serving dishes and entertaining supplies. A cabinet in the laundry room can store bulk paper goods and extra canned goods.
Use the space above your refrigerator for items you don’t need daily. Store holiday baking supplies, extra paper goods, or small appliances you use seasonally in attractive baskets or bins.
Choosing the Right Method for Your Kitchen
Your ideal organization method depends on your space, cooking habits, and family size. Busy families with kids benefit most from zone organization combined with clear labeling. Serious bakers need container systems that keep ingredients fresh and easily measurable.
Small kitchens require a combination approach. Use containers for frequently used items, door organizers for spices and small items, and rotation systems for canned goods. Focus on making your most-used ingredients easily accessible.
Don’t try to implement every method at once. Start with the area that frustrates you most and build your system gradually. A partial system that you maintain is better than a complete system that overwhelms you.
Common Pantry Organization Mistakes to Avoid
Buying organizers before decluttering creates more problems than it solves. Start by removing expired items and things you won’t actually use. Only then should you invest in storage solutions sized for what you actually keep.
Choosing containers that are too small leads to buying multiples of items you already have. If your flour container only holds half a bag, you’ll forget about the remaining flour and buy more unnecessarily.
Ignoring your actual cooking patterns when organizing leads to systems that look good but don’t work practically. Put items you use weekly at eye level, not items that look prettiest in matching containers.
Frequently Asked Questions
How often should I reorganize my pantry?
Deep clean and reorganize your pantry every 3-4 months, but do quick maintenance weekly. Check expiration dates monthly and move items to your “use first” section as needed. Seasonal changes in cooking habits might require adjusting your zones or container systems.
What’s the best way to store opened packages?
Transfer opened items to airtight containers when possible, but keep the original packaging with dates and cooking instructions. For items that don’t transfer well, use clips designed for food storage and store packages in bins to keep them upright and visible.
How do I keep my family using the organization system?
Make the system easier to follow than to ignore. Use clear labels, put frequently used items at convenient heights, and create designated spots for everything. Hold a family meeting to explain the new system and why it helps everyone. Be patient as new habits form.
Should I store everything in matching containers?
Matching containers look nice but aren’t necessary for good organization. Focus on airtight seals, appropriate sizes, and stackability over appearance. You can always upgrade to matching sets gradually as your current containers need replacement.
This article contains affiliate links. We may earn a small commission at no extra cost to you.