Standing at your kitchen sink waiting for water to trickle out drop by drop is beyond frustrating. You turn the handle expecting a strong, steady stream, but instead get a pathetic dribble that makes washing dishes feel like an endurance test. While low water pressure might seem like a mystery, it’s actually one of the most fixable plumbing problems you’ll encounter.
The good news is that most kitchen sink pressure issues stem from simple blockages, worn components, or mineral deposits that you can tackle yourself. Before calling a plumber and spending hundreds of dollars, you can diagnose and fix the problem with basic tools and a little patience.
Let’s walk through six proven DIY solutions that consistently restore proper water flow to kitchen sinks, plus help you figure out exactly what’s causing your pressure problem in the first place.
Diagnosing Your Low Pressure Problem
Before diving into fixes, you need to identify whether the problem affects just your kitchen sink or your entire home. Turn on other faucets throughout your house and check if they have similar pressure issues.
If every faucet has low pressure, you’re dealing with a whole-house problem that likely requires professional attention. This could involve your main water line, pressure regulator, or municipal supply issues.
However, if only your kitchen sink is affected, you can almost certainly fix it yourself. Next, test both hot and cold water separately. Low pressure on just the hot side often points to water heater issues or hot water line problems. Low pressure on both sides typically means the issue is in your faucet itself or the immediate supply lines.
Fix #1: Clean the Aerator (Most Common Solution)
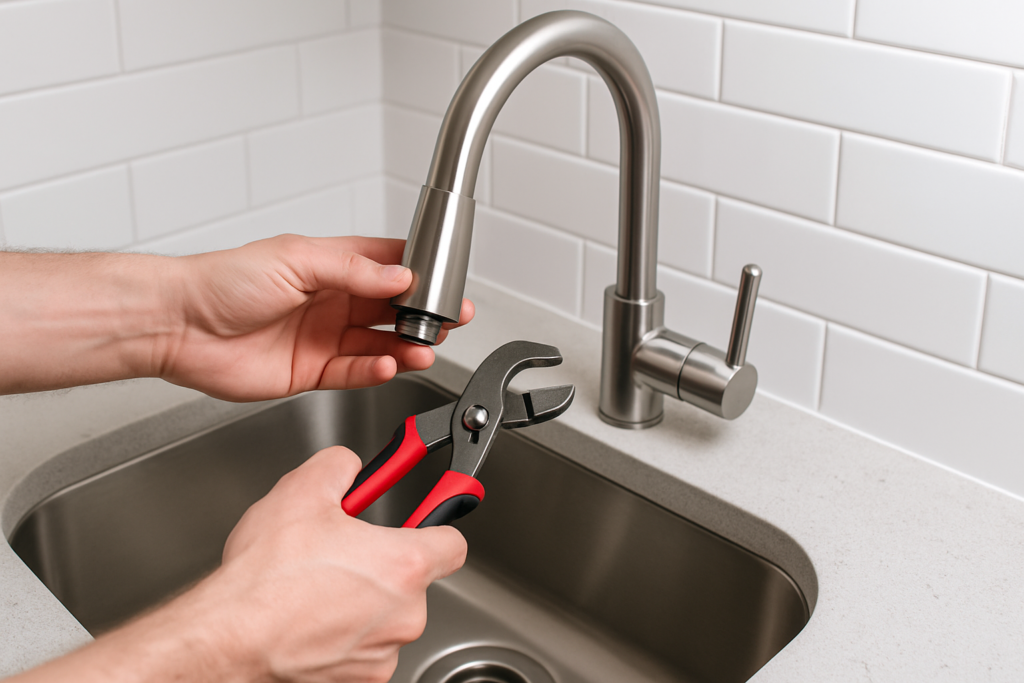
The aerator is that small screen-like attachment at the tip of your faucet spout. It mixes air with water to create a smooth flow while conserving water. Over time, mineral deposits and debris clog these tiny holes, drastically reducing water pressure.
Start by unscrewing the aerator from the faucet tip. Most turn counterclockwise by hand, but stubborn ones might need pliers wrapped in tape to prevent scratching. Once removed, you’ll likely see white, chalky buildup or small debris blocking the screen.
Soak the aerator in white vinegar for 30 minutes to dissolve mineral deposits. For stubborn buildup, use an old toothbrush to gently scrub the screen and internal components. Rinse thoroughly with clean water and reassemble.
Faucet Aerator Key Tool Set
Makes removing stuck aerators much easier than pliers and prevents damage to the fixture
This simple fix solves low pressure problems about 70% of the time. If cleaning doesn’t restore full pressure, the aerator might be too damaged to salvage and needs replacement.
Fix #2: Replace the Cartridge
Inside your faucet lives a cartridge that controls water flow and temperature mixing. These cartridges wear out over time, developing internal restrictions that limit water flow even when the handle is fully open.
Cartridge replacement varies significantly between faucet brands, so you’ll need to identify your specific model first. Look for manufacturer markings on the faucet body or take photos before disassembly to help match the right replacement part.
Turn off water supply valves under the sink before starting. Remove the faucet handle (usually held by a screw hidden under a decorative cap), then pull out the old cartridge. Some require special pulling tools, while others lift out by hand.
Take the old cartridge to your local hardware store to ensure you get the exact replacement. Installation is simply the reverse of removal, but pay attention to cartridge orientation. Installing it backwards will reverse your hot and cold controls.
Fix #3: Check and Clean Supply Line Connections
The flexible supply lines connecting your shut-off valves to the faucet can develop internal restrictions or partial blockages. These braided metal or polymer lines sometimes collect debris at connection points or develop kinks that restrict flow.
Turn off both hot and cold water supply valves under your sink. Disconnect the supply lines from the faucet (have a bowl ready to catch residual water) and inspect the ends for debris or mineral buildup.
Flush each supply line separately by briefly turning the shut-off valve back on and letting water flow through the disconnected line into your bowl. This clears any loose debris that might be restricting flow.
If flushing doesn’t improve flow significantly, the supply lines themselves might be internally restricted and need replacement. Supply lines are inexpensive and easy to replace, making this a worthwhile upgrade if yours are more than five years old.
Braided Stainless Steel Supply Lines
Durable replacement supply lines that resist mineral buildup better than standard versions
Fix #4: Address Mineral Buildup in Valve Seats
Even with a clean aerator and good cartridge, mineral deposits can accumulate in the valve seats where your cartridge interfaces with the faucet body. This creates restrictions that limit flow regardless of other components.
With your cartridge already removed from the previous step, examine the valve seat area inside the faucet body. Look for white, green, or brown mineral deposits around the edges where the cartridge sits.
Use a flashlight and small mirror to get a clear view of these areas. Carefully scrape away mineral deposits with a plastic scraper or old credit card. Avoid metal tools that could scratch and damage the valve seats.
For stubborn mineral buildup, soak cotton swabs in white vinegar and work them around the valve seat areas. Let the vinegar sit for 10-15 minutes, then scrub gently with a toothbrush and rinse thoroughly.
Fix #5: Clear the Faucet Spout Internally
Sometimes the restriction isn’t in the aerator but further up inside the faucet spout itself. Mineral deposits can build up in the internal passages, creating bottlenecks that reduce flow even after cleaning everything else.
Remove the aerator and use a thin wire or straightened paper clip to gently probe the spout opening. You might feel resistance from mineral buildup or discover debris lodged inside the spout.
Fill a plastic bag with white vinegar and secure it around the faucet spout with a rubber band, ensuring the spout end is submerged in vinegar. Let this soak for several hours or overnight to dissolve internal mineral deposits.
After soaking, run water at full pressure to flush out loosened deposits. You might see chunks of mineral buildup flow out during this process. Repeat if necessary until water flows freely.
Fix #6: Inspect Shut-Off Valves
The shut-off valves under your sink can partially close over time or develop internal restrictions that limit water flow to your faucet. These valves often go years without being operated, allowing mineral deposits to accumulate or components to stick.
With water supply restored, check that both hot and cold shut-off valves are fully open. Turn each valve clockwise until it stops (closed), then counterclockwise until it stops (fully open). Sometimes valves that feel open aren’t actually in the full-open position.
If a valve feels stiff or won’t turn smoothly, it might have internal mineral buildup or worn components. Try working the valve back and forth several times to break loose any deposits.
Old gate valves are particularly prone to internal restrictions and partial closure problems. If your shut-off valves are more than 10 years old and show signs of corrosion or mineral buildup, consider having them replaced with modern quarter-turn ball valves.
Quarter Turn Water Shut Off Valves
Modern ball valves that provide reliable shut-off and resist the sticking problems of older gate valves
When to Call a Professional
While these DIY fixes handle most kitchen sink pressure problems, certain situations require professional plumbing help. Call a plumber if you discover leaks during your repairs, if multiple fixtures throughout your home have pressure issues, or if your water pressure problem coincides with other plumbing problems like strange noises or water discoloration.
Additionally, if you’ve tried all these fixes and still have low pressure, the problem might be in your main supply line or require specialized diagnostic equipment. Issues with your home’s pressure regulator or problems with corroded galvanized pipes often need professional attention.
Municipal water pressure problems also require professional intervention, though you should contact your water utility company rather than a private plumber for these issues.
Prevention Tips for Future Pressure Problems
Regular maintenance prevents most low pressure issues from developing in the first place. Clean your aerator every three to six months, especially if you have hard water with high mineral content.
Consider installing a whole house water filter system if mineral buildup is an ongoing problem. These systems reduce the minerals that cause most faucet restrictions while improving your overall water quality.
Exercise your shut-off valves twice a year by closing and reopening them. This prevents the internal components from seizing and helps maintain proper valve function.
Frequently Asked Questions
Why does my kitchen sink have low pressure but my bathroom faucets work fine?
Kitchen sinks typically have different aerators and cartridges than bathroom faucets, plus they handle more debris from food preparation and dishwashing. The aerator in kitchen faucets often has finer screens that clog more easily. Additionally, kitchen faucets see heavier daily use, causing components to wear out faster than less-used bathroom fixtures.
How do I know if my whole house has low water pressure?
Test several fixtures throughout your home, including upstairs and downstairs faucets, showers, and outdoor spigots. If multiple fixtures show reduced pressure, particularly those on different floors or in different areas of the house, you likely have a whole-house pressure issue that requires professional diagnosis.
Can I use CLR or other commercial cleaners instead of vinegar?
Commercial lime and calcium removers work well for heavy mineral buildup, but vinegar is gentler on rubber seals and plastic components. If you use commercial cleaners, rinse components extremely thoroughly before reinstalling. Some aggressive cleaners can damage cartridge seals or aerator screens if not completely removed.
How often should I replace my faucet cartridge?
Most quality faucet cartridges last 5-10 years with normal use, but hard water can shorten this lifespan significantly. Replace the cartridge when cleaning doesn’t restore proper pressure, when you notice dripping that won’t stop, or when hot and cold water mixing becomes inconsistent. Cartridge replacement is much less expensive than buying a new faucet.
This article contains affiliate links. We may earn a small commission at no extra cost to you.