Your kitchen works hard every day, handling everything from quick breakfast prep to elaborate dinner parties. Over time, grease builds up on cabinet fronts, mysterious spills lurk behind appliances, and that mysterious film on your refrigerator shelves starts to look permanent. A deep clean goes far beyond your daily wipe-downs, tackling the hidden grime that regular cleaning misses.
Professional cleaners follow systematic checklists to ensure nothing gets overlooked. They know which products cut through stubborn grease, how long each task should take, and the food safety protocols that keep your family healthy. This guide breaks down their approach into 20 manageable steps you can tackle over a weekend or spread across several evenings.
From forgotten areas like the inside of your microwave vents to obvious trouble spots like the stovetop, each task includes specific time estimates and product recommendations. You’ll also learn which areas require immediate attention for food safety and which can wait until your next deep cleaning session.
Before You Start: Essential Prep and Safety
Clear your schedule for 4-6 hours total, though you can break this into smaller sessions. Remove everything from countertops, unplug small appliances, and gather your supplies. You’ll need rubber gloves, microfiber cloths, scrub brushes, and several cleaning products.
Food safety comes first. Toss expired items as you go and store perishables in a cooler if you’re cleaning the refrigerator. Keep cleaning products separate from food prep areas, and always read labels before mixing different cleaners.
Work from top to bottom and inside to outside. This prevents recontamination as you clean. Start with upper cabinets and light fixtures, then work down to countertops, appliances, and finally the floor.
The 20-Point Deep Cleaning Checklist
1. Clean Light Fixtures and Ceiling Fan (15 minutes)
Dust and grease rise upward, coating your overhead lighting and fan blades. Turn off power at the switch and remove glass shades or covers. Wash them in warm, soapy water while you wipe down the fixture base with a damp microfiber cloth.
Ceiling fan blades need special attention. Use a pillowcase slipped over each blade to trap dust instead of sending it flying around the room. Spray the inside of the pillowcase with all-purpose cleaner for better results.
2. Tackle Upper Cabinet Exteriors (20 minutes)
Grease and cooking vapors leave a sticky film on cabinet fronts, especially near the stove. Mix warm water with a few drops of dish soap, or use a specialized kitchen degreaser for heavy buildup.
Work from top to bottom, paying extra attention to areas around handles where hands frequently touch. Don’t forget the cabinet tops, which collect dust and grease over time.
Krud Kutter Original Concentrated Degreaser
This powerful degreaser cuts through kitchen grime without harsh chemicals and works on multiple surfaces.
3. Deep Clean Upper Cabinet Interiors (25 minutes)
Empty each cabinet completely and check expiration dates as you go. Vacuum or wipe out crumbs and debris, then clean shelves with warm, soapy water. Pay attention to corners where spills tend to accumulate.
Line shelves with fresh shelf liner if needed. This makes future cleaning easier and protects cabinet surfaces from spills and stains.
4. Clean Lower Cabinet Exteriors (20 minutes)
Lower cabinets face different challenges than upper ones. They deal with splashes from the sink, food prep spills, and constant contact from hands and feet. Use the same degreasing approach as upper cabinets, but expect to scrub harder around the sink and stove areas.
Check for water damage around the sink base, and tighten any loose hinges or handles you notice.
5. Deep Clean Lower Cabinet Interiors (30 minutes)
Under-sink cabinets often harbor moisture and cleaning product residue. Remove everything and check for leaks or water damage. Clean thoroughly with disinfectant, especially if you store cleaning supplies here.
Other lower cabinets accumulate crumbs from food storage and prep. Vacuum first, then wipe with soapy water. Replace any torn shelf liners.
6. Scrub the Stovetop and Range Hood (25 minutes)
Your stovetop sees the worst of cooking splashes and spills. Remove drip pans and burner grates if possible, and soak them in hot, soapy water. For gas ranges, remove burner caps and clean the ignition ports with a toothpick.
The range hood filter traps grease and should be cleaned monthly during deep cooking seasons. Most filters are dishwasher-safe, or you can soak them in hot water with degreasing dish soap.
7. Deep Clean Oven Interior (45 minutes)
Oven cleaning takes the most time and effort. If your oven has a self-cleaning cycle, run it according to manufacturer instructions. Otherwise, remove racks and use a specialized oven cleaner or make a paste with baking soda and water.
Let the cleaner work for the recommended time, then scrub with a plastic scraper or scrub brush. The oven door glass often needs extra attention, especially the area between double-pane windows where grease can accumulate.
8. Clean Refrigerator Interior (35 minutes)
Remove everything from your refrigerator, checking expiration dates ruthlessly. Take out removable shelves and drawers, and wash them in the sink with warm, soapy water.
Wipe interior surfaces with a solution of 2 tablespoons baking soda in 1 quart warm water. This cleans without leaving chemical residues near food. Pay special attention to door seals, where crumbs and spills often hide.
9. Clean Refrigerator Exterior and Top (15 minutes)
Stainless steel exteriors show every fingerprint and water spot. Use a specialized stainless steel cleaner or a mixture of white vinegar and water, wiping in the direction of the grain.
Don’t forget the refrigerator top, which collects dust and sometimes serves as unofficial storage. Clear it completely and wipe clean.
Weiman Stainless Steel Cleaner and Polish
This cleaner removes fingerprints and water spots while leaving a protective coating to resist future smudges.
10. Deep Clean Dishwasher Interior (20 minutes)
Even dishwashers need cleaning. Remove the bottom dish rack and unscrew the bottom spray arm if possible. Rinse it under hot water and use a toothpick to clear any clogs in the spray holes.
Run an empty cycle with 2 cups white vinegar placed in a dishwasher-safe bowl on the top rack. Follow with a second cycle using 1 cup baking soda sprinkled on the bottom. This removes mineral deposits and eliminates odors.
11. Clean Microwave Inside and Out (15 minutes)
Microwave splatters become cement-hard if left too long. Place a microwave-safe bowl filled with 1 cup water and 2 tablespoons white vinegar inside. Heat for 3 minutes, then let it sit for 2 more minutes to steam.
The steam loosens stuck-on food, making it easy to wipe clean. Remove and wash the turntable separately. Clean the exterior with appropriate cleaner for your microwave’s finish.
12. Scrub Sink and Faucet (20 minutes)
Kitchen sinks harbor more bacteria than most people realize. Scrub the entire basin with a disinfecting cleaner, paying attention to the areas around the drain and faucet base where grime accumulates.
For stainless steel sinks, use baking soda as a gentle abrasive to remove water spots and scratches. Clean the faucet with an old toothbrush to reach crevices around the base and aerator.
13. Clean Small Appliances (30 minutes)
Small appliances like coffee makers, toasters, and blenders need individual attention. Empty and wash removable parts in soapy water. Run vinegar through coffee makers to remove mineral deposits, and clean toaster crumb trays thoroughly.
Wipe exterior surfaces with appropriate cleaners. Unplug everything first, and make sure heating elements are completely cool.
14. Deep Clean Countertops (15 minutes)
Different countertop materials require different approaches. Granite and other natural stones need pH-neutral cleaners, while laminate can handle stronger degreasers. Remove everything from counters first, including small appliances and canisters.
Clean the backsplash at the same time, scrubbing grout lines with an old toothbrush if needed. Don’t forget the edges where countertops meet walls or appliances.
15. Organize and Clean Pantry (25 minutes)
Remove everything from pantry shelves, checking expiration dates and looking for signs of pests. Wipe shelves thoroughly and vacuum any crumbs or debris.
Group similar items together as you replace them, and consider adding shelf liners or clear storage containers to make future organization easier.
16. Clean Garbage Disposal and Drain (10 minutes)
Drop a few ice cubes and coarse salt into the disposal and run it to sharpen blades and remove buildup. Follow with citrus peels for fresh scent, or use specialized disposal cleaning pods.
Pour hot water down all drains to flush away soap residue and food particles.
17. Wipe Down All Handles and Hardware (10 minutes)
Cabinet handles, drawer pulls, and appliance handles get touched constantly but often missed during regular cleaning. Use disinfecting wipes or a cloth with all-purpose cleaner to sanitize all hardware.
This step makes a surprising difference in the overall cleanliness feel of your kitchen.
18. Clean Windows and Glass Surfaces (15 minutes)
Kitchen windows face grease and cooking vapors along with regular dirt. Use a glass cleaner or white vinegar solution, and clean both interior and exterior surfaces if accessible.
Include any glass cabinet doors, appliance displays, and the glass on your oven door in this step.
Invisible Glass Premium Glass Cleaner
This ammonia-free formula cuts through kitchen grease on windows and glass surfaces without leaving streaks or film.
19. Sweep and Mop Floors Thoroughly (20 minutes)
Move lightweight appliances and clean underneath them. Sweep or vacuum thoroughly, getting into corners and along baseboards where crumbs accumulate.
Mop with a cleaner appropriate for your floor type. Pay extra attention to areas around the stove, sink, and refrigerator where spills are most common.
20. Final Touches and Organization (15 minutes)
Replace items on clean shelves and countertops thoughtfully. This is a perfect time to reorganize for better function and easier future cleaning.
Wipe down anything you’re putting back to avoid transferring dust or grime to your clean surfaces. Step back and admire your work.
Cleaning Product Recommendations
Different kitchen surfaces need specific products for best results. All-purpose cleaners work for most daily cleaning, but deep cleaning requires specialized formulas.
For heavy grease, choose degreasers specifically designed for kitchen use. These cut through cooking residue better than general cleaners. Look for products that are food-safe and rinse clean.
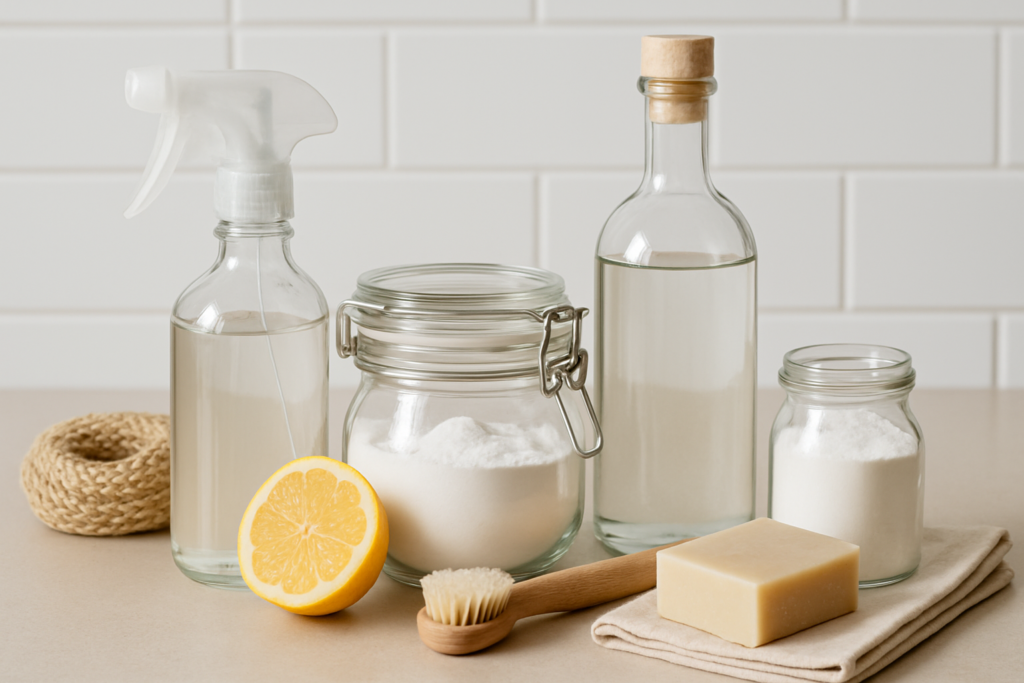
Natural options like white vinegar, baking soda, and dish soap handle many tasks effectively. They’re safer around food and less expensive than commercial cleaners. However, avoid vinegar on natural stone surfaces like granite or marble.
Microfiber cloths outperform paper towels for most cleaning tasks. They trap dirt and bacteria better, don’t leave lint, and can be washed and reused hundreds of times.

AmazonBasics Microfiber Cleaning Cloths
These lint-free cloths work better than paper towels and can be washed hundreds of times for ongoing kitchen cleaning.
Time-Saving Tips for Future Deep Cleans
Regular maintenance makes deep cleaning faster and easier. Wipe up spills immediately, clean your microwave weekly, and run the dishwasher’s cleaning cycle monthly.
Keep cleaning supplies in multiple locations so they’re always handy. A caddy under the kitchen sink, cleaning wipes near the stove, and glass cleaner by the windows eliminate excuses for skipping quick cleanups.
Schedule deep cleaning seasonally or after heavy cooking periods like holidays. Breaking the 20 steps into smaller groups over several days makes the task less overwhelming.
Consider which tasks you can do while cooking or during other kitchen activities. Soaking oven racks while you clean cabinets, or running dishwasher cleaning cycles during other tasks saves time.
Food Safety During Deep Cleaning
Keep cleaning products completely separate from food and food prep areas. Store them in a designated area, preferably locked if you have small children.
Use separate cleaning cloths for different areas. Don’t use the same cloth on the floor and then on countertops. Color-code your cloths or use disposable wipes for cross-contamination concerns.
Always rinse food-contact surfaces after using cleaning products, even if the label says it’s food-safe. This removes any residue and ensures safety.
Wash your hands frequently during the cleaning process, especially before touching food storage areas or moving between cleaning the floor and upper surfaces.
Frequently Asked Questions
How often should I deep clean my kitchen?
Most kitchens benefit from deep cleaning every 3-6 months, depending on cooking frequency and family size. Heavy cooks or large families may need quarterly deep cleans, while light kitchen users can stretch to twice yearly. Holiday cooking periods typically require additional deep cleaning afterward.
Can I use the same cleaning products on all kitchen surfaces?
Different materials require different cleaners for best results and to prevent damage. Natural stone countertops need pH-neutral cleaners, while stainless steel benefits from specialized formulas. Read manufacturer recommendations for your specific appliances and surfaces. When in doubt, test cleaners in an inconspicuous area first.
What’s the biggest mistake people make during kitchen deep cleaning?
Working in the wrong order causes the most problems. Cleaning floors first, then having debris fall from upper cabinets defeats your efforts. Always work top to bottom and inside to outside. Also, many people underestimate the time needed and rush through tasks, missing important areas or not allowing cleaners enough time to work effectively.
Should I replace or clean extremely dirty items like oven racks?
Most kitchen components can be restored with proper cleaning techniques and patience. Oven racks, refrigerator shelves, and even heavily stained containers usually respond well to soaking and scrubbing. However, if items are damaged, warped, or pose food safety concerns, replacement is worthwhile. Consider the cost of