Your vacuum cleaner works hard to keep your home spotless, but when’s the last time you gave it some TLC? A well-maintained vacuum not only cleans better but also lasts longer and saves you money on repairs or premature replacement.
Most people think vacuum maintenance means emptying the bag or canister occasionally, but there’s so much more to it. Hair wrapped around brush rolls, clogged filters, and dirty hoses can dramatically reduce suction power and leave you frustrated with poor cleaning results.
Regular vacuum maintenance isn’t complicated, but it does require knowing the right steps for your specific vacuum type. Whether you have a bagged upright, bagless canister, or robot vacuum, this guide will walk you through everything you need to know to keep your machine running like new.
Signs Your Vacuum Needs Deep Cleaning
Before diving into the cleaning process, you need to recognize when your vacuum is crying out for attention. Reduced suction power is the most obvious indicator, but it’s not the only one.
Strange odors coming from your vacuum during use signal trapped debris or dirty filters. Pet owners especially notice this when hair and dander build up in hard-to-reach areas.
Visible debris on carpets after vacuuming, unusual noises, or the vacuum shutting off unexpectedly all point to maintenance issues. If you’re pushing harder or going over the same spot multiple times to pick up dirt, your vacuum needs help.
Check the brush roll too. If it’s not spinning freely or you can see hair wrapped tightly around it, cleaning is overdue.
Cleaning Bagged Vacuum Cleaners
Bagged vacuums require slightly different care than their bagless counterparts, but the process is equally important for optimal performance.
Replacing and Maintaining Vacuum Bags
Don’t wait until your vacuum bag is completely full. Replace it when it reaches about two-thirds capacity for best suction. Overfull bags restrict airflow and force your motor to work harder.
Always use the correct bag type for your model. Generic bags might fit, but they often have poor filtration or tear easily. Check your owner’s manual for the specific bag model number.
When changing bags, take a moment to inspect the bag compartment. Wipe down any dust or debris with a slightly damp cloth and let it dry completely before installing the new bag.
Filter Maintenance for Bagged Models
Many people assume bagged vacuums don’t need filter cleaning, but most models have additional filters that require regular attention.
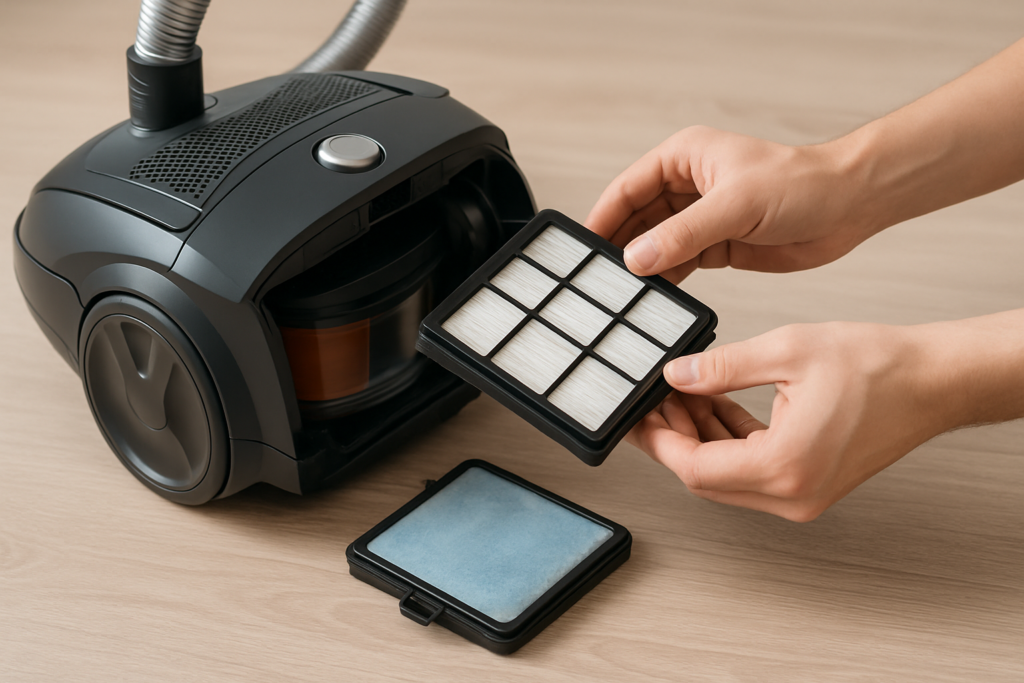
Locate your vacuum’s HEPA or exhaust filter, usually found near the motor or exhaust port. Remove it according to your manual’s instructions and tap out loose debris outdoors.
Washable filters can be rinsed with cool water until the water runs clear. Never use hot water or cleaning products, as these can damage the filter material. Allow filters to air dry completely for at least 24 hours before reinstalling.
Eureka Groove NEC122A Lightweight Stick Vacuum Cleaner
Popular bagged option with easy maintenance and reliable performance
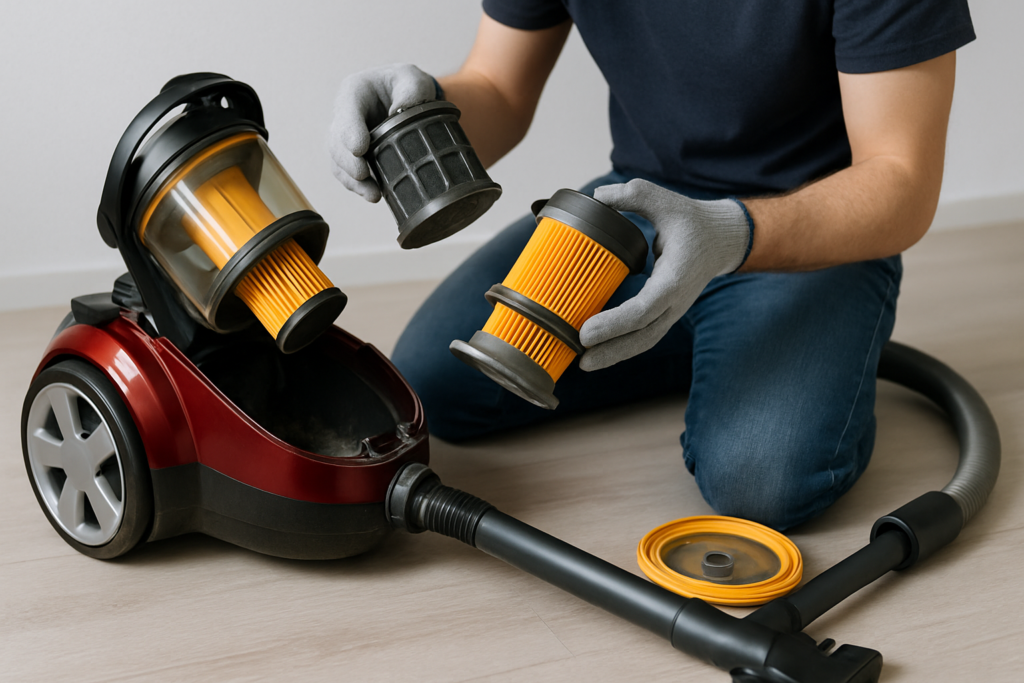
Cleaning Bagless Vacuum Cleaners
Bagless models offer convenience but require more frequent cleaning to maintain peak performance. The transparent canister makes it easy to see when cleaning is needed.
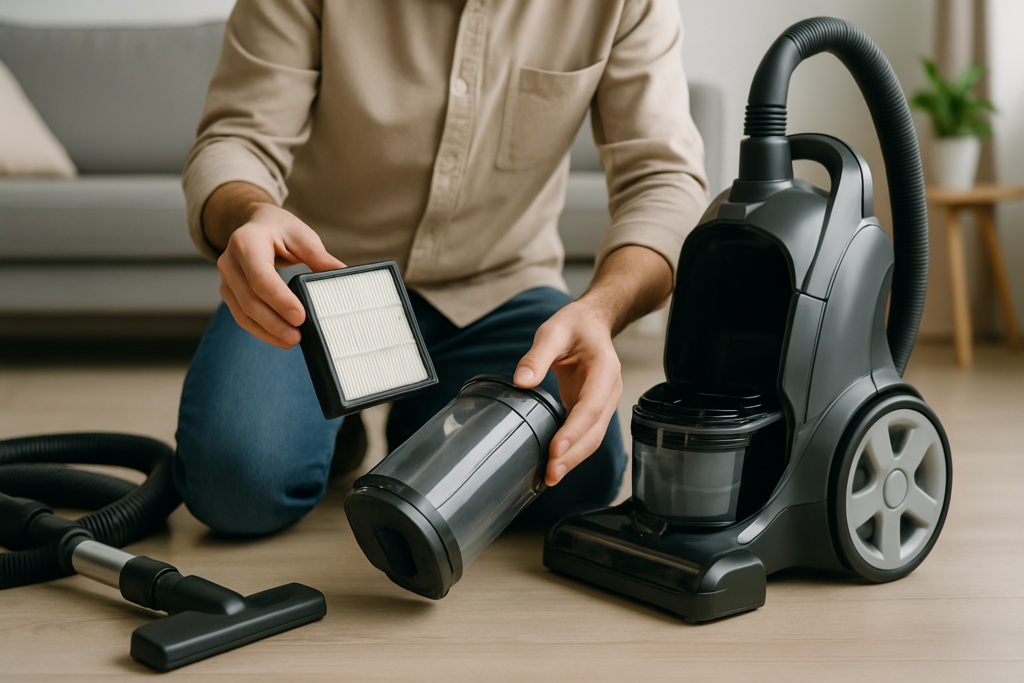
Emptying and Cleaning the Canister
Empty the canister when it’s about half full, not completely packed. This prevents debris from backing up into the cyclone system and maintains proper airflow.
Remove the canister completely and empty it into a trash bag outdoors when possible. This prevents dust from redistributing in your home.
Wash the canister with warm soapy water monthly or whenever you notice odors. Pay special attention to the bottom where fine dust accumulates. Rinse thoroughly and dry completely before reattaching.
Cyclone System Maintenance
The cyclone components separate dirt from air, and they need regular cleaning to function properly. Remove any removable cyclone parts according to your manual.
Rinse cyclone chambers with cool water, using a soft brush to remove stubborn debris. Avoid using compressed air, which can damage delicate internal components.
Check for cracks or damage while cleaning. Damaged cyclone parts reduce suction significantly and should be replaced promptly.
Filter Cleaning and Replacement
Filters are your vacuum’s first line of defense against dust returning to your air, making their maintenance critical for both cleaning performance and indoor air quality.
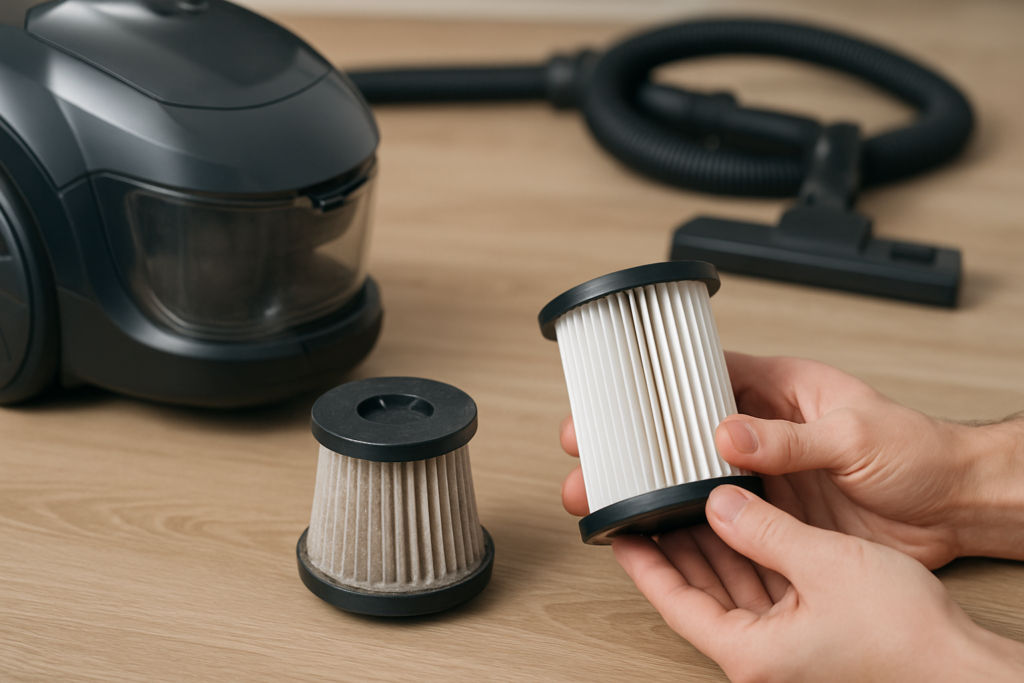
Pre-Motor Filters
Pre-motor filters protect your vacuum’s motor from fine particles. These typically need cleaning every month with moderate use, or bi-weekly in dusty conditions or homes with pets.
Remove the filter and tap it firmly against the inside of a trash can to remove loose debris. For washable filters, rinse under cool running water until clean, then air dry completely.
Non-washable filters should be replaced according to manufacturer recommendations, typically every 6-12 months depending on usage.
HEPA and Exhaust Filters
HEPA filters require gentle handling to maintain their fine filtration capabilities. Never wash a HEPA filter unless specifically labeled as washable, as water can damage the filtration media.
For washable HEPA filters, use only cool water and avoid scrubbing or wringing. Allow 24-48 hours for complete drying, as trapped moisture can lead to mold growth.
Replace non-washable HEPA filters every 6-12 months, or sooner if they appear darkly discolored or damaged.
WORKSHOP Wet Dry Vacuum Filters
High-quality replacement filters that fit multiple vacuum brands and provide excellent filtration
Brush Roll Hair Removal and Maintenance
The brush roll takes the biggest beating in your vacuum, especially in homes with long hair or pets. Regular maintenance keeps it spinning freely and prevents motor strain.
Removing Hair and Debris
Turn off and unplug your vacuum before working on the brush roll. Most models have a removable bottom plate or twist-lock mechanism for easy access.
Use scissors or a seam ripper to cut hair wrapped around the brush. Work from one end to the other, cutting every few inches to make removal easier. Pull the hair out in sections rather than trying to unwind it.
A specialized brush cleaning tool can speed up this process significantly, especially if you deal with hair buildup frequently.
Deep Cleaning the Brush Roll
Once you’ve removed visible debris, the brush roll itself needs attention. Remove it completely if possible for thorough cleaning.
Wash the brush roll with warm soapy water, using an old toothbrush to scrub between bristles. Remove any remaining hair or string wrapped around the ends.
Check the brush bearings for hair or debris that could impede rotation. Clean these areas carefully and ensure the brush spins freely before reinstalling.
Brush Roll Replacement
Brush rolls don’t last forever. Replace yours when bristles are significantly worn, bent, or missing. A worn brush roll won’t agitate carpet effectively, reducing cleaning performance.
Most brush rolls last 6-12 months with regular use, but homes with multiple pets may need more frequent replacement.
Hose and Attachment Cleaning
Vacuum hoses and attachments often harbor hidden clogs and debris that can significantly impact performance.
Checking for Clogs
Remove the hose completely and look through it toward a light source. Any blockages will be visible as dark spots interrupting the light.
For flexible hoses, gently stretch and compress sections while looking for clogs. Sometimes debris gets stuck in the corrugated ridges and isn’t immediately obvious.
Use a broomstick or long, flexible brush to push out stubborn clogs. Work from both ends if necessary, but avoid sharp objects that could puncture the hose.
Washing Hoses and Attachments
Most plastic attachments can be washed in warm soapy water. Use a bottle brush to clean inside narrow crevice tools and upholstery attachments.
Hoses can be rinsed with water, but ensure they dry completely before reattaching. Hang them vertically or lay them straight to prevent water pooling, which could lead to mold growth.
Check attachment connections for cracks or damage that could cause air leaks and reduced suction.

Hoover Linx Cordless Stick Vacuum Cleaner
Lightweight cordless option with easily removable components for thorough cleaning
Maintenance Schedule and Frequency
Consistent maintenance prevents major problems and keeps your vacuum performing at its best. Here’s a practical schedule based on average household use.
After Each Use
Empty bagless canisters when half full, and check for obvious clogs or wrapped hair on the brush roll. This takes less than a minute but prevents bigger problems.
Wind the cord properly to prevent damage and store attachments in their designated spots to avoid losing them.
Weekly Maintenance
Check and clean the brush roll if you have pets or family members with long hair. Inspect the hose for clogs if you notice reduced suction.
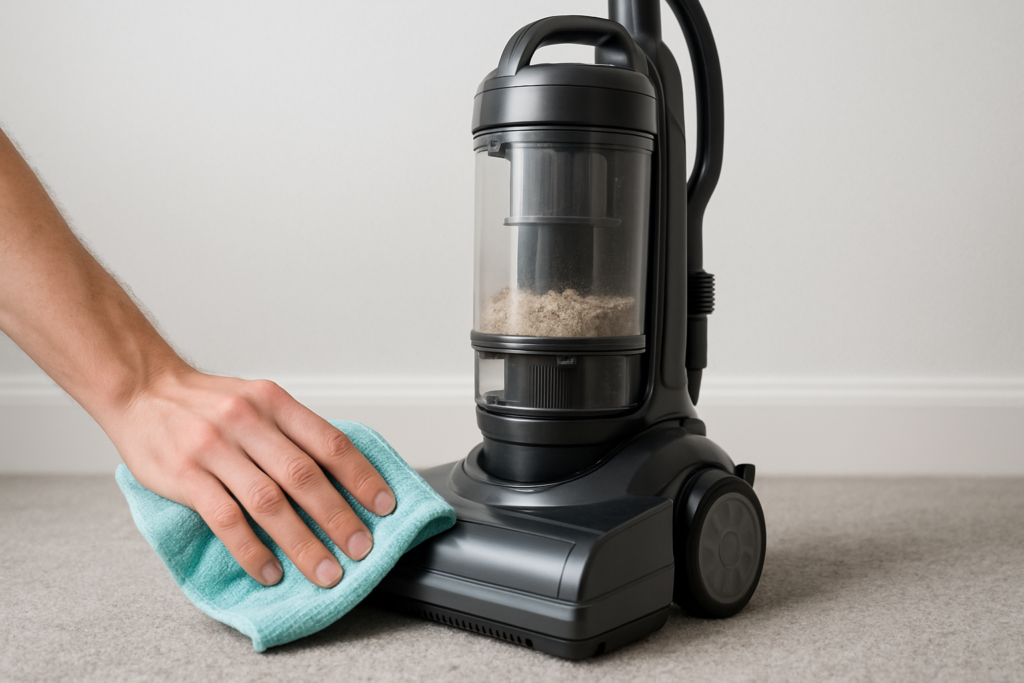
Wipe down the exterior with a damp cloth to prevent dust buildup and keep your vacuum looking new.
Monthly Deep Clean
Clean or replace filters, wash the canister thoroughly, and inspect all connections for wear or damage. This is also a good time to clean attachments and check the hose for clogs.
Test suction power by holding your hand over the hose end. Strong, consistent suction indicates good vacuum health.
Annual Maintenance
Replace worn brush rolls, check belts for stretching or cracking, and consider having the motor serviced if you notice unusual noises or reduced performance.
Review your filter replacement schedule and stock up on consumables like bags and filters.
Common Mistakes to Avoid
Even well-intentioned maintenance can damage your vacuum if done incorrectly. These common mistakes are easily avoided with proper knowledge.
Never vacuum up wet debris with a regular vacuum, even small amounts. Moisture can damage filters, promote mold growth, and potentially harm electrical components.
Avoid using your vacuum on construction debris, fine powders like flour, or hot ashes. These materials can clog filters, damage motors, or create fire hazards.
Don’t ignore unusual noises or burning smells. These often indicate serious problems that require immediate attention to prevent costly damage.
Reinstalling wet filters is another common mistake. Always ensure filters are completely dry before putting them back, as trapped moisture leads to mold and unpleasant odors.
Frequently Asked Questions
How often should I replace vacuum filters?
Replace disposable filters every 6-12 months depending on usage, while washable filters can last 1-2 years with proper care. Homes with pets or allergies may need more frequent replacement. Replace filters immediately if they’re damaged, have persistent odors, or don’t come clean after washing.
Why does my vacuum smell bad even after cleaning?
Persistent odors usually indicate trapped debris in hard-to-reach areas, wet filters, or mold growth. Check the hose thoroughly, ensure all washed components are completely dry, and replace filters if washing doesn’t eliminate smells. Sometimes odors come from the brush roll area where pet hair decomposes.
Can I use my vacuum without a filter temporarily?
Never operate your vacuum without filters, even briefly. Filters protect the motor from damage and prevent dust from recirculating into your air. Operating without filters can cause expensive motor damage and void your warranty. If you need a replacement filter, stop using the vacuum until you get one.
How do I know when my vacuum brush roll needs replacement?
Replace your brush roll when bristles are worn down to less than half their original length, bent permanently, or missing in patches. If the brush doesn’t spin freely after cleaning, or if you notice reduced cleaning performance on carpets, it’s time for a replacement. Most brush rolls last 6-12 months with regular use.
Regular vacuum maintenance might seem tedious, but it’s one of the best investments you can make in your home cleaning routine. A well-maintained vacuum cleans more effectively, lasts longer, and saves you money on repairs and replacements.
Start with a monthly deep clean to get your vacuum back in top shape, then stick to the maintenance schedule that fits your household’s needs. Your carpets, your wallet, and your indoor air quality will thank you.
This article contains affiliate links. We may earn a small commission at no extra cost to you.