Nothing makes a beautiful tile floor look dingy faster than grimy, discolored grout lines. You know the feeling when you spot those dark streaks spreading across your bathroom or kitchen floor. What started as pristine white grout has turned into an embarrassing eyesore that screams “dirty house” no matter how much you scrub the tiles themselves.
The truth is, most people clean grout wrong. They grab whatever cleaner is handy, scrub frantically for a few minutes, then wonder why the results are so disappointing. Professional cleaners know that effective grout cleaning requires the right method, proper tools, and patience.
I’ll walk you through three proven methods that actually work, from gentle natural solutions to heavy-duty commercial cleaners and high-powered steam cleaning. You’ll also learn how to prevent future staining and when it’s time to call in the professionals.
Why Grout Gets So Dirty (And Why It’s Hard to Clean)
Grout is essentially a porous concrete mixture that sits lower than your tiles. This creates the perfect storm for collecting dirt, soap scum, body oils, and moisture. Unlike smooth tile surfaces, grout’s rough texture traps particles deep in its pores.
Over time, this buildup becomes a feeding ground for mold and mildew, especially in humid environments like bathrooms. The longer you wait to clean it, the deeper these stains penetrate into the grout matrix.
Different types of grout also present different challenges. Unsanded grout, typically used in narrow joints, tends to be softer and more prone to staining. Sanded grout is more durable but has more texture to trap dirt.
Method 1: Natural Cleaning Solutions
Natural cleaning methods work best for regular maintenance and light to moderate staining. They’re safer for your family, pets, and the environment, plus you probably have most ingredients in your pantry already.
Baking Soda and Vinegar Treatment
Start by making a thick paste with three parts baking soda to one part water. Spread this paste generously over your grout lines using an old toothbrush or small scrub brush. Let it sit for 10-15 minutes to penetrate the stains.
Next, spray white vinegar over the baking soda paste. You’ll see it foam up as the chemical reaction begins breaking down grime and soap scum. Use a stiff-bristled grout brush to scrub in small circular motions.
Work in sections about three feet at a time. Rinse thoroughly with clean water and dry with a microfiber cloth. This method works particularly well on soap scum and light mildew stains.
Hydrogen Peroxide Power Clean
For tougher stains, hydrogen peroxide offers more cleaning power while remaining relatively gentle. Mix equal parts 3% hydrogen peroxide and water in a spray bottle. Add a few drops of dish soap for extra degreasing power.
Spray the solution on grout lines and let it work for 15-20 minutes. The hydrogen peroxide will bubble and lift stains from deep in the grout pores. Scrub with a brush and rinse well.
Clorox Hydrogen Peroxide Cleaner Disinfectant
Pre-mixed hydrogen peroxide solution that’s ready to use without mixing your own
Always test natural cleaners on an inconspicuous area first, especially on colored grout. While gentler than commercial cleaners, acids like vinegar can still etch certain grout types over time.
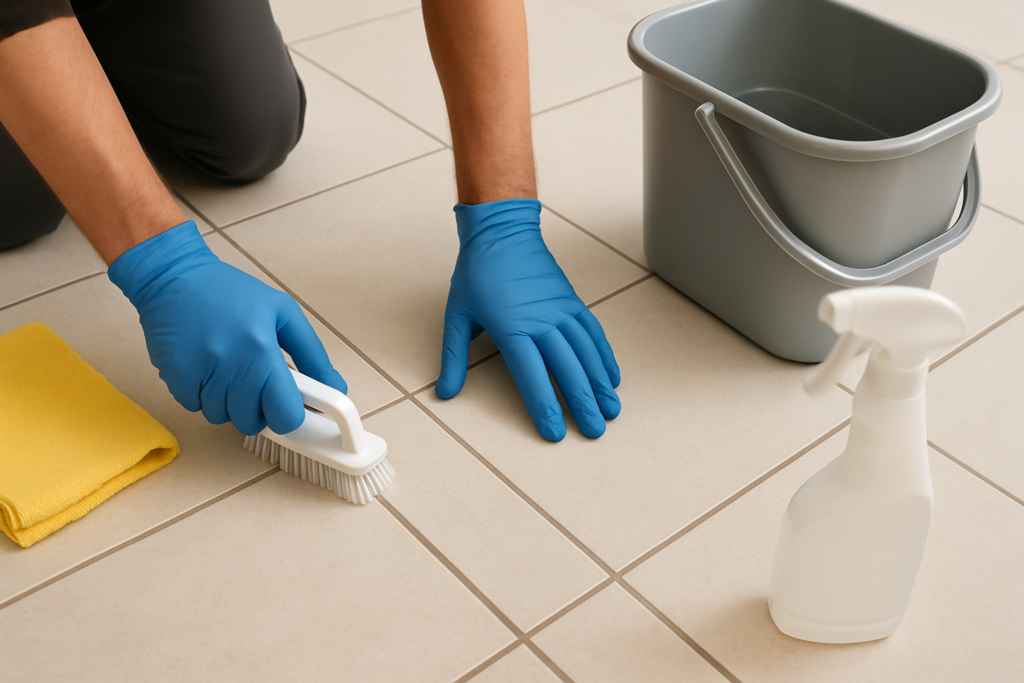
Method 2: Commercial Grout Cleaners
When natural methods aren’t cutting it, commercial grout cleaners bring serious cleaning power. These products are specifically formulated to break down the types of stains that accumulate in grout.
Oxygen Bleach Cleaners
Oxygen bleach cleaners are my go-to recommendation for most grout cleaning jobs. Unlike chlorine bleach, they won’t damage colored grout or create toxic fumes when mixed with other cleaners.
Apply the cleaner according to package directions, typically letting it sit for 10-15 minutes. The oxygen bleach penetrates deep into grout pores and breaks down organic stains, mold, and mildew at the molecular level.
OxiClean MaxForce Laundry Stain Remover
Works exceptionally well on grout despite being marketed for laundry
Use a grout brush to agitate the cleaner, then rinse thoroughly. Most oxygen bleach cleaners are safe for regular use and won’t weaken your grout over time.
Acid-Based Cleaners
For mineral deposits and really stubborn stains, acid-based cleaners pack the most punch. These typically contain hydrochloric or phosphoric acid that dissolves calcium, lime, and rust stains.
Exercise extreme caution with acid cleaners. Always wear gloves, ensure good ventilation, and never mix with other cleaning products. Apply only to the grout lines, avoiding tile surfaces that could be etched by the acid.
Let the cleaner work for the recommended time, usually 5-10 minutes maximum. Scrub gently and rinse multiple times with clean water to neutralize any acid residue.
Method 3: Steam Cleaning
Steam cleaning represents the most thorough and chemical-free way to deep clean grout. The high-temperature steam penetrates deep into pores while sanitizing surfaces naturally.
How Steam Cleaning Works
Steam cleaners heat water to over 200 degrees Fahrenheit, creating pressurized steam that loosens dirt, kills bacteria, and dissolves grime without chemicals. The heat also helps evaporate moisture quickly, preventing new mold growth.
Most steam cleaners come with specialized grout cleaning attachments. These narrow brushes direct steam precisely into grout lines while scrubbing simultaneously.

McCulloch MC1385 Deluxe Canister Steam System
Professional-grade steam cleaner with excellent grout cleaning attachments
Steam Cleaning Technique
Start by sweeping or vacuuming loose debris from your grout lines. Fill your steam cleaner with distilled water to prevent mineral buildup in the machine.
Work systematically across your floor, moving the steam cleaner slowly along grout lines. Don’t rush – the steam needs time to penetrate and loosen embedded dirt. Follow immediately with a microfiber cloth to absorb loosened grime and excess moisture.
For vertical surfaces like shower walls, work from top to bottom to prevent dirty water from dripping onto clean areas.
Proper Ventilation and Safety
Regardless of which cleaning method you choose, proper ventilation is crucial. Open windows and run exhaust fans to prevent moisture buildup and remove cleaning fumes.
Wear protective equipment including rubber gloves, safety glasses, and knee pads if you’re working on floor grout. Some people are sensitive to cleaning products even when they’re considered “natural.”
Keep pets and children away from the cleaning area until everything is completely dry. Store all cleaning products securely and never mix different chemicals together.
Prevention Tips to Keep Grout Clean Longer
The best grout cleaning strategy is preventing stains in the first place. Simple daily habits make a huge difference in how often you need to deep clean.
Wipe down shower walls after each use with a squeegee or microfiber cloth. This removes soap residue and moisture before they can penetrate grout pores. In kitchens, clean up spills immediately rather than letting them sit.
Use bath mats in showers and entry mats at doorways to reduce dirt tracked onto tile floors. Vacuum or sweep regularly to prevent abrasive particles from grinding into grout lines.
Run bathroom exhaust fans during and for 30 minutes after showering. Proper ventilation prevents the humid conditions that promote mold and mildew growth.
Sealing Your Grout
Fresh grout should be sealed within 24-72 hours of installation, but many homeowners skip this crucial step. Grout sealer creates a protective barrier that repels water, oils, and stains.
Clean your grout thoroughly before applying sealer. Any dirt or stains will be locked in permanently once you seal over them. Allow grout to dry completely, typically 24 hours after cleaning.
Apply grout sealer with a small brush or applicator bottle, being careful not to get sealer on tile surfaces. Most sealers require two thin coats for optimal protection.
Reseal grout annually in high-traffic areas like kitchens and bathrooms. Test whether your grout needs resealing by dropping a small amount of water on it. If the water soaks in rather than beading up, it’s time to reseal.
When to Consider Professional Restoration
Sometimes grout is beyond saving with DIY methods. Consider professional restoration if your grout has deep stains that won’t budge, extensive mold growth, or structural damage like cracking or crumbling.
Professional grout restoration involves removing the top layer of damaged grout, deep cleaning, and applying new grout or grout colorant. This process can make old grout look brand new but requires specialized tools and expertise.
The cost of professional restoration is often less than retiling an entire area. Get quotes from certified tile and grout specialists who can assess whether your grout can be saved or needs complete replacement.
Warning signs that you need professional help include persistent musty odors, grout that’s pulling away from tiles, or recurring mold problems despite regular cleaning.
Frequently Asked Questions
How often should I deep clean my grout?
Deep clean grout every 3-6 months depending on usage and moisture levels. High-traffic bathrooms may need monthly attention, while guest bathrooms can go longer between deep cleans. Regular maintenance cleaning prevents the need for aggressive scrubbing.
Can I use bleach on colored grout?
Avoid chlorine bleach on colored grout as it can cause fading or discoloration. Oxygen bleach cleaners are safer alternatives that won’t affect grout color. Always test any cleaner on an inconspicuous area first to check for color changes.
Why does my grout look dirty again so quickly after cleaning?
If grout gets dirty quickly after cleaning, it likely needs sealing. Unsealed grout absorbs dirt and stains rapidly because of its porous nature. Clean thoroughly, let dry completely, then apply a quality grout sealer to create a protective barrier.
Is it normal for grout to darken over time?
Some darkening is normal as grout ages and absorbs moisture, oils, and dirt. However, sudden color changes or black spots often indicate mold growth that requires immediate attention. Regular cleaning and proper ventilation minimize normal darkening.
This article contains affiliate links. We may earn a small commission at no extra cost to you.