Plumbing problems always seem to strike at the worst possible moment. Whether it’s a clogged toilet when guests are coming over or a mysterious leak that appears on a Sunday night, these issues can quickly turn into expensive emergency calls if you don’t know the basics.
Learning fundamental plumbing skills isn’t about becoming a professional overnight. It’s about building the confidence to handle common problems and knowing when you’re in over your head. Most homeowners can master these essential techniques with the right tools and a careful approach.
This guide covers the core skills every homeowner should develop, from finding shutoff valves to detecting leaks before they become disasters. You’ll learn what tools to keep on hand, when to tackle a repair yourself, and most importantly, when to step back and call a professional.
1. Locate and Test All Water Shutoff Valves
Before you touch any plumbing project, you need to know how to stop water flow quickly. Every home has multiple shutoff valves, and knowing their locations could save you thousands in water damage.
Start with the main water shutoff valve, typically located where the water line enters your home. This might be in the basement, crawl space, or near the water meter outside. Test this valve by turning it clockwise until it stops, then turn your kitchen faucet on to verify the water stops flowing.
Individual fixtures also have their own shutoff valves. Look under sinks for small oval or round handles on the supply lines. Toilets have similar valves behind the tank, usually on the wall or floor. Water heaters have shutoff valves on both the cold water inlet and hot water outlet.
Mark valve locations with small labels or take photos for quick reference during emergencies. Replace any valves that feel stuck or won’t turn completely. Old gate valves often fail when you need them most.
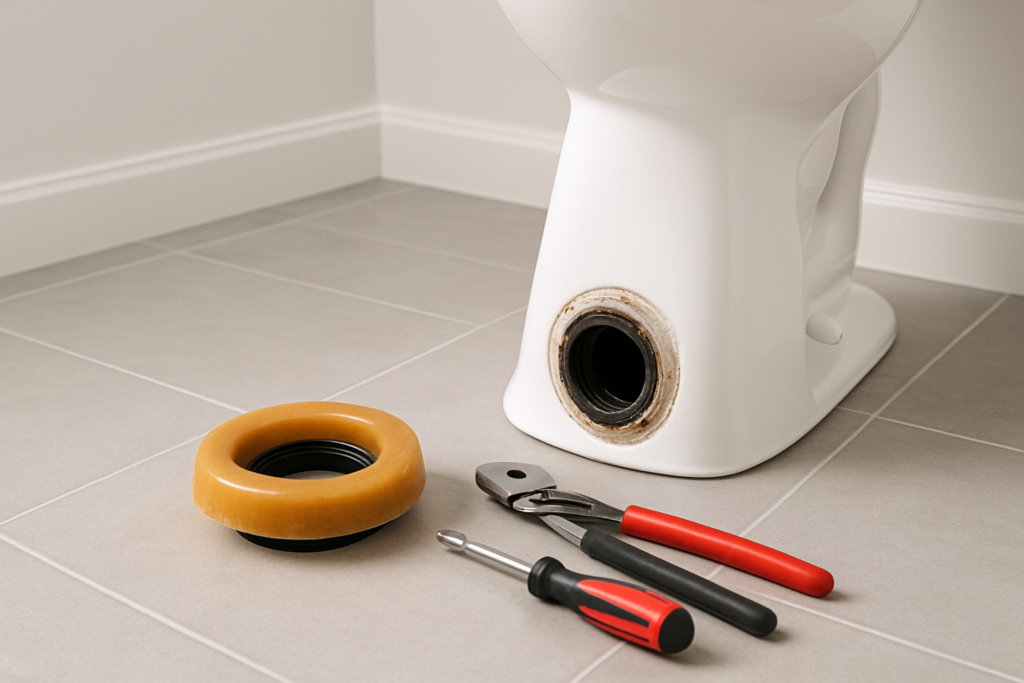
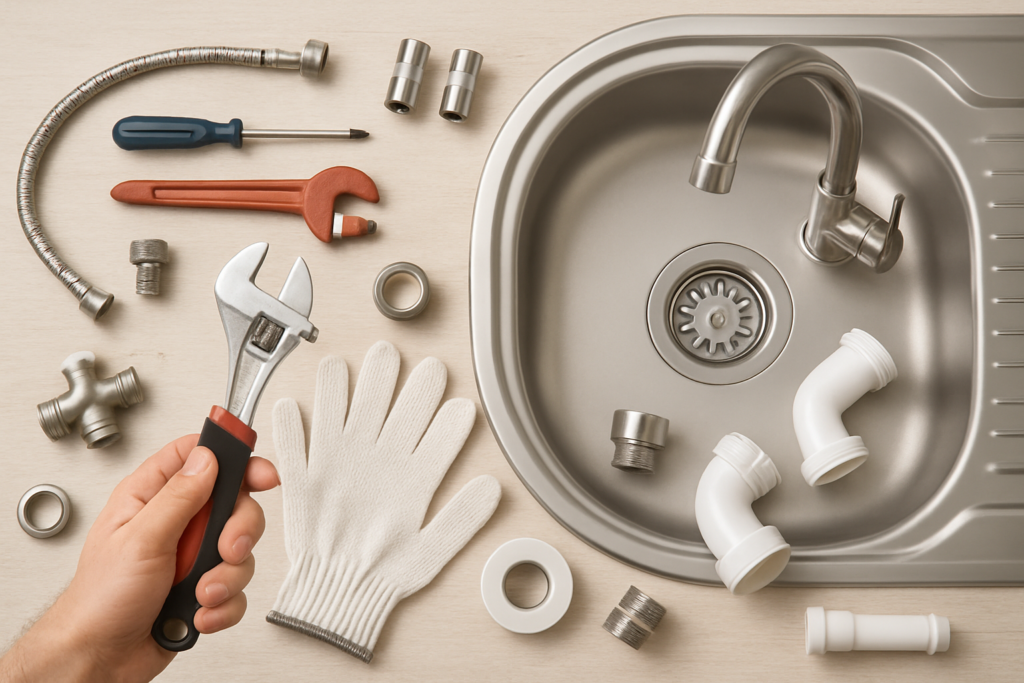
2. Build Your Basic Tool Collection
You don’t need a truck full of expensive tools to handle basic plumbing repairs. A well-chosen collection of essential tools will cover most common problems you’ll encounter.
Your core toolkit should include an adjustable wrench, pipe wrench, plunger (both cup and flange styles), and a drain snake or auger. Add a basin wrench for working under sinks, Teflon tape for threading connections, and a good flashlight or headlamp for seeing in tight spaces.
RIDGID Model 59787 3-Foot Toilet Auger
Professional-grade toilet auger that won’t scratch porcelain and handles tough clogs effectively.
Keep penetrating oil like WD-40 for stuck valves and fittings. A tube of plumber’s putty and some pipe joint compound will handle most sealing jobs. Don’t forget rubber gloves and safety glasses for protection.
Store everything in a dedicated toolbox or bucket so you can grab it quickly when problems arise. Having the right tool immediately available often makes the difference between a quick fix and a messy disaster.
3. Master the Art of Leak Detection
Small leaks become big problems when they go unnoticed. Developing good leak detection skills helps you catch issues early, before they cause expensive damage to walls, floors, or foundations.
Check your water meter reading when no water is being used in the house. Note the reading, wait an hour without using any water, then check again. Any change indicates a leak somewhere in your system.
Inspect visible pipes regularly, looking for water stains, mineral deposits, or corrosion around joints and connections. Pay special attention to areas under sinks, around water heaters, and wherever pipes pass through walls or floors.
Listen for unusual sounds like dripping, running water, or hissing when your home is quiet. Many leaks make noise long before they become visible. Use a stethoscope or simply press your ear against walls to locate hidden problems.
Food coloring in toilet tanks reveals silent leaks. Add a few drops, wait 30 minutes without flushing, and check if color appears in the bowl. This simple test catches expensive water waste that might otherwise go unnoticed for months.
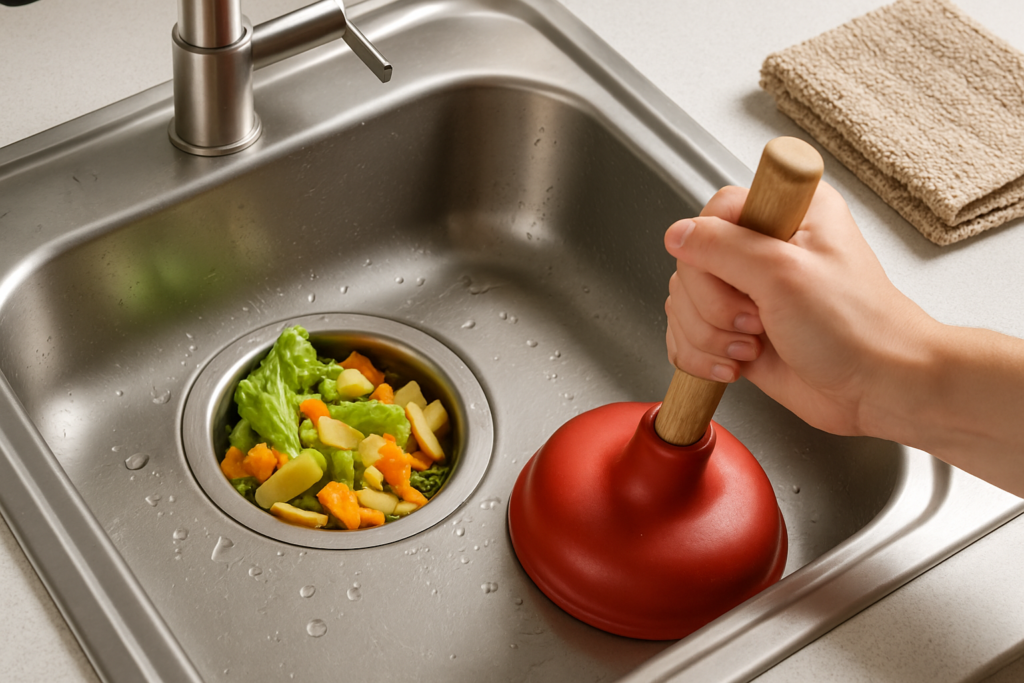
4. Unclog Drains Like a Professional
Drain clogs are probably the most common plumbing problem homeowners face. Learning proper unclogging techniques saves money and prevents damage from harsh chemical drain cleaners.
Start with the simplest approach: hot water and dish soap. Pour a pot of boiling water slowly down the drain, followed by a few tablespoons of dish soap, then another pot of hot water. This dissolves many grease-based clogs without any tools.
For stubborn clogs, use a drain snake rather than a plunger. Plungers work great for toilets but can push debris deeper into sink and shower drains. Feed the snake slowly into the drain, rotating as you go, until you feel resistance.
FlexiSnake Drain Millipede Hair Clog Tool
Specialized tool designed specifically for bathroom drains clogged with hair and soap buildup.
Avoid chemical drain cleaners when possible. They can damage pipes, especially older metal ones, and create dangerous fumes. If you must use chemicals, follow directions exactly and never mix different products.
For recurring clogs, address the root cause. Install drain screens to catch hair and debris before they enter the pipes. Clean pop-up stoppers regularly and remove visible buildup from shower drains monthly.
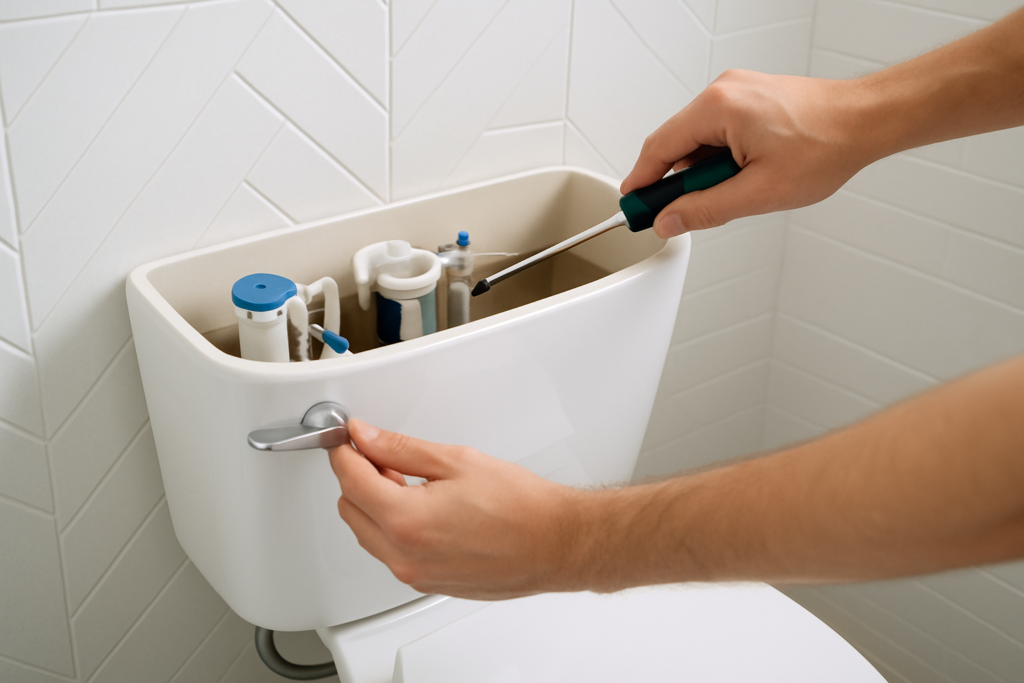
5. Fix Running Toilets Quickly and Permanently
A running toilet wastes hundreds of gallons per day and drives up water bills significantly. Most toilet problems stem from just a few common causes that you can diagnose and fix yourself.
Remove the toilet tank lid and look inside while the toilet runs. The most common issue is a flapper that doesn’t seal properly against the flush valve seat. Adjust the chain length so there’s slight slack when the flapper is closed, but not so much that it prevents full opening.
Check if the float or float ball is sticking in the raised position. Bend the float arm down slightly so the float sits lower in the water, or adjust the screw on newer fill valves to reduce the water level.
Replace a warped or cracked flapper immediately. Take the old one to the hardware store to ensure you get the right size and style. Clean the flush valve seat thoroughly before installing the new flapper for the best seal.
If adjustments don’t solve the problem, the fill valve itself might need replacement. This is still a beginner-friendly repair that takes about 30 minutes and requires no special tools.
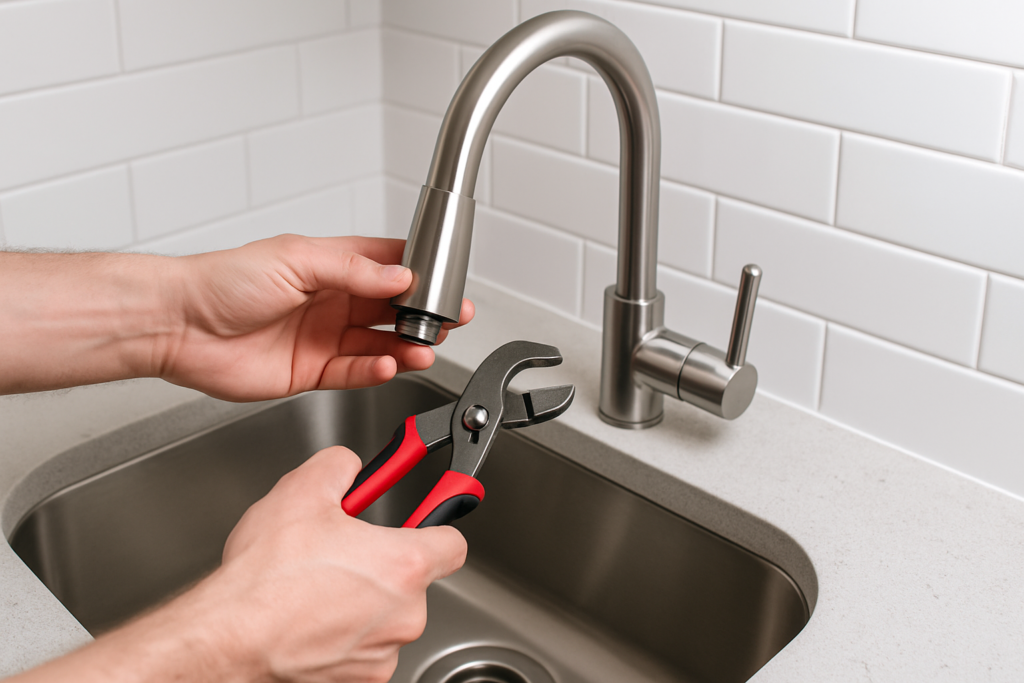
6. Replace Faucet Washers and O-Rings
Dripping faucets waste water and create annoying sounds, but they’re often simple to fix once you understand the basic mechanism. Most drips come from worn washers or O-rings that cost pennies to replace.
Turn off water supply valves under the sink before starting any faucet repair. Remove the faucet handle by unscrewing the packing nut with an adjustable wrench. Take photos before disassembly to remember how everything fits together.
Examine all rubber washers and O-rings for cracks, hardening, or deformation. Take the old parts to the hardware store for exact matches. Rubber components come in many sizes, and using the wrong size creates new leaks.
Apply a thin layer of plumber’s grease to new O-rings before installation. This prevents tearing during assembly and helps create a better seal. Reassemble everything in reverse order, but don’t overtighten connections.
Different faucet types require slightly different approaches, but the basic principle remains the same: find and replace the worn rubber components that no longer seal properly.
7. Clear Toilet Clogs Without Calling for Help
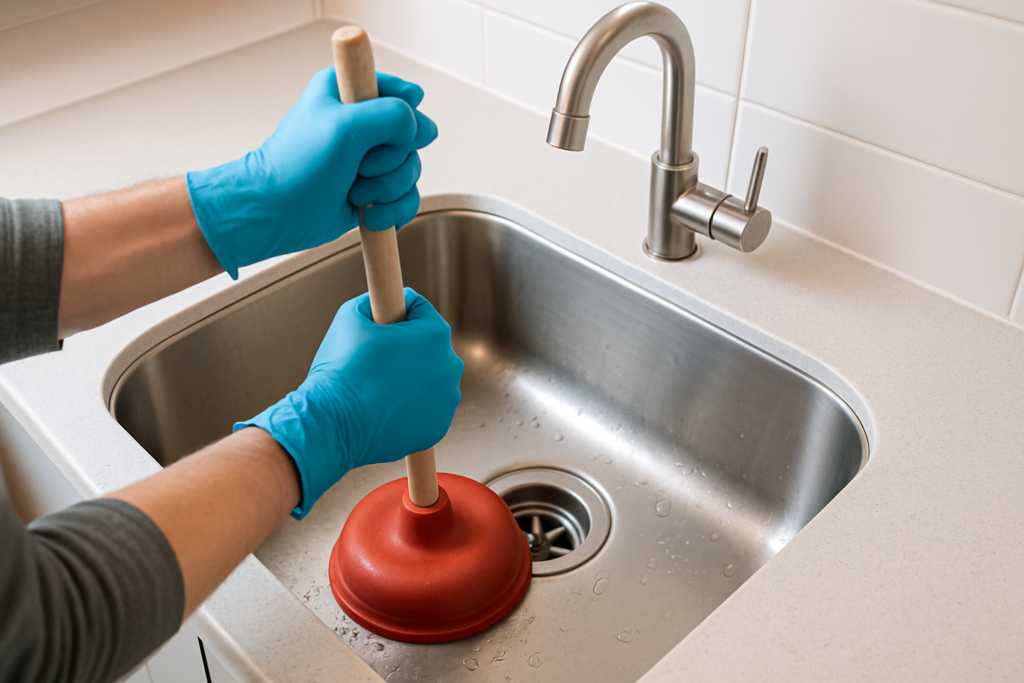
Toilet clogs strike at the most inconvenient times, but most can be cleared quickly with the right technique and tools. The key is using proper plunging method and knowing when to switch to other approaches.
Use a flange plunger specifically designed for toilets, not the cup plunger meant for sinks. The flange creates a better seal in the toilet’s outlet. Place the plunger over the drain hole and push down slowly to create suction, then pull up quickly.
Maintain water coverage over the plunger head during the entire process. Add water to the bowl if needed, but be careful not to cause overflow. Work with steady, rhythmic motions rather than frantic plunging.
For clogs that resist plunging, switch to a toilet auger. This specialized tool navigates the toilet’s internal trap without scratching the porcelain. Insert the auger and crank the handle while applying gentle downward pressure.
Never use regular drain snakes in toilets, as they can scratch or crack the porcelain. Avoid flushing multiple times when dealing with a clog, as this usually makes the problem worse and risks overflow.
8. Install Basic Plumbing Fixtures
Installing simple fixtures like showerheads, toilet seats, and sink aerators builds confidence for larger projects. These beginner-friendly tasks teach you fundamental skills without major consequences if something goes wrong.
Replacing a showerhead requires only an adjustable wrench and some Teflon tape. Unscrew the old head counterclockwise, clean the threads on the shower arm, wrap new threads clockwise with tape, and install the new head hand-tight plus one full turn with the wrench.
Delta Faucet 75152 Water-Amplifying Showerhead
Well-built showerhead that provides excellent water pressure while meeting water conservation standards.
Toilet seat replacement teaches you about different mounting systems and bolt lengths. Remove old bolts from underneath the rim, clean the area thoroughly, and install new seats according to manufacturer instructions. Keep spare bolts on hand, as plastic ones break easily.
Sink aerators screw directly into faucet spouts and improve water flow while reducing splash. Remove old aerators with pliers (wrap threads with tape to prevent scratches), clean out debris, and install new ones with fresh O-rings.
These small projects help you learn how different materials thread together, when to use sealers, and how much force to apply without damaging fixtures.
9. Handle Water Pressure Problems
Low water pressure frustrates everyone in the household, but the causes are often simple to diagnose and fix. Understanding your home’s water pressure system helps you identify problems quickly.
Test pressure at multiple fixtures to determine if the problem affects the whole house or individual faucets. Single-fixture problems usually indicate clogged aerators or showerheads, while house-wide issues suggest main line problems or failing pressure regulators.
Clean clogged aerators by unscrewing them and soaking in vinegar overnight. Use an old toothbrush to scrub away mineral deposits, then rinse thoroughly before reinstalling. Replace aerators that remain clogged after cleaning.
Check your home’s pressure regulator if equipped with one. These bell-shaped devices typically mount near the main water shutoff and maintain consistent pressure throughout your home. Failing regulators cause pressure fluctuations and should be replaced by professionals.
Partially closed valves also reduce pressure significantly. Verify that your main shutoff valve opens completely, and check that individual fixture valves aren’t restricting flow. Sometimes valves close gradually over time without anyone noticing.
10. Know When to Call Professionals
Recognizing your limits prevents small problems from becoming expensive disasters. Certain plumbing tasks require professional expertise, special tools, or permits that put them beyond typical homeowner capabilities.
Call professionals for any work involving gas lines, major pipe replacement, or sewer line issues. These projects involve safety risks and often require permits and inspections. Similarly, water heater installation and major fixture relocation typically need professional attention.
Electrical components near water always require professional evaluation. Garbage disposals, hot water circulation pumps, and electric water heaters combine electricity and plumbing in potentially dangerous ways for inexperienced homeowners.
Stop DIY efforts immediately if you encounter unexpected complications. A simple faucet replacement that reveals corroded supply lines or damaged walls needs professional assessment before continuing. Pushing forward often creates much larger problems.
Establish relationships with reliable plumbers before you need emergency service. Get recommendations from neighbors, read reviews, and verify licensing and insurance. Having a trusted professional’s number saves panic and money during plumbing crises.
Building Confidence Through Practice
Plumbing skills develop through hands-on experience rather than just reading instructions. Start with simple projects when you’re not facing emergencies, so you can work carefully and learn without pressure.
Practice shutoff valve operation regularly to ensure they work when needed. Exercise valves quarterly by turning them off and on completely. This prevents them from seizing up and identifies problems before they become critical.
Keep a plumbing journal documenting your home’s specific systems. Note valve locations, pipe materials, fixture brands and models, and any modifications made over time. This information proves invaluable during future repairs or when communicating with professionals.
Take before photos of any disassembly work. Your phone camera serves as an instant reference for reassembly, especially helpful when working with unfamiliar fixtures or complex connections.
Essential Safety Considerations
Safety should always come first in any plumbing project. Water and electricity create dangerous combinations, and pressurized water systems can cause serious injuries when handled improperly.
Turn off electricity to any area where you’re working with water. Even battery-powered tools can create problems if water contacts electrical components. Use GFCI-protected outlets when power tools are necessary.
Wear appropriate protective equipment including safety glasses and gloves. Plumbing work often involves sharp edges, chemical cleaners, and contaminated water that can cause injuries or infections.
Never work alone on significant plumbing projects. Having someone nearby provides help in emergencies and an extra set of hands for difficult tasks. This person can also call for help if accidents occur.
Ventilate work areas properly, especially when using chemical products or working in confined spaces. Many plumbing chemicals produce dangerous fumes that require adequate airflow to prevent health problems.
Frequently Asked Questions
How often should I inspect my plumbing system for problems?
Conduct a basic plumbing inspection every three months by checking visible pipes, testing shutoff valves, and looking for signs of leaks. Pay extra attention during seasonal changes when temperature fluctuations stress pipes and connections. Annual professional inspections can catch problems you might miss and help prevent expensive repairs.
What’s the most important plumbing skill for new homeowners to learn first?
Learning shutoff valve locations and operation should be your absolute first priority. This single skill can prevent thousands of dollars in water damage during plumbing emergencies. Practice operating these valves and ensure every adult in your household knows where they’re located and how to use them quickly.
Are chemical drain cleaners safe to use regularly?
Avoid regular use of chemical drain cleaners, especially in older homes with metal pipes. These products can corrode pipes over time and create dangerous fumes when mixed with other chemicals. Stick to mechanical cleaning methods like snakes and augers, or use enzyme-based cleaners that break down organic clogs naturally.
When should I replace plumbing fixtures rather than repair them?
Replace fixtures when repair costs approach 50% of replacement cost, when parts are no longer available, or when repeated repairs indicate underlying problems. Also consider replacement if current fixtures don’t meet your needs for water efficiency, accessibility, or functionality. Modern fixtures often pay for themselves through water savings and improved reliability.
This article contains affiliate links. We may earn a small commission at no extra cost to you.