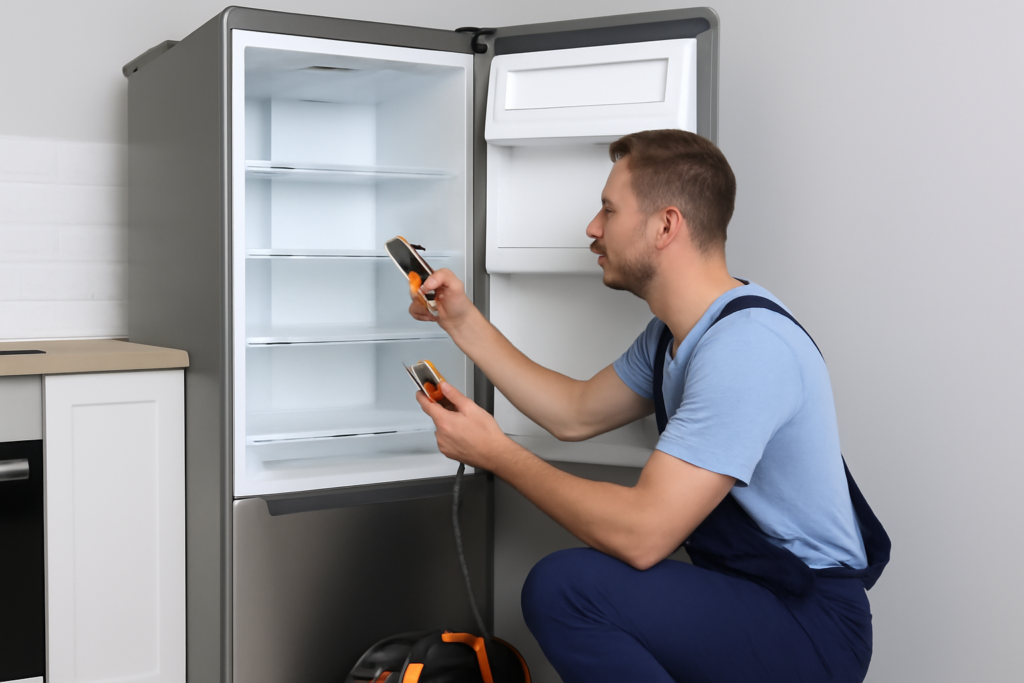
You open your refrigerator and hear that unmistakable sound of water dripping where it shouldn’t be. Maybe there’s a puddle forming under the crisper drawers, or worse, water pooling on your kitchen floor. A refrigerator that won’t drain properly is more than just annoying. It can lead to spoiled food, mold growth, and water damage to your floors.
The good news is that most drainage issues are fixable without calling a repair technician. I’ll walk you through the most common causes and show you exactly how to get your fridge draining properly again.
Understanding Your Refrigerator’s Drainage System
Before you start troubleshooting, it helps to understand how your fridge handles water. When your refrigerator goes through its defrost cycle, ice melts off the evaporator coils. This water needs somewhere to go, and that’s where the drainage system comes in.
The water flows down through a small drain hole, travels through a drain line or tube, and ends up in a drain pan underneath the refrigerator. Under normal conditions, the heat from the compressor causes this water to evaporate naturally. When something disrupts this process, you get standing water.
The Clogged Drain Hole Problem
This is the most common culprit by far. The drain hole is tiny, usually about the size of a pencil eraser, and it’s located at the back of your refrigerator compartment or inside the freezer. Food particles, ice crystals, and debris can easily block it.
To check if this is your problem, look for water pooling under the crisper drawers or ice buildup in the freezer floor. You might also notice a bad smell coming from the fridge, which happens when water sits stagnant.
Here’s how to fix it. First, locate the drain hole. In most fridges, you’ll find it at the back wall, sometimes hidden behind a panel. Remove any visible debris, then use a turkey baster or syringe filled with warm water to flush the drain. You can also use a pipe cleaner or a piece of flexible wire to gently clear any stubborn blockages.
A refrigerator drain cleaning kit includes the right tools for this job and makes the process much easier. These kits typically include flexible brushes sized specifically for fridge drain lines.

Refrigerator Drain Cleaning Kit
Contains the exact tools you need to clear stubborn drain clogs without damaging the line
Frozen Drain Line Issues
Sometimes the drain line itself freezes solid, especially if your freezer is running too cold or if there’s a problem with your defrost system. When this happens, water backs up because it has nowhere to go.
You can tell if this is your issue by checking the temperature settings on your freezer. If it’s set below 0°F, try raising it slightly. Most freezers work best between 0°F and 5°F.
To thaw a frozen drain line, you have a few options. The simplest is to unplug the refrigerator and let it defrost completely for 24 hours. Keep towels around to catch the melting water. For a faster fix, you can carefully pour hot water down the drain hole using a turkey baster. Just be patient and use small amounts at a time to avoid cracking anything from thermal shock.
After thawing, flush the line with a mixture of hot water and a tablespoon of baking soda. This helps remove any residue and can prevent future freezing.
Checking the Drain Pan and Pump
The drain pan sits under your refrigerator, usually accessible from the front or back. Over time, this pan can crack, shift out of position, or overflow if the evaporation process isn’t working properly.
Pull out your refrigerator or remove the front bottom panel to access the pan. Check for cracks or damage. Even a small crack can cause water to leak onto your floor. If the pan is damaged, you’ll need to replace it with one that matches your refrigerator model.
Some refrigerators, particularly side-by-side and French door models, have a drain pump instead of relying on gravity alone. These pumps can fail over time. Listen for a humming or buzzing sound coming from under the fridge. If you hear it but water isn’t draining, the pump might be clogged or failing.
You can test the pump by unplugging it and checking for blockages in the impeller. If the pump motor itself is dead, you’ll need a replacement. Look up your refrigerator’s model number and search for the specific drain pump replacement that fits your unit.
The Defrost System Connection
Your refrigerator’s defrost system and drainage system work together. If the defrost cycle isn’t working properly, you’ll end up with excessive ice buildup that can block the drain or overwhelm the drainage system when it eventually melts.
Check if your freezer has excessive frost buildup on the back wall or around the evaporator coils. This usually means the defrost heater, defrost thermostat, or defrost timer has failed.
The defrost timer controls when the heating element turns on to melt ice off the coils. You can manually advance it using a flathead screwdriver to see if the heater activates. If nothing happens, or if the timer won’t advance, you might need to replace one of these components.

Refrigerator Defrost Timer
Essential replacement part when your defrost cycle stops working properly
Testing these components requires a multimeter, but replacing them is usually simple once you’ve identified the faulty part. Just make sure to match the part number to your specific refrigerator model.
Drain Line Positioning and Installation Issues
Sometimes the problem isn’t a clog or a broken part but rather how the drain line is positioned. The line should have a gentle slope all the way from the refrigerator compartment to the drain pan. If it has any loops or upward bends, water can pool in these low spots and eventually freeze or cause backups.
This is particularly common if someone has recently moved the refrigerator or if you’ve had repair work done. Check the entire length of the drain line to make sure it maintains proper drainage angle.
In some cases, the drain line might have come disconnected from either the drain hole or the drain pan. These connections can work loose over time from vibration. Reconnect any loose fittings and consider using a small zip tie to keep them secure.
Preventive Maintenance Tips
Once you’ve got your refrigerator draining properly again, you’ll want to keep it that way. Regular maintenance takes just a few minutes every few months and can prevent most drainage problems.
Flush the drain hole with hot water every three to four months. Add a tablespoon of baking soda to help prevent bacteria and mold growth. This simple habit prevents the gradual buildup that leads to clogs.
Check your drain pan every time you clean behind or under the refrigerator. Look for cracks, proper positioning, and excessive water accumulation. If water isn’t evaporating between cleanings, your refrigerator might not be level or the compressor might not be generating enough heat.
Keep an eye on your temperature settings. Freezers set too cold create more frost, which means more water during defrost cycles and a higher chance of drain line freezing. Your refrigerator compartment should stay around 37°F to 40°F, and your freezer between 0°F and 5°F.
Using a refrigerator thermometer gives you accurate readings rather than relying on the dial settings, which can be imprecise.
When to Call a Professional
Most refrigerator drainage problems are DIY-friendly, but some situations call for professional help. If you’ve cleared the drain, checked all the components, and water is still pooling, there might be a more serious issue with the sealed system or internal components.
Problems with the evaporator coils, refrigerant leaks, or complex electrical issues require specialized tools and training. If your refrigerator is still under warranty, attempting these repairs yourself might void the coverage.
You should also call a pro if you’re uncomfortable working with electrical components or if accessing certain parts requires major disassembly of your refrigerator. Water damage to your home from a DIY repair gone wrong can cost far more than a service call.
Frequently Asked Questions
How often should I clean my refrigerator drain?
You should flush your refrigerator drain with hot water every three to four months as preventive maintenance. If you notice any standing water or slow drainage, clean it immediately. Homes with hard water or high humidity might need more frequent cleaning, possibly every six to eight weeks.
Why does my refrigerator drain smell bad?
Bad smells from the drain area usually come from bacteria and mold growing in standing water or organic debris stuck in the drain line. Flush the drain thoroughly with a mixture of hot water and baking soda. For persistent odors, use a solution of one part bleach to ten parts water, but rinse thoroughly afterward to prevent the bleach from damaging plastic components.
Can a clogged drain cause my refrigerator to stop cooling?
A clogged drain won’t directly stop the cooling system, but it can create problems that affect performance. Excessive ice buildup from poor drainage can block airflow around the evaporator coils, reducing cooling efficiency. You might notice warmer temperatures in the fresh food section or hear the compressor running more frequently than normal.
Is it normal to have water in the drain pan?
Yes, you should see some water in the drain pan after defrost cycles. This water should evaporate between cycles thanks to heat from the compressor. However, if the pan is consistently full or overflowing, you either have a clog causing excess water or the pan isn’t positioned correctly to allow proper evaporation. Check that your refrigerator is level and that air can circulate around the pan.
This article contains affiliate links. We may earn a small commission at no extra cost to you.