A clogged or dirty vacuum filter can turn your cleaning routine into a frustrating battle against poor suction and scattered debris. Your vacuum might be running, but it’s not performing at its best when the filter is past its prime. The difference between a fresh filter and an overdue replacement is often the difference between effortless cleaning and pushing the same dirt around your floors.
Most homeowners wait too long to replace their vacuum filters, often because they’re unsure when to make the switch or how to do it properly. Different filter types have varying lifespans, and your usage patterns play a major role in determining replacement frequency. A household with pets and daily vacuuming needs will require more frequent filter changes than a single person who vacuums weekly.
Getting your filter replacement timing right keeps your vacuum running efficiently, extends its lifespan, and ensures you’re actually removing allergens and fine particles from your home instead of just moving them around.
Understanding Vacuum Filter Types
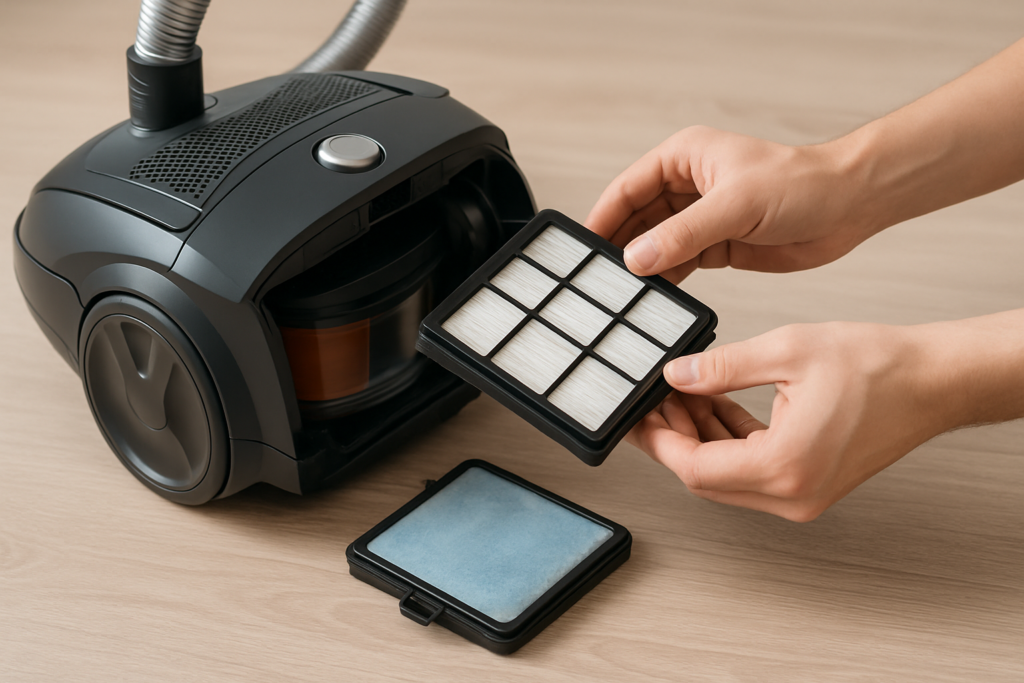
Your vacuum likely uses one of several filter types, each with different maintenance requirements and replacement schedules. HEPA filters capture 99.97% of particles 0.3 microns or larger, making them excellent for allergy sufferers but requiring regular replacement to maintain effectiveness.
Foam filters are washable and reusable for several months before needing replacement. These pre-filters catch larger debris before it reaches your main filter system. Standard pleated filters fall somewhere between HEPA and foam in terms of filtration capability and typically need replacement every 3-6 months.
Some vacuums use combination systems with multiple filter stages. Your Dyson might have both a pre-filter and post-motor filter, while your Shark could combine foam and felt filters. Check your manual to identify exactly which filters your model uses.
Replacement Schedules by Filter Type
HEPA Filters
HEPA filters require replacement every 6-12 months for average household use. Homes with pets should replace them every 4-6 months, while households with multiple pets or family members with allergies might need replacements every 3-4 months. Heavy daily use accelerates this timeline significantly.
Non-washable HEPA filters lose effectiveness when you try to clean them with water. Stick to gentle tapping or compressed air for light maintenance, but plan for regular replacements to maintain peak performance.
Genuine HEPA Filter Replacement
Essential for maintaining air quality and vacuum performance in homes with allergies or pets
Foam and Pre-Filters
Foam filters can be washed monthly and typically last 6-12 months before the material breaks down. Rinse them in cool water without soap, squeeze gently, and let them air dry completely before reinstalling. Replace foam filters when they start tearing, lose their shape, or develop a persistent odor.
Pre-filters catch larger particles and extend the life of your main filter. These usually need washing every 2-4 weeks and replacement every 3-6 months, depending on your home’s dust levels and pet hair situation.
Standard Pleated Filters
Standard pleated filters should be replaced every 3-6 months for typical household use. These filters balance cost and performance, making them popular in mid-range vacuum models. You can extend their life slightly with gentle cleaning, but replacement is more effective than attempting to restore a heavily soiled pleated filter.
Signs Your Filter Needs Replacement
Reduced suction power is the most obvious sign your filter needs attention. When your vacuum struggles to pick up debris it used to handle easily, check the filter first before assuming motor problems.
Visual inspection reveals a lot about filter condition. Filters that look gray, brown, or black instead of their original color need replacement. HEPA filters should maintain their white or off-white appearance, while foam filters shouldn’t show permanent discoloration.
Musty odors coming from your vacuum indicate trapped moisture and bacteria in the filter. This is especially common with foam filters that weren’t completely dry before reinstallation. A filter producing odors should be replaced immediately.
Dust or debris escaping from your vacuum’s exhaust means the filter can no longer trap particles effectively. This often happens when HEPA filters become oversaturated or develop small tears from attempted cleaning.
Step-by-Step Replacement Instructions by Brand
Dyson Filter Replacement
Dyson vacuums typically have two filters: a pre-filter near the cyclone assembly and a post-motor filter near the back of the machine. Turn off and unplug your vacuum before starting any filter replacement.
For the pre-filter, twist the cyclone assembly counterclockwise and lift it out. The filter sits at the top of this assembly. Pull the old filter straight up and press the new one down until it clicks into place. Reinstall the cyclone assembly by aligning it properly and twisting clockwise.
The post-motor filter usually has a purple or gray release catch. Press this catch and pull the filter housing away from the vacuum body. Remove the old filter and insert the new one, ensuring it sits flush before closing the housing.
Dyson Replacement Filter Set
Genuine Dyson filters maintain optimal performance and warranty coverage for your investment
Shark Filter Replacement
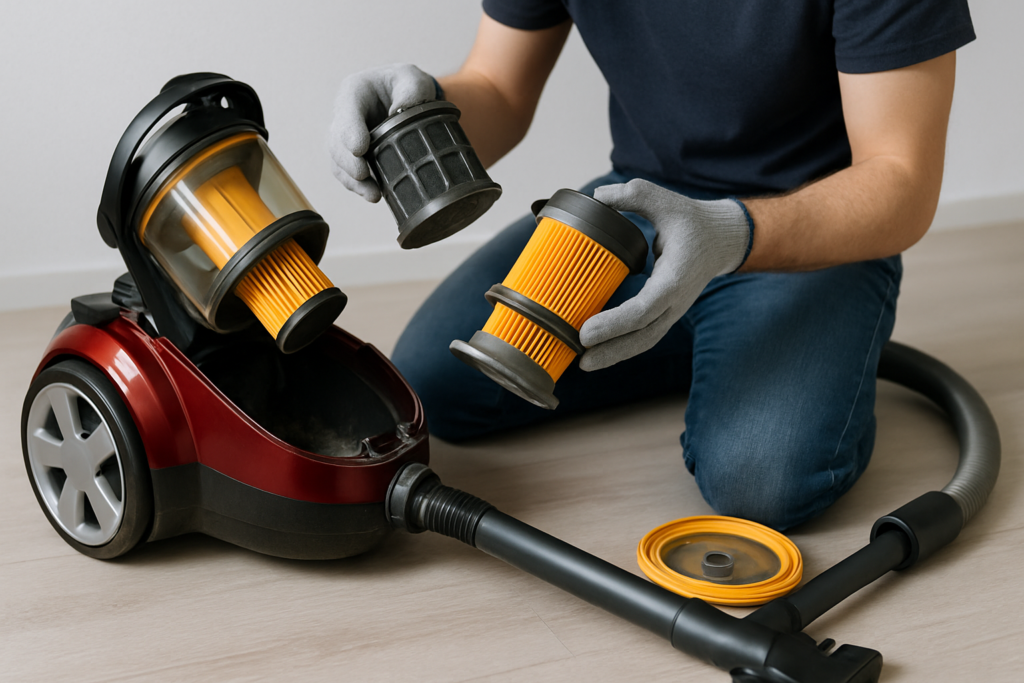
Shark vacuums often use a combination of foam and felt filters housed in a removable canister. Press the canister release button and remove the dust cup from the vacuum body.
Open the filter housing by pressing the tabs or twisting the cover, depending on your model. Remove the foam filter first, followed by the felt filter underneath. Note their orientation before removal to ensure proper reinstallation.
Insert the new felt filter first, then the foam filter on top. The foam filter’s textured side should face toward the motor. Close the filter housing securely and reinstall the dust cup.
Bissell Filter Replacement
Bissell uprights typically have easily accessible filters near the bottom of the dirt container. Remove the dirt tank and locate the filter housing, usually marked with a filter symbol or colored differently from the surrounding plastic.
Twist or pull the filter housing open, depending on your model. Some Bissell filters are cylindrical and simply lift out, while others are flat and slide out from slots. Replace with the identical filter type and ensure proper seating before closing the housing.
Canister Bissell models often have filters in both the canister and near the motor. Check both locations during replacement and replace both filters simultaneously for optimal performance.
Hoover Filter Replacement
Hoover vacuums place filters in various locations depending on the model. Upright models typically house filters in the dirt cup assembly or in a separate compartment near the base.
Remove the dirt cup and look for a removable filter housing. Some Hoover filters are rinse-cleanable, while others require replacement. Check your model number to ensure you’re purchasing the correct replacement filter.
Bagless Hoover models often have multiple filters working together. Replace all filters simultaneously to maintain balanced airflow and filtration effectiveness.
Usage-Based Replacement Schedules
Light Use (1-2 times per week)
Light users can typically follow the longer end of manufacturer recommendations. HEPA filters might last 12 months, while foam filters could go 8-10 months before replacement. Monitor filter condition visually rather than relying solely on time-based schedules.
Even with light use, homes with pets or high dust levels need more frequent replacements. Pet dander and fine particles clog filters faster than visible dirt and debris.
Moderate Use (3-4 times per week)
Moderate users should plan on replacing HEPA filters every 6-8 months and foam filters every 4-6 months. This usage level represents most households with standard cleaning routines.
Seasonal factors affect replacement timing for moderate users. Spring cleaning, fall leaf debris tracked indoors, and winter dry air all impact filter life expectancy.
Heavy Use (Daily vacuuming)
Daily vacuum users need aggressive replacement schedules. HEPA filters might need replacement every 3-4 months, while foam filters could require replacement every 2-3 months. Commercial cleaning applications fall into this category.
Heavy users benefit from buying filters in bulk and keeping spares on hand. Waiting for filter delivery when you need immediate replacement disrupts cleaning routines.
Multi-Pack Vacuum Filter Set
Bulk purchasing saves money and ensures you always have fresh filters when needed
Maximizing Filter Life
Proper pre-vacuum preparation extends filter life significantly. Pick up large debris by hand before vacuuming, and use appropriate attachments for different surfaces. Your main floor tool shouldn’t be handling pet hair that your upholstery tool could manage more efficiently.
Regular filter maintenance between replacements keeps your vacuum running efficiently. Tap non-washable filters gently to remove surface debris, or use compressed air in short bursts. Avoid hitting filters against hard surfaces, which can damage the filtering media.
Store spare filters in cool, dry locations away from direct sunlight. Filters can degrade from environmental exposure even before installation, especially foam and paper-based types.
Common Replacement Mistakes
Installing filters backwards or upside down reduces effectiveness and can damage your vacuum motor. Most filters have airflow direction arrows or specific orientation markings. Take a photo before removing the old filter to reference during installation.
Using water on non-washable filters damages the filtering material permanently. HEPA filters and many pleated filters cannot be washed despite seeming dirty enough to need cleaning. Stick to dry cleaning methods or replacement.
Mixing filter types or using incorrect sizes creates gaps that allow debris to bypass filtration. Always verify part numbers and compatibility before purchasing replacement filters.
Universal Vacuum Filter Adapter Kit
Helpful for fitting generic filters when OEM options aren’t available
Cost-Saving Filter Strategies
Generic filters can provide significant savings compared to OEM versions, but quality varies widely. Stick with well-reviewed aftermarket brands that specify compatibility with your vacuum model. Poor-quality generic filters might save money upfront but could damage your vacuum or provide inadequate filtration.
Buying filter multipacks reduces per-filter costs and ensures you have replacements when needed. Many manufacturers offer 2-packs or 4-packs at better per-unit pricing than individual filters.
Subscription services through Amazon or directly from manufacturers can provide additional savings and automatic delivery timing. Set delivery frequency based on your usage patterns rather than manufacturer suggestions.
FAQ
Can I wash HEPA filters to extend their life?
Most HEPA filters cannot be washed safely. Water damages the filtering fibers and can cause the filter to fall apart or lose effectiveness. Some manufacturers make washable HEPA filters, but these are specifically labeled as such. When in doubt, replace rather than wash.
How do I know if I’m using the right replacement filter?
Check your vacuum’s model number and cross-reference it with the filter packaging or product description. Many filters look similar but have slight size or design differences that affect fit and performance. Keep your original filter packaging or take a photo of the part number for reference.
Why does my vacuum still have poor suction after filter replacement?
Poor suction after filter replacement usually indicates other maintenance issues. Check for clogs in the hose, brush roll problems, or full dust containers. Sometimes multiple filters need replacement simultaneously, or the filter wasn’t installed correctly.
Is it worth buying expensive OEM filters versus generic ones?
OEM filters guarantee proper fit and maintain warranty coverage, but quality generic filters often perform just as well for significantly less money. Read reviews carefully and choose generic filters from established brands with good return policies. For expensive vacuums or those under warranty, OEM filters provide extra protection.
This article contains affiliate links. We may earn a small commission at no extra cost to you.